Searching for Errors
After the schematic design has been completed, you should run project validation and check all files for possible errors. Errors happen to everyone - from beginners to professionals - and that's okay, nobody's safe from that. Even the most insignificant mistake in the design can cost a lot of time and money, so it is necessary to be very attentive to the process of searching and correcting errors.
In Altium Designer, checking for errors in the schematic are performed during project validation. Validation should be run for each project after the schematic design and before the PCB design. Let's perform validation for our project. To do this, right-click on the project name in the Projects panel then select Validate PCB Project Kame_FMU.PrjPCB.
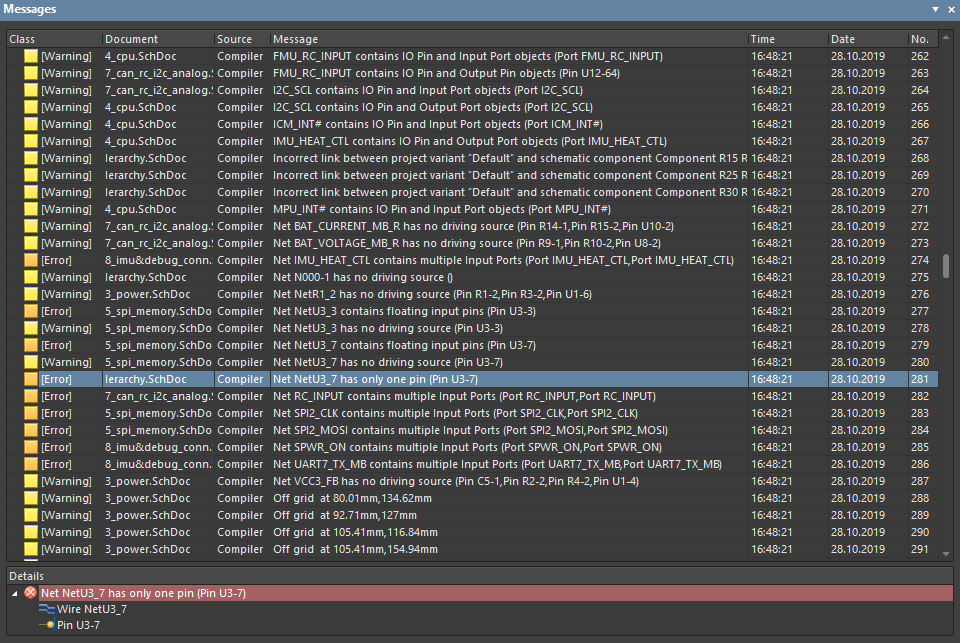
After starting the validation of the project, the design rule checking engine automatically starts its work. Every error found during validation has a link to the location at the schematic sheet where it was detected, which helps to fix it easily and quickly. All errors and warnings are displayed in the Messages panel, which will automatically open in the workspace if there are errors. It is important to pay attention to all detected warnings and errors.
Tip: You can access the Messages panel anytime by selecting it using the Panels button in the lower-right corner of the design space.
The Messages panel displays errors and warnings of several types:
-
Warning: The violation is included in the report but the project is validated. Usually, it is a minor violation without critical consequences but you should still pay attention to it.
-
Error: Significant design rules violation.
-
Fatal Error. This can cause other mistakes. Project validation is not possible. If any of these errors occur, they must be corrected first.
The rule checking engine allows you to locate an error as quickly and as easily as possible. When an error is selected in the list, the Details region will open at the bottom of the Messages panel that displays details about the error. In this region, you can see a specific object that breaks the rule. Double-click on the object to zoom to the area on the schematic with the violating object. This allows you to not have to search for it. The next section of this guide describes the most common schematic errors and approaches to correcting them.
If you do not want a particular schematic object to give an error and you are sure that everything is correct, you can place a No ERC directive. No ERC directives are discussed in the next section.


