Wednesday, April 24th - 3 PM CEST

Bridge the Information Divide: Altium 365 meets Z2Data

Wednesday, April 24th - 3 PM CEST

Thursday, April 25th - 10 AM PDT | 1 PM EDT

Bridge the Information Divide: Altium 365 meets Z2Data

Thursday, April 25th - 10 AM PDT | 1 PM EDT

Working with Altium 365 Projects / Replacing Placed Components Completed Sign In To Save Your Progress
Click if you find this content useful

Working with Altium 365 Projects

Replacing Placed Components

It is often necessary to replace one component with another when designing a schematic. While you can update a placed component with the component's Properties panel, sometimes you just need a similar part with different parameters. Instead of manually deleting the original component and placing a new one, Altium 365 allows you to replace it, retaining existing wire connectivity. We will consider how to quickly and easily replace one component with another.

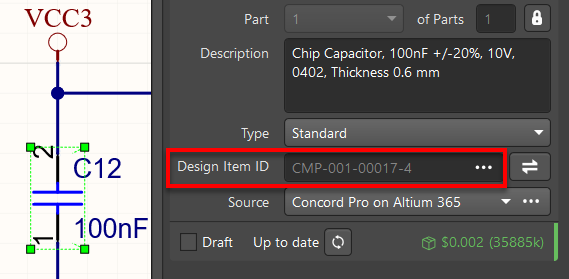
Open the properties of the component to be replaced and click on the Three Dots Menubutton in the Design Item ID field (Fig.1).

Component Before Replacement
Fig. 1 - Component Before Replacement

The name of the selected component is on the top of the Replace… window. You can also find a list of components available for replacement filtered by component type. (Fig. 2)

Replace Window
Fig. 2 - Replace Window

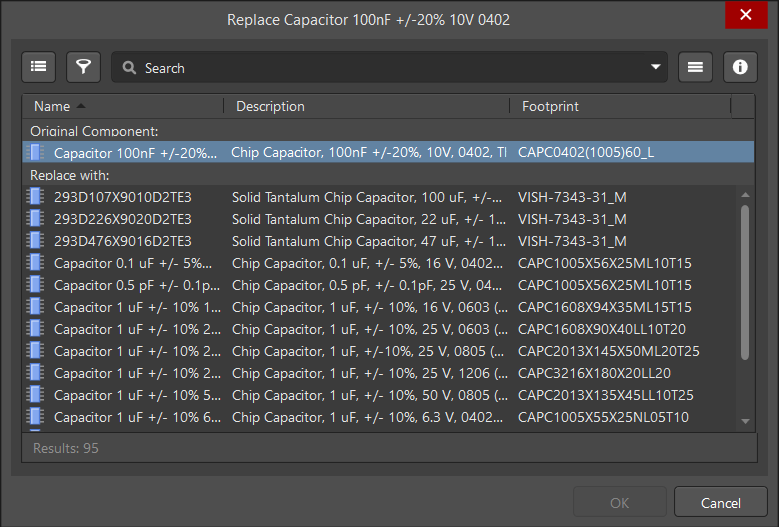
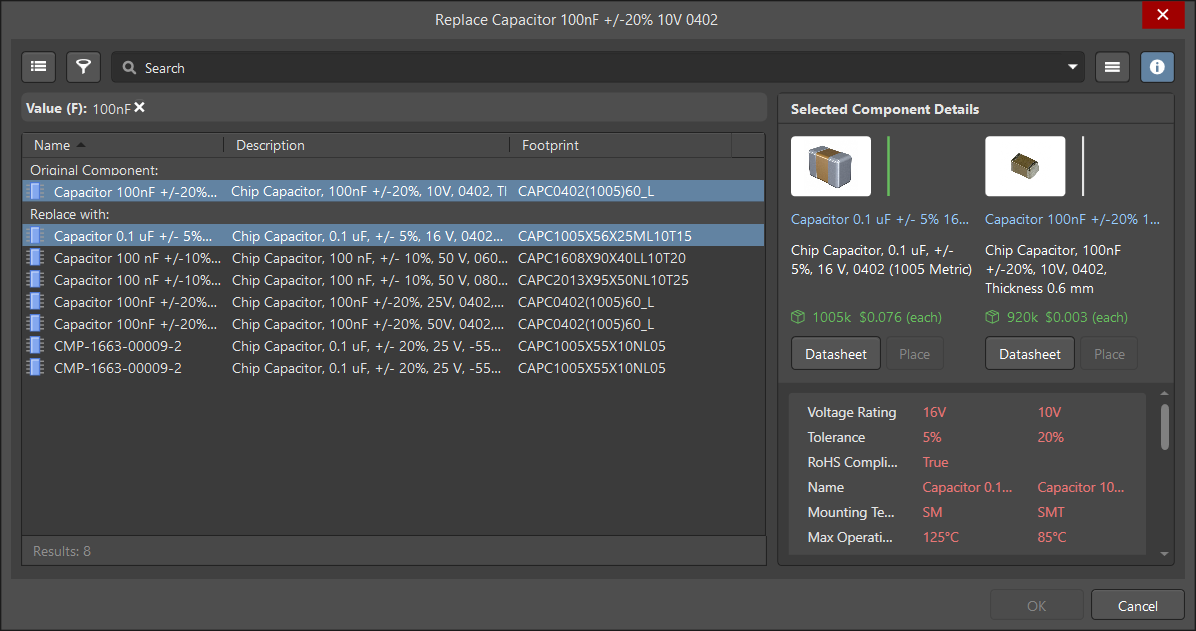
Use the filters to find an appropriate replacement or specify your search options using the Search field. Component search is described in more detail in the Component Search and Placement Chapter (Fig. 3).

Compare Filtered Components
Fig. 3 - Compare Filtered Components

Select the required component in the list, then click ОК. It will be placed automatically into the schematic (Fig. 4).

Replaced Component
Fig. 4 - Replaced Component

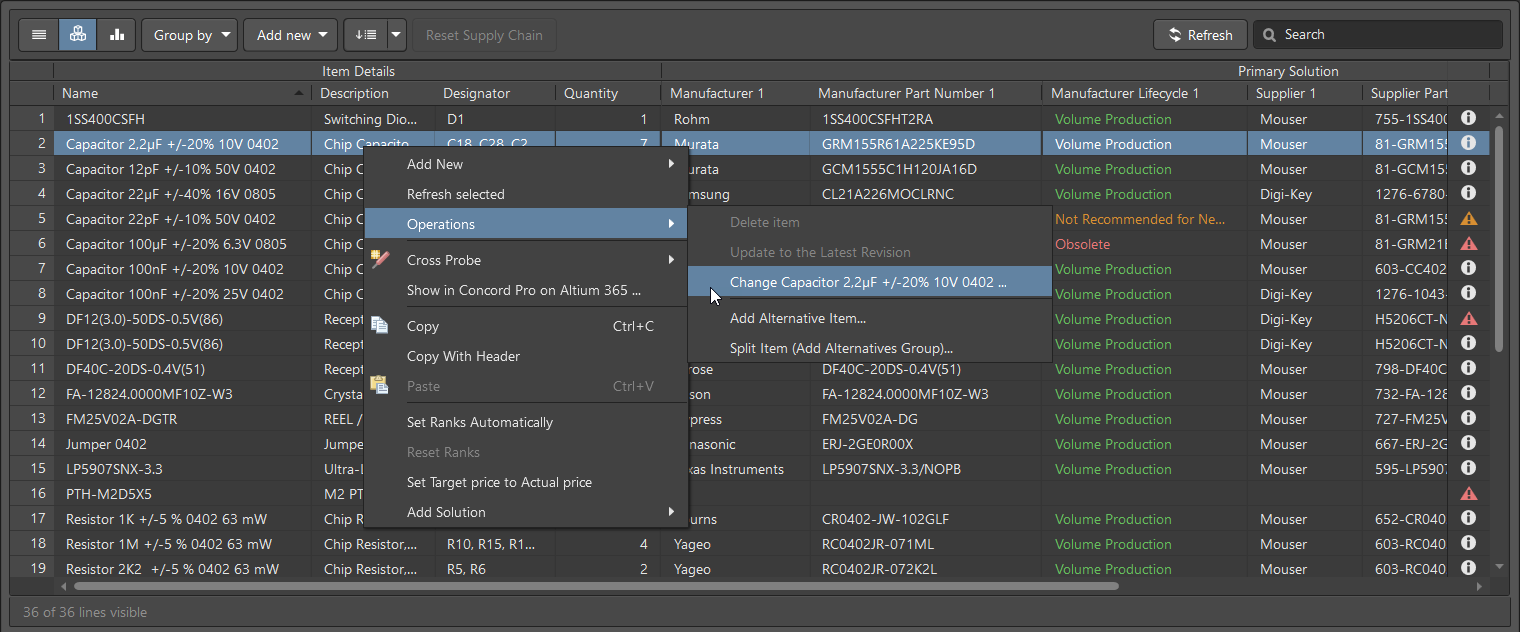
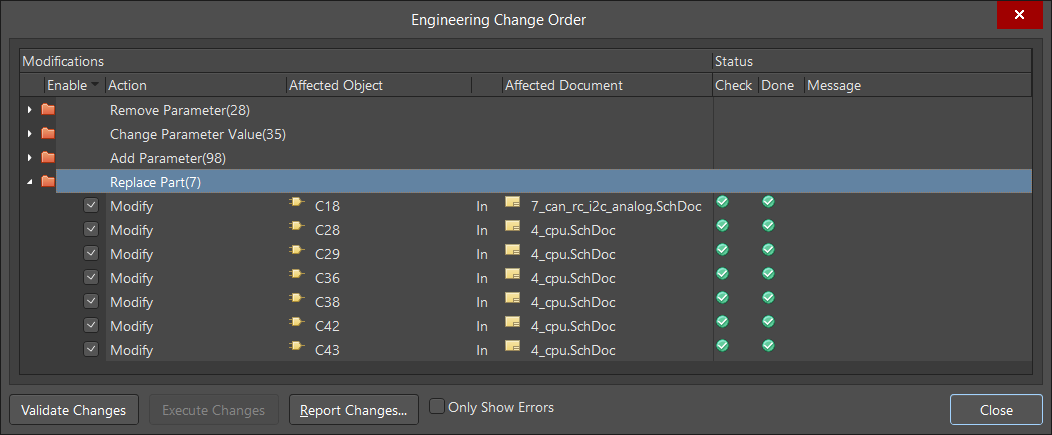
Using the Properties panel to replace a large number of components is inconvenient. In this case, we recommend using the ActiveBOM document.

Open the ActiveBOM document or add it to the project. Use Project > Add New to Project > ActiveBOM command (in this particular instance the document is in the project so it will not show the add command).
Apply the Operation > Change… command from the context menu (Fig.5).
ActiveBOM Component Replacement
Fig. 5 - ActiveBOM Component Replacement
In the Replace... window, the steps are similar to the one described earlier. The Engineering Change Order pop-up window validates (i.e., Validate Changes button) and executes (i.e., Execute Changes button) component replacement for each instance of identical components for the entire project (Fig.6).
Replace Component ECO
Fig. 6 - Replace Component ECO
Good job! Article is now completed!
Sign In To Save Your Progress

Read Again

CAPTCHA
Was this article useful?
Yes No
Thank you Glad to hear it