Open and Save Projects
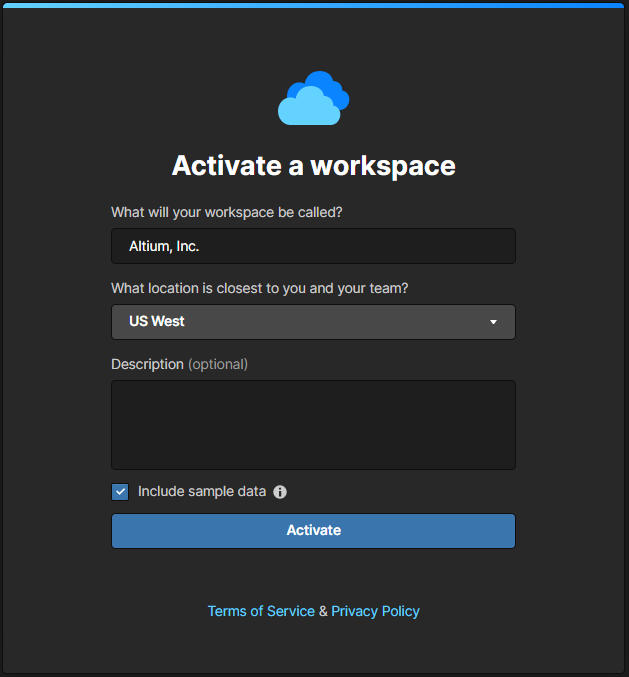
Once connected to your Workspace, you have access to all the data stored in it. All projects, project documents, components, and file templates will be available to you, and you can work with them from any computer anywhere! The most important thing is that the usual operations with project files have not changed - the process is as smooth and precise as the traditional one. If you enable the Include Sample Data option during workspace activation, the Workspace will contain examples of projects and components.
Let's open one of the projects.
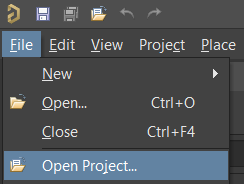
Select File > Open Project from main menus to access the Open Project dialog.
On the left side of the Open Project dialog in the LOCATIONS region, select your Workspace. After selecting, the central area of the dialog will show all stored projects in the connected Workspace. Select the project you want to work with then click Open at the lower-right corner of the dialog.
Tip: You can search from your project through the Search bar at the top of the Open Project dialog. You can find projects through ANY information in the General and Parameter tabs.

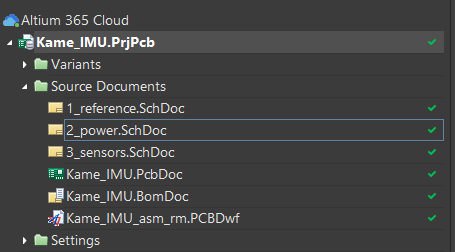
If the project is opening for the first time on your computer, Altium Designer will first download it to your local storage. After your project loads into local storage, it will display all of its associated files in the Projects panel. Each project from your Workspace has an icon to the right of the project name that indicates the current state of the local project compared to the Workspace version to synchronize design files easily. In the figure below, all files display as up-to-date since there are no updates to the local revisions.
You can interact with the project the same as before by opening the desired document and performing your work! After modifying a file in the project, it will save in local storage. The “modified” state icon ![]() will appear to the right of the file name. This state icon means that the file on your computer is different from the one currently stored in the cloud because it is only saved on your computer. For other team members to have access to the original version of this file with all the latest changes, the cloud version of the file must be updated.
will appear to the right of the file name. This state icon means that the file on your computer is different from the one currently stored in the cloud because it is only saved on your computer. For other team members to have access to the original version of this file with all the latest changes, the cloud version of the file must be updated.
To update a file in the cloud, you need to save the project on the workspace. Right-click on the project name in the Projects panel then select Save to Server.
A "Save to Server" dialog opens and displays all files within the project that are different from the cloud version. We recommend that you enter a Comment that will let other designers know what changes have been made and will allow for more detailed tracking of the project in the future. Click OK to save the project to the cloud, after which all modified files in the Projects panel will display the up-to-date icon.
Tip: Entering a comment is optional, but it creates a complete log of the work done on the project.
The Projects panel will appear with only green checkmarks when your local project is synchronized with the Workspace: