Get Your BOM In
BOM Portal offers two ways to add/create a Managed BOM in the Workspace. Choose the one based on your source data.
Access Altium BOM Portal
To access BOM Portal is actually quite easy. While you are in your Altium 365 Workspace, you can click on the 9 dots in the top right and select BOM Portal.

Method 1: Create BOM from PCB Project
This is the most common workflow when you work with your electrical engineers within the same workspace in Altium 365. The system can extract a managed BOM directly from the PCB project and maintains a live connection for synchronizing updates.
Navigate to Projects page
From your Altium 365 workspace, go to the Projects page where you can see all your PCB design projects listed (next to other files).
Expand the PCB project's menu
Find your project in the list and click the three horizontal dots (...) next to it. This opens the project's contextual menu.
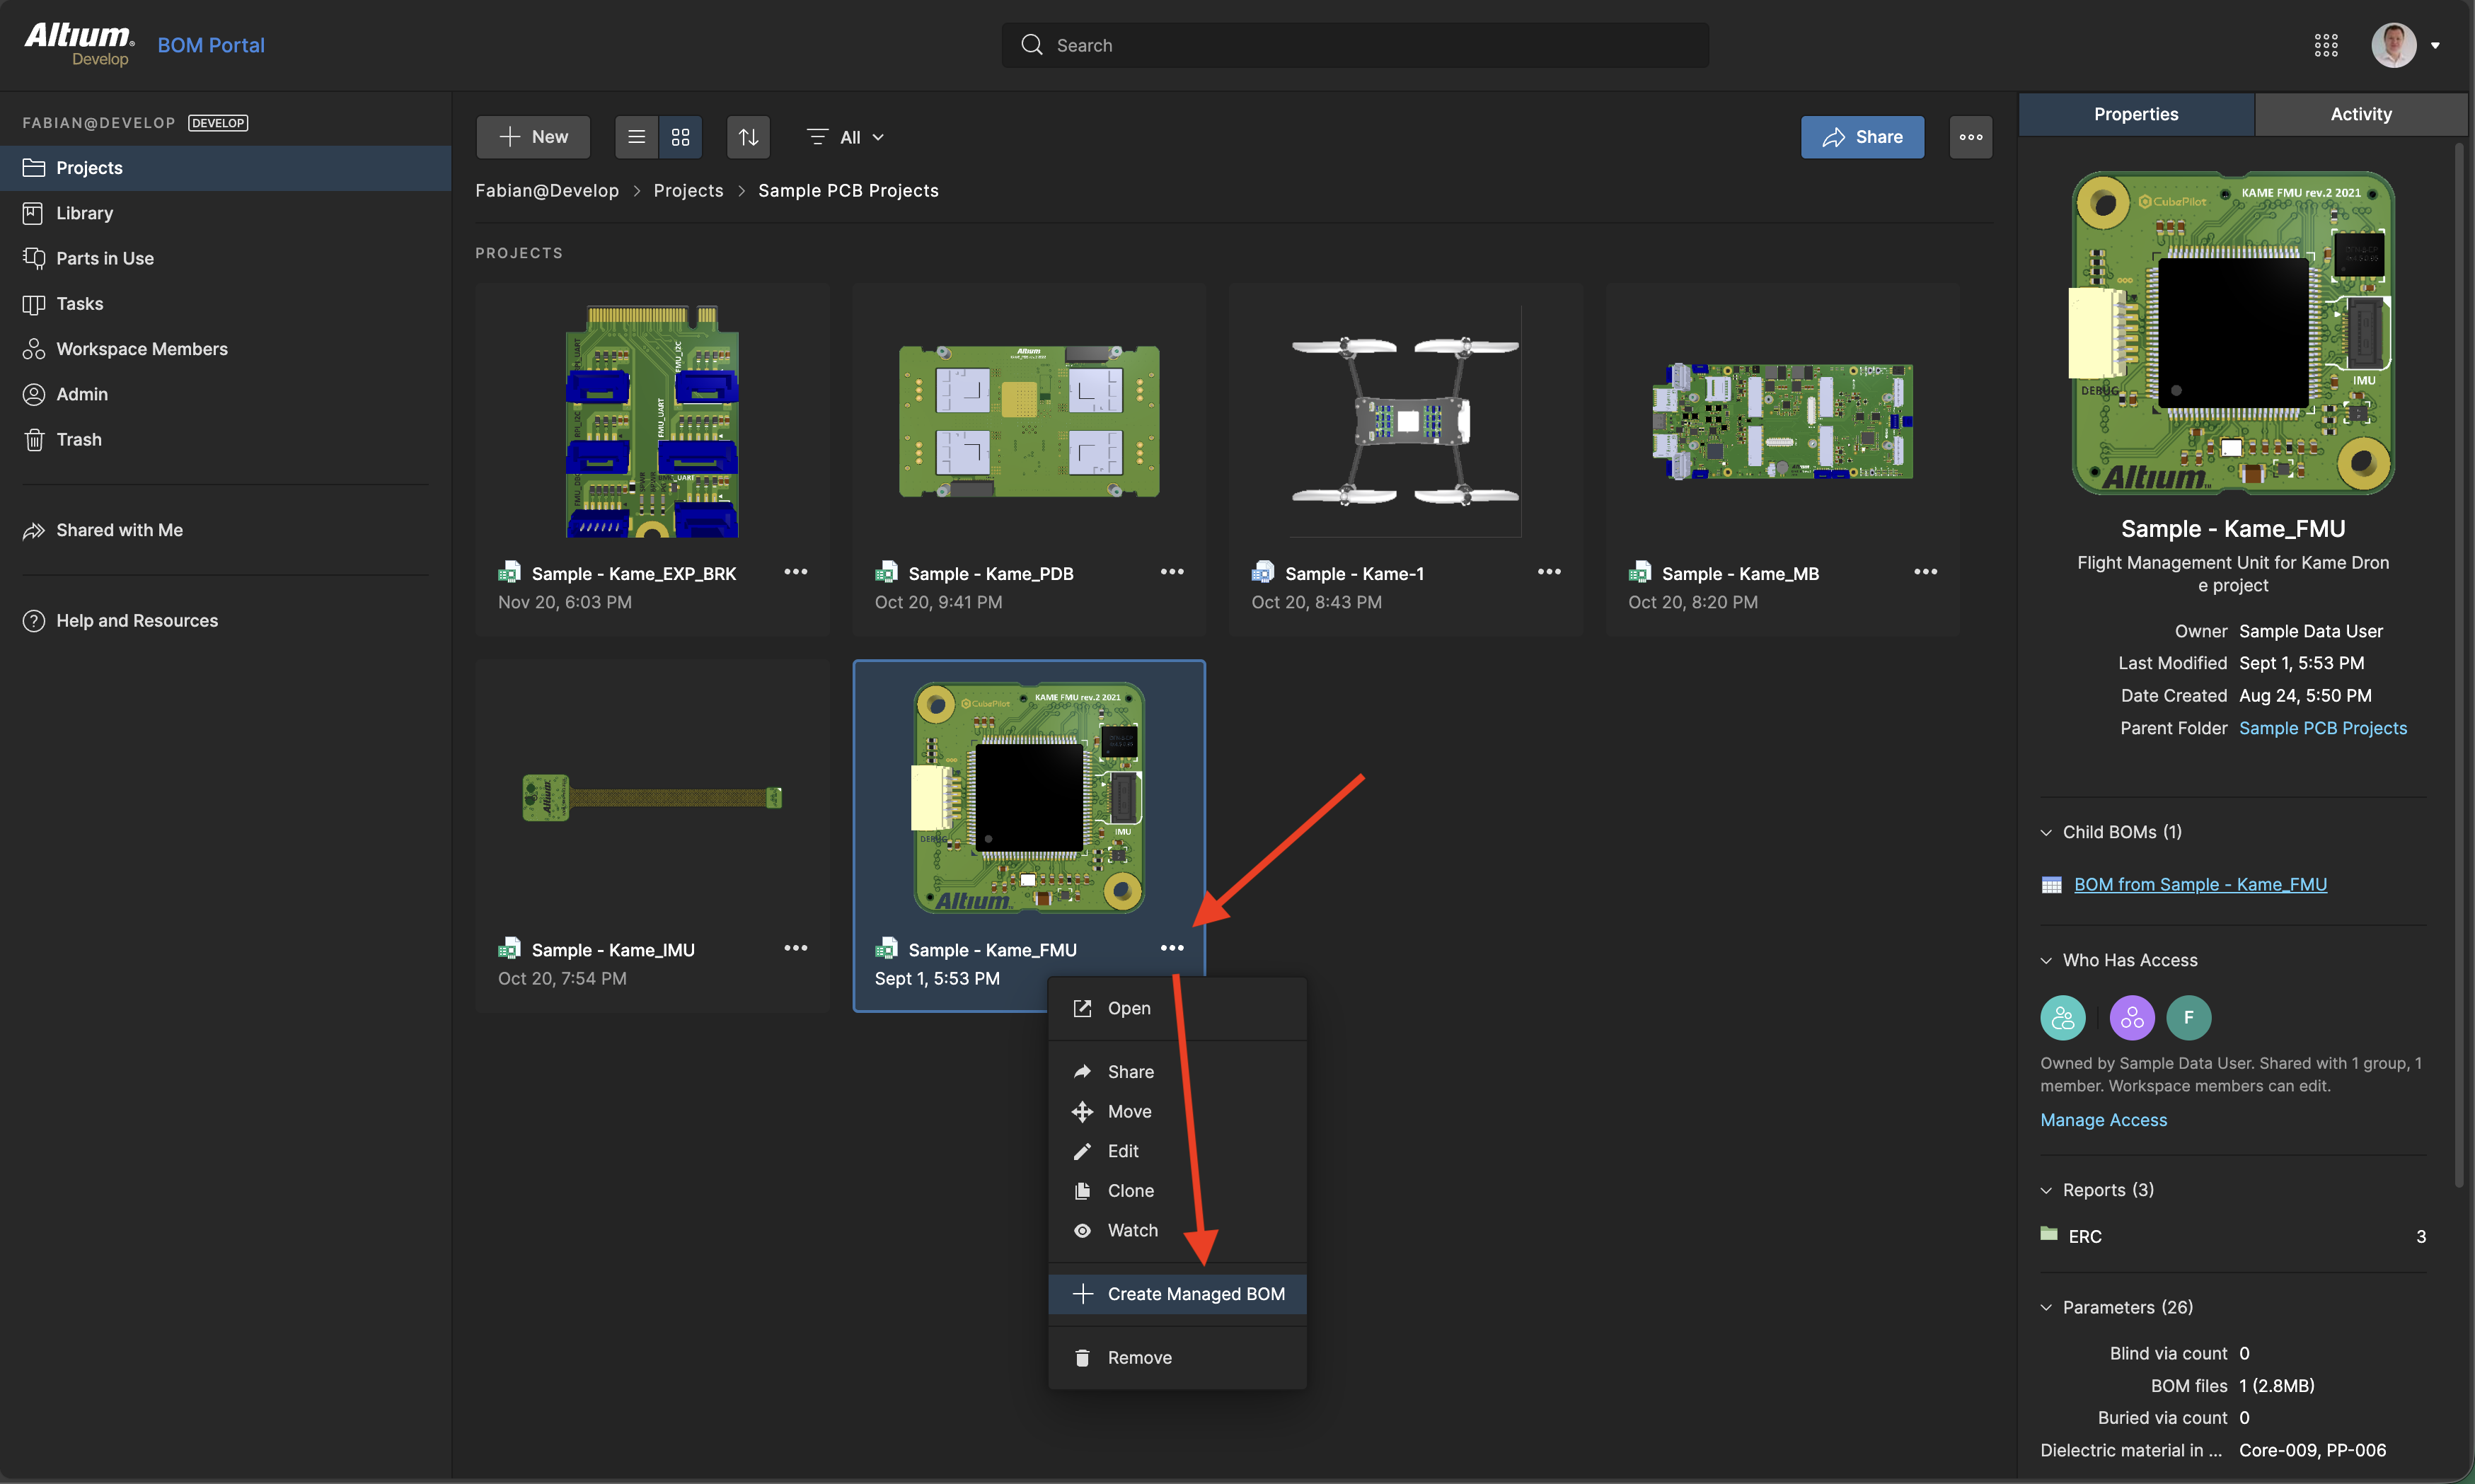
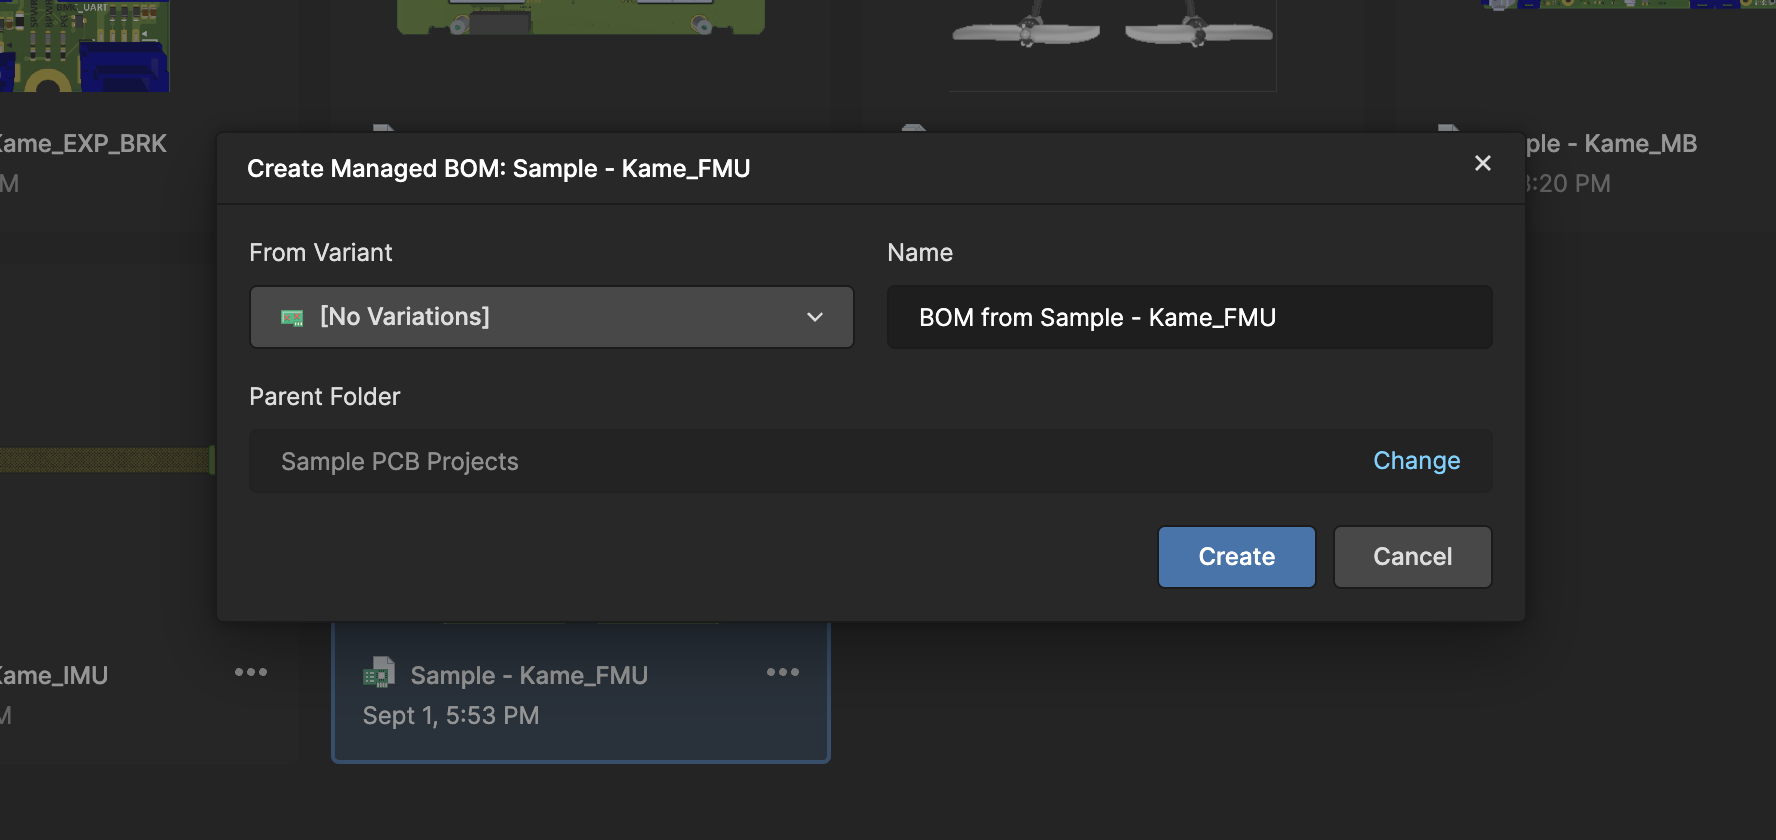
Select Create Managed BOM
A dialog box opens showing BOM creation settings. You can optionally select a specific variant, define a Name and choose a folder where the BOM should be saved.
Click Create
BOM Portal generates your Managed BOM and opens a new view displaying the BOM data. The system automatically begins enriching part data from integrated sources.
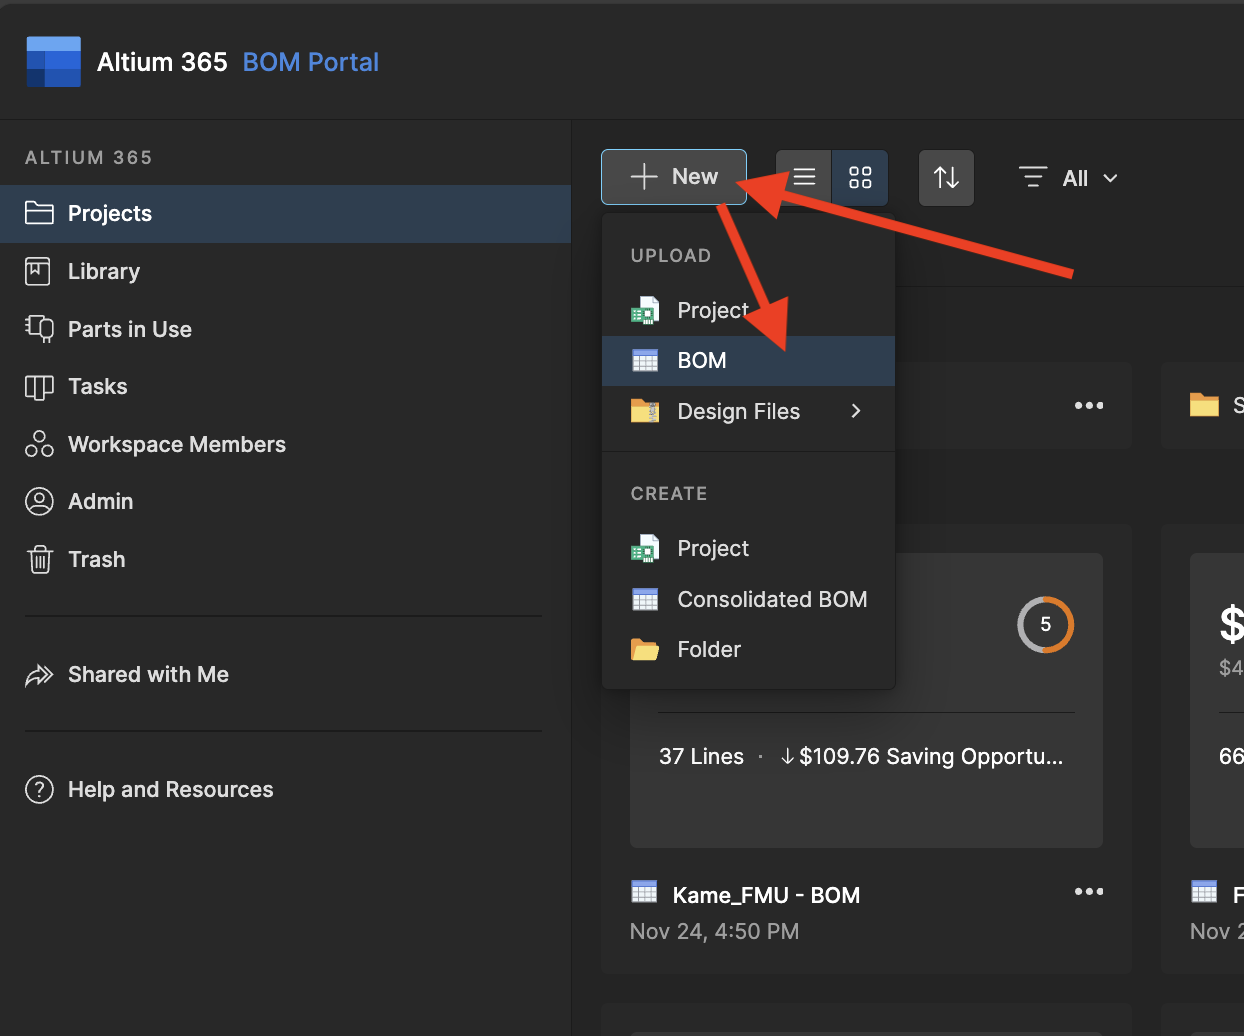
Method 2: Upload a BOM File
Use this when you have an existing BOM in spreadsheet format (CSV, XLS, XLSX).
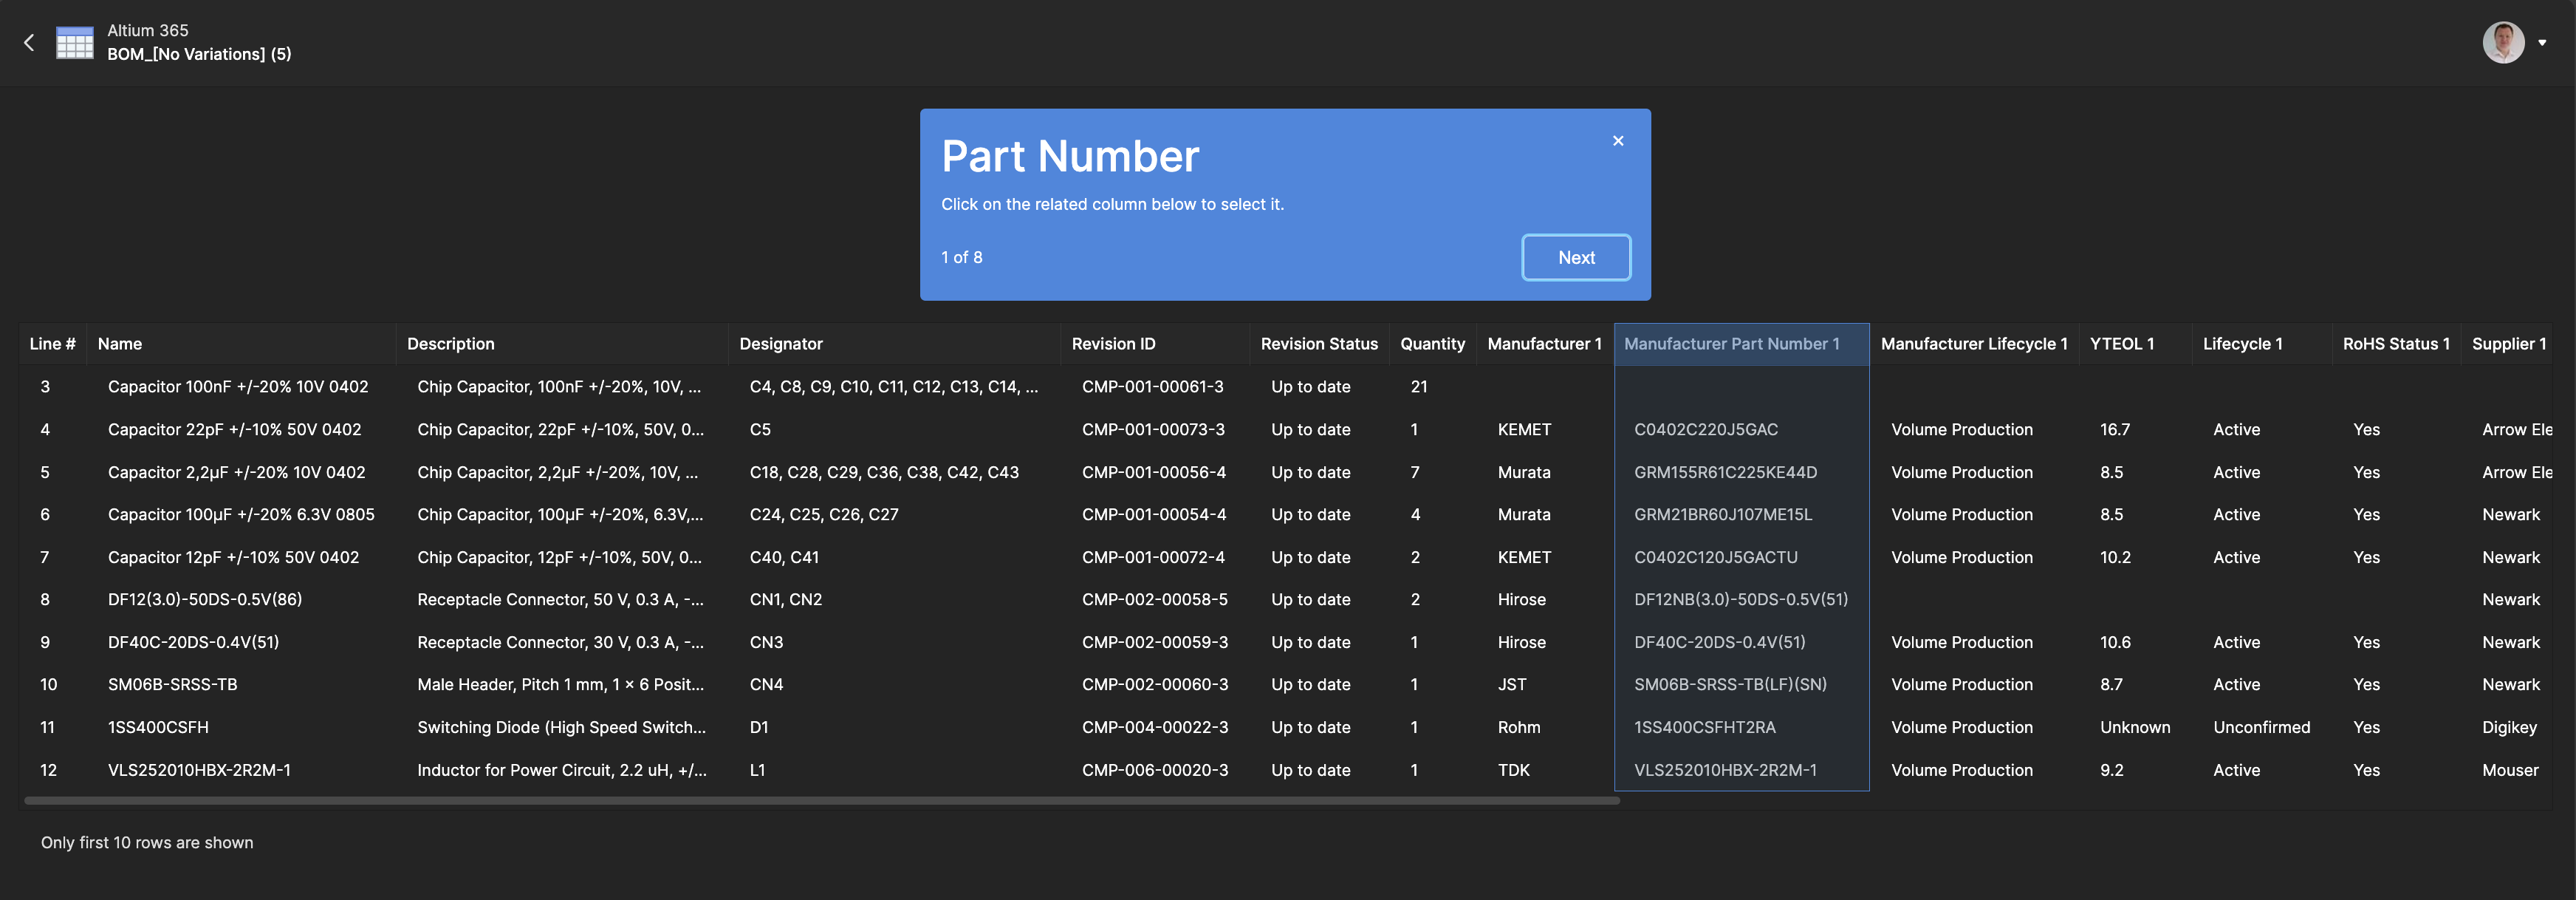
Prepare your file
Ensure your file has at minimum a Manufacturer Part Number column. Quantity defaults to 1 if not provided. Common column names like Manufacturer name, and Part Number are auto-mapped.
Upload and map
Click Create → Upload BOM File. Review the column mapping and confirm. If a column was not correctly mapped, you can simply select the correct column and continue. Optional columns can be also skipped.