News & Updates
Blog
•
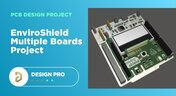
Nucleo Shields Multi-Board Design
Learn how easy it is to create multi-board projects. This practical project article covers the reasons for breaking larger boards into sub-assemblies and explores the various connection options available between sub-assembly boards.
Blog
•
Analog Solar Tracker Project
In this article you can learn about light sensors while building an analog solar panel tracking system. This open-source project covers multi-channel design, window comparators, driving motors, and photosensors.

Blog
•
Concept Phase – Initial CAD Design
We are continuing our journey through the open-source laptop project. This article explains an initialization of CAD design process from the early concept and brainstorming phase.
Blog
•
Expert Tips for Safely Powering Up Your New PCB for the First Time
In this blog we will show you the strategies to minimize the risk of damage to circuit boards during the initial power-up process.

Blog
•
High-Speed PCB Design Tips
Essential tips for high-speed PCB designs, and when you need to start being concerned about how and where you route your traces.

Blog
•
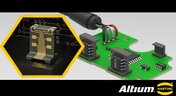
MIDs Make a Comeback as Vertical SMD Modules for Your PCB
If you've ever wanted to mount components vertically, but without the expense of a flex section this article is for you. You can use an MID in your PCB.
Blog
•
Everything You Need to Know about Conformal Coating
Explore the basics of conformal coating with us. Conformal coating is a protective layer applied to electronic circuits to guard against environmental factors such as moisture and dust.
Blog
•
Introduction to Open Source Laptop Project
We have started a very exciting journey into the creation of an open source laptop project. This project will be an ongoing one, with our community able interactively participate. By utilizing Altium 365 users will be able to view, comment on, and download design files. This will be a great learning experience for new and experienced PCB designers.
On-Demand Webinar
•
Benefits of Altium 365 Version Control for Solo Users
Join our insightful webinar on Altium 365 Version Control System (VCS) designed for solo users, where Ari Mahpour will guide you through creating and managing projects on the cloud-based platform.


Blog
•
Mechanical and Electrical Design Come Together With Altium’s MCAD CoDesigner
Electronics designers working in small design houses or in large enterprises often encounter a common set of challenges when interfacing with mechanical designers. Continue reading to learn how you can best interface with your mechanical designer to get your projects out the door fast!


Blog
•
Ebook: Routing High-Density Interconnects with Reliable Microvias
HDI PCBs take a particular approach to routing interconnects through multiple layers to ensure reliability during fabrication, assembly, and operation. The critical structure that enables this is microvias, which are prone to failure if not designed properly. In this e-book, readers will receive an initial look at the reasons microvia reliability has come into the spotlight and why HDI PCB designers put reliability first when routing through microvias.


Blog
•
Dual Rail Voltage Supply
The highest performing operational amplifiers often need a split supply with positive and negative voltages connected to the op amps supply rails. In this project, we’re going to be building a positive/negative dual rail power supply for a differential oscilloscope probe I’m designing. I’m making the power supply a separate project, as a dual rail supply is quite useful to have, and I’m sure I’ll find multiple uses for it in the future.

Blog
•
Library Importer Improvements (former Library Migrator)
Importing file-based libraries from your local computer or network drive to your Altium 365 workspace can be done using the Library Importer. Altium’s Library Migrator was renamed Library Importer—the feature’s name was changed to conform more closely to the tool’s purpose. Not only is its name new, but our team has also made several user experience improvements. We have updated the documentation to reflect this change.

Blog
•
How to Select Copper Foil for High-Frequency PCB Design
The PCB materials industry has spent significant amounts of time developing materials that provide lowest possible signal loss for products with RF applications. For high speed and high frequency designs, losses will limit signal propagation distance and distort signals, and it will create an impedance deviation that can be seen in TDR measurements. In this article, we'll look at the balance between copper foil losses and other types of losses in a PCB, as well as some strategies that are commonly used to overcome roughness.

Blog
•
Altium Designer 22.8 Update
We are happy to announce that the Altium Designer 22.8 update is now available. Altium Designer 22.8 continues to focus on improving the user experience, as well as performance and stability of the software, based on feedback from our users. Check out the key new features in the What's New section on the left side of this window!

Blog
•
What is Hybrid Beamforming?
In this article, we’ll look at beamforming implementation in an advanced method combining analog and digital techniques, known as hybrid beamforming. This method blends both digital and analog techniques to create multiple beams and thus reach multiple users with varying intensities. In the case of an RF imaging system or a radar system, hybrid beamforming in a MIMO technique also allows tracking of multiple targets with adjustable resolution.

Blog
•
Why Most Via Impedance Calculators Are Inaccurate
The problem with every via impedance calculator that I have seen is simple: they are incomplete or totally wrong. The “incomplete” part refers to a lack of context; these calculators can roughly reproduce a well-known estimate from a legend like Howard Johnson in his Digital Design textbooks. However, these calculators never provide insight into what they are actually calculating, or where the calculated via impedance is accurate. Keep reading to see why these calculators get it so wrong, as well as the context surrounding via impedance.

Blog
•
Buck Converter Simulation in Altium Designer
When designing high power circuits (usually very high voltage and/or current), you’ll need to create a regulator from scratch and place it in your PCB layout. It's also the case that you may want to model a real component using discretes in a simulation in order to qualify the system's expected operating regime. As part of buck converter design, you can easily run a buck converter simulation directly in Altium Designer’s schematic editor. Here’s how you can access these features in the newest version of Altium Designer.

Blog
•
Overview of the PCIe 6.0 Standard
Just as you get used to PCIe 5.0, they decide to release another standard! The newest iteration of PCIe is Gen6, or PCIe 6.0. PCIe 6.0 brings a doubling of channel bandwidth through introduction of PAM-4 as the signaling method in high-speed differential channels. This signaling method is a first for PCIe, and it’s an important enabler of the doubled data rate we see in the current standard. In this article, I’ll run over the important points in the standard and what PCB designers can expect when designing these channels.

Blog
•
SPI vs. I2C: How to Choose the Best Protocol for Your Memory Chips
One of the common implementations of SPI and I2C in a PCB layout is as a protocol for reading and writing to an external Flash memory. Flash chips are a very common component in embedded systems and can offer high capacities of non-volatile memory up to Gb values. When choosing a memory chip, you'll want to match the application requirements and functionality with the bus speed you need for read and write operations in your memory chip. There is also the matter of the type of Flash memory you'll need to access (NOR vs. NAND).

Blog
•
Is There an SPI Trace Impedance Requirement?
There is no SPI trace impedance requirement? The reality is that SPI lines only start to need impedance control when the length of the interconnect becomes very long. And because there is no specific impedance requirement in the bus, you have some freedom in channel design and termination. So what exactly qualifies as “very long” and when is some termination method needed? We’ll break it down in this article.

Blog
•
The Skin Effect, Current Density, and the Electromagnetic Field
During this year's AltiumLive CONNECT event, I recall receiving an interesting question about the skin effect and the distribution of current due to the presence of ground in coplanar transmission lines. In this article, we'll look at the electric field around a transmission line carrying a signal, and how this might be impacted by the skin effect.

Blog
•
What You Need for PCB Packaging and Shipping
When you get your PCBA back from an assembler, you’ll notice the packaging materials used to pack and ship the PCBA. Those materials are specific to electronics, and if you build products on behalf of clients, it’s important to know the packaging materials used for packing and shipping electronics. In this article I’ll show the main set of materials and equipment used to package electronics assemblies.

Blog
•
How to Make PCB Gerber Files in Altium Designer Step-by-Step
Once you've got your PCB layout finished and you're ready to start preparing for manufacturing, one of the critical steps is to create PCB Gerber files. When you're ready to create your Gerber files, you need the right set of CAM processor tools that can take data from your PCB layout. In this article, we'll guide you through this process of how to make PCB Gerber files and show some example tasks you might need to perform to generate them.

Blog
•
Should You Place Teardrops on Differential Pairs?
One of the major factors impacting reliability of a PCBA is the use of teardrops on traces in the PCB. Like many aspects of reliability, the considerations also span into the signal integrity domain, particularly as more high-reliability products require greater data handling capabilities and run at higher speeds. In this article, I’ll break down the issues present in teardrop usage on differential pairs and how these may affect impedance.

Blog
•
The High-Reliability PCBA Design and Test Challenge
High-reliability electronics must go through multiple rounds of testing and qualification to ensure they can withstand their intended operating environment. Designing to performance standards, whether the baseline IPC standards or more stringent industry standards, is the first step in ensuring a reliable circuit board. In this e-book, readers will gain a thorough look into PCB testing and analysis, starting from basic tests performed on bare boards and completed assemblies.

Blog
•
AC Coupling Capacitors in PCIe Routing
Coupling capacitors find plenty of uses in analog applications and on differential protocols, acting essentially as high pass filters that remove DC bias carried seen on a signal. In the case of PCIe, there are a few reasons to place AC coupling capacitors on differential pairs beyond the fact that AC coupling capacitors are listed in the standard. In this article, we’ll look briefly at where to place coupling capacitors on PCIe links, as well as the reasons these are placed on PCIe links.


Your search returns no results.