News & Updates


Blog
•
How to Solve Your Engineering Design Review Challenges
You’ve possibly gone through plenty of engineering design reviews, both on the front-end of a project and the back-end before manufacturing. Engineering design reviews are performed to accomplish multiple objectives, and with many engineering teams taking a systems-based approach to design and production, electronics design teams will need to review much more than just a PCB layout and BOM. Today’s challenges with sourcing, manufacturability, reliability, and mechanical constraints are all areas that must be confronted in real designs


Blog
•
Schematic Review Checklist
One of the most common points of failure of a device occurs even before you start to layout your circuit board. Mistakes in your schematic design can easily make their way all the way into prototypes or production without a second thought once layout starts. In this article, I’m not going to extol the virtues of a good schematic design. Instead, this article is a simple no frills checklist.


Blog
•
PCB Via Current-Carrying Capacity: How Hot is Too Hot?
One common question from designers is current-carrying capacity of conductors in a PCB. Trace and via current-carrying capacity are legitimate design points to focus on when designing a new board that will carry high current. The goal is to keep conductor temperatures below some appropriate limit, which then helps keep components on the board cool. Let’s dig into the current state of thermal demands on vias in PCBs and how they compare to internal and external PCB traces.
On-Demand Webinar
•
SPICE Simulation Made Simple
SPICE simulation saves you critical time in the prototyping phase. Understanding your simulation interface makes it simple to analyze how your circuits work in different scenarios. Altium Designer provides an intuitive, dedicated interface to support your simulation verification, setup, and analysis directly in your schematic environment. You also benefit from growing support for popular model formats, as well as generic models, simplifying circuit definition and simulation.

Blog
•
Phalanx, not Failure: PCB Shielding to Protect Your Design
A combination of good printed circuit board design and good shielding mitigates EMI. Good PCB design for EMI shielding revolves around the layout, the placement of filters, and ground planes. A well-designed PCB minimizes parasitic capacitance and ground loops. Keep reading to learn more about PCB shielding.


Blog
•
Best Practices in Hardware Version Control Systems
Any project can get very complex, and the PCB design team needs to track revisions throughout a project. Why worry about tracking revisions? In the event you ever receive changes to product functional requirements, major changes are made to your product’s architecture, or you’re ready to finalize the design and prepare for fabrication, it’s best to clone a project at its current state and begin working on a new version. Keeping track of all these design changes in a PCB design project takes the type of hardware version control tools you’ll find in Altium 365™.


Blog
•
Copper Pour and Via Stitching: Do You Need Them in a PCB Layout?
To pour or not to pour, to stitch or not to stitch… Over many years, some common “rules of thumb” have become very popular and, ultimately, taken a bit out of context. Rules of thumb are not always wrong, but taking PCB design recommendations out of context helps justify bad design practices, and it can even affect the producibility of your board. Like many aspects of a physical PCB layout, via stitching and copper pour can be like acid: quite useful if implemented properly, but also dangerous if used indiscriminately.

On-Demand Webinar
•
What is High-Speed Design?
The primary source of high-speed problems is not due to high clock frequency but rather the fast rise and fall times of component signals. With fast edge rates, reflections may occur at the receiver side, and when the board routing is dense, crosstalk may become a problem. During this webinar, you'll sharpen your knowledge and develop new skills that you can use to design High-Speed PCB's more efficiently and effectively.

Blog
•
Should You Use Power MOSFETs in Series?
Power MOSFETs enable a huge range of electronic systems, specifically in situations where BJTs are not useful or efficient. MOSFETs can be used in high current systems in parallel arrangements, but what about their use in series? Both arrangements of MOSFETs have their pitfalls that designers should consider. Let’s look at MOSFETs in series as they are quite useful in certain systems, but be careful to design your circuits and your PCB for reliability.


Blog
•
Compare Commercial Altium 365 vs Altium 365 GovCloud
If you're trying to understand how commercial Altium 365 differs from Altium 365 GovCloud, you're in the right place. Click to grasp the unique features of each.

Blog
•
5 Ways Hardware Development Is Just… Different
Explore the challenges and strategies of implementing Agile methodology in electronics hardware development. Understand key differences between hardware and software development within the Agile framework.

Blog
•
Flexible Circuit Assembly: Thinking Through Component Placement
The flexible circuits are ideal for applications where a thin, small, and lightweight PCB is needed. However, in such cases, challenges in assembly and fabrication often arise. This article delves into these challenges, focusing on component selection and placement and how they can significantly impact the performance of the flexible circuit in its intended application.
Blog
•
Coding Your Own Networked Test Equipment
Have you ever performed manual tests? If your answer is yes, you're likely aware of how laborious and time-consuming the entire process can be. Allow us to introduce you to the realm of test equipment automation. Our new step-by-step guide empowers you to write code that seamlessly configures your networked test equipment, all from the convenience of your computer.
Blog
•
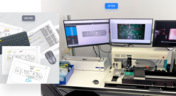
Pi.MX8 Project – Schematic structure and component placement
We are advancing with our brand new Pi.MX8 Project. In this chapter, we delve deeper into two crucial aspects: the overall schematic and component placement on the PCB board. Don't hesitate to check it out. Additionally, you can follow this project through our workspace; the link is provided within the article.
Blog
•
Redefine PCB Boundaries with HDI Design
Dive into the world of High-Density Interconnect (HDI) design to enhance your projects. Explore heightened signal integrity, improved reliability, and the seamless integration of advanced technologies - all within compact and lightweight designs. Discover more about HDI on our updated feature page.
Blog
•
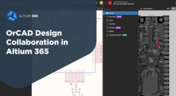
OrCAD Design Collaboration in Altium 365
Ready to start collaborating on your OrCAD projects in a multi-CAD environment? Check how you can use Multi-CAD File Support in Altium 365 in practice.
Blog
•
The Critical Role of Constraint-Based PCB Design in Modern Electronics
A constraint-based approach to PCB design is crucial in today's electronics industry. This article delves deeper into this complex and interesting topic, exploring various types of constraints, their advantages, and providing guidance on implementing them into your PCB design process.
Blog
•
Pi.MX8 Project – Introduction and Overview
Do you have extensive knowledge about the Pi.MX8 module? We're excited to introduce a new series of articles focusing on an innovative approach to utilizing this module. In this inaugural chapter, we provide insights into the preparation for this project and detail the elements that will be used.

Blog
•
How to 'Shift Left' and Connect Procurement and Engineering? Altium 365 BOM Portal Step-by-Step
Learn why BOM management is critical for both procurement managers and electronic engineers. Altium 365 BOM Portal helps to bridge the gap between these worlds. Discover how!
Blog
•
Altium 365 Assembly Assistant: Available Now in the Altium Store
Happy New Year! 🎉 We are thrilled to announce that the Altium 365 Assembly Assistant is now officially released and available for direct purchase through the Altium Store.
Blog
•
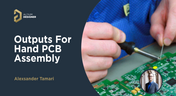
Simple Documentation for Hand PCB Assembly
Creating documentation for hand PCB assembly does not prevent the same documentation from being utilized to assist in automated PCB assembly. Learn more about the optimal format for this data to enhance both your hand PCB assembly and overall assembly processes.
Blog
•
Constraint Manager: Precision in Every Detail
Explore the powerful features of Altium Designer 24! Experience Constraint Manager and revolutionize your PCB design with reusable constraint sets, schematic-to-board rule transition, easy class and differential pair grouping, and more.

Blog
•
Accelerate Last-Minute Design Changes with Altium 365
Curious about how to solve production blockers before they derail your product launch? Explore how Altium 365® can help you swiftly manage last-minute design changes.
Blog
•
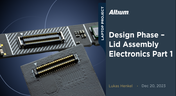
Design Phase – Lid Assembly Electronics Part 1
We are advancing our Open Source Laptop project to the next stage: assembling lid electronics. In the first part of this phase, we are focusing on the electronics and PCB design of the webcam module.
Blog
•
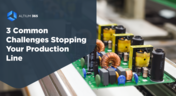
3 Common Challenges Stopping Your Production Line
The efficiency of production lines is crucial for any successful hardware product development. However, some challenges derail these processes. Do you face these problems, too? Let’s find out!


Your search returns no results.