News & Updates


Blog
•
7 Ways to Catch Rules & Constraints Early – Checklist
Discover seven actionable ways to spot and fix rules and constraint issues before they derail your PCB project. Using Altium Designer Agile, these tips help you build more manufacturable and reliable boards with fewer iterations.
Blog
•
Do You Need an IPC-D-356 Netlist?
If your output package is Gerber-based, adding an IPC-D-356 netlist can dramatically improve how your design is reviewed and validated for production. Here’s when it matters, what it contains, and how to generate it quickly in Altium.


Blog
•
How Agile BOM Management Helps You Lock in Pricing Before Market Shifts
When engineering and procurement work from different BOM versions, delays and cost surprises follow. Learn how agile BOM management brings teams onto one connected BOM so they can respond fast, manage risk, and lock pricing early.


Blog
•
Flexible Circuits: Enhancing Performance with Shielding, Heat Dissipation, and Stiffeners
A flex circuit can look perfect on paper and still fail in the real world due to EMI, hot spots, or mechanical strain. This article breaks down how shielding, thermal planning, and stiffeners help deliver designs that stay reliable over time.

Blog
•
Avoid These Top 3 Power Distribution Failures in PCB Design
Power distribution issues can silently undermine your PCB’s reliability. This article uncovers the top three failure modes and shows how Power Analyzer by Keysight helps you catch them early in the design phase and how Altium Agile Teams turns those checks into structured team action.


Blog
•
From BOM to Requirements and Back: Building Sourcing Constraints Into Specs
When engineering and procurement remain disconnected, supply-chain problems will sneak up on you. This guide argues convincingly: embed sourcing constraints into your requirements from day one, and avoid costly rework down the line.


Blog
•
Understanding Power Integrity in PCB Design: Power Analyzer by Keysight Whitepaper
Power integrity is the backbone of reliable PCB design. This whitepaper explains how to analyze and optimize voltage drop, current density, and grounding directly within Altium Designer Agile using the Power Analyzer by Keysight.


Blog
•
How to Manage ECAD Libraries for Consistent PCB Layout Design
Strong hardware starts with strong libraries. Discover how disciplined ECAD-library management dramatically improves design consistency and accelerates every stage of your PCB workflow.


Blog
•
High Speed PCB Design Review: Signal Integrity Questions You Should Always Ask
As data rates increase, the risks hidden in your layout grow with them. This quick guide highlights the critical SI checkpoints that can save you from late-stage surprises and redesigns. If you design high-speed boards, you’ll want to read this before your next review.


Blog
•
Supplier Negotiation: Turn Market Data Into Your Best Negotiation Tool
Don’t walk into supplier talks blind. Use market data to benchmark quotes, check lead times and uncover alternate parts. This article shows how visibility can shift the balance and de-risk your BOM.

Blog
•
Explore New Possibilities with True 3D-MID Design
3D-MID technology seamlessly integrates electrical circuits with three-dimensional mechanical parts. This unique fusion of functionality unlocks a myriad of possibilities across various application areas. Explore more about this innovative feature, available in Altium Designer 24, to delve into the fascinating world of the 3D design process.

Blog
•
Strategies to Minimize PCB Damage
The PCB design process is always an exciting journey for a designer or the founder of a project. The first run of it can be breathtaking. In this article, we delve into strategies for minimizing PCB damage in the case of an exemplary circuit.

Blog
•
Fragmented Feedback Loops: The Hidden Cost in PCB Design and Testing
Explore the hidden impact of fragmented feedback loops in PCB design and testing. Check how minor communication gaps lead to significant financial burdens and learn how to address them.

Blog
•
Altium 365 GovCloud 101: Everything You Need to Know
Would you like to improve the protection of your data? Altium 365 GovCloud can help you achieve these goals. It’s a version of Altium 365, engineered to meet the stringent demands of US government regulations.

Blog
•
Design Phase – Lid Assembly Mechanics Part 3
We are heightening the anticipation for our Open Source Laptop project. In this chapter, we delve into the ambient light sensor module. Learn more about how to implement it into this project.

Blog
•
PCB CoDesign: Design Faster Together
Experience accelerated design collaboration with PCB CoDesign, exclusively available on Altium Designer starting from December 13th. This innovative feature adopts a collaborative approach by seamlessly integrating schematic and PCB design, enabling multiple engineers to work on the same project. Explore this cutting-edge feature on our newly launched page dedicated to its functionalities.

Blog
•
6 Steps to Accelerate the Development of Complex Products
Learn the key lessons from the presentation at Iteration22; “Joe Justice, Wikispeed - Everyone Must Be a Chief Engineer at SpaceX.” Read on and discover how to speed up the development of complex products.
Blog
•
Design Phase – Lid Assembly Mechanics Part 2
We are continuing our journey into lid assembly mechanics inside the Open Source Laptop Project. In this chapter, we are focusing on the sensor PCB above the display panel.

Blog
•
How to Speed Up Your Manual Assembly Process with Assembly Assistant? The Story of XVP Photonics
Are you struggling with your manual assembly process? Would you like to speed it up and improve component placement accuracy? Read the story of XVP Photonics; with Assembly Assistant, they improved the component placement time by 25%. Discover how!

Blog
•
45V-5A Adjustable Half-Bridge DC to DC Converter
DC-to-DC buck converters are extensively employed in electronic devices. In this article, we will introduce you to one of our new projects—a DC-to-DC converter designed to serve as a power supply as well.

Blog
•
The Challenges of Modern Design: Why Requirements Management Is Essential
You need a robust requirements management process to ensure your design intent communication stays clear and organized. Read on to explore the crucial connection between well-managed requirements and today’s design.

Blog
•
Efficiency And Noise Top 10 Switching Regulator Modules
Switching regulator modules have become indispensable in a wide array of electronic devices, providing a more efficient means of voltage conversion between different levels by storing and releasing energy. Explore further insights into these devices in today's dynamic world of electronics.
Blog
•
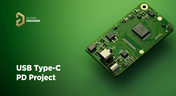
Add USB Type-C Power Delivery to Your Designs!
We want to invite you to explore the fundamentals of USB Type-C Power Delivery which is now the most popular energy transmission in current times. We will show you how to easily incorporate a dedicated PD IC into your own designs.

Blog
•
Design Phase – Lid Assembly Mechanics Part 1
It is time to delve deep into the mechanical design of our Open Source Laptop project. In this article we give you an update about the first part of fitting elements into the system. You will learn more about laptop lid, webcam integration, light sensor and microphones which will be used in this project.

Blog
•
How to Design for Test in Embedded Systems
Whether you're designing a high-speed PCB, or a complex embedded system, it will need some level of testing. In this article, we will show you some simple tricks that can make testing and debugging a prototype much easier.

Blog
•
Crosstalk Basics in PCB Design
Crosstalk is one of the most common issues related to electronics. Learn the basics of this phenomenon in PCB design, and gain knowledge on how to avoid it in your projects.


Your search returns no results.