News & Updates


Blog
•
Common Flex Design Mistakes and How to Fix Them
Designing flexible circuits involves managing numerous factors. Discover how to prevent mistakes in this process and how to rectify them post-implementation.

Blog
•
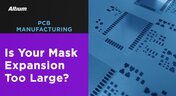
How Much PCB Mask Expansion is Too Much?
In this article you will learn about finding the right balance between PCB mask expansion and potential problems.

Blog
•
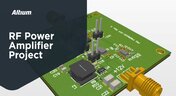
RF Power Amplifier Module PCB Design
RF power amplifiers can be found in many wireless products, often integrated into chipsets or modems. However, in certain specialized systems, you might require higher power output at a specific frequency. This necessitates a discrete amplifier circuit to deliver that power. In this article, we present an example project for a power amplifier that you can incorporate into your RF project.

Blog
•
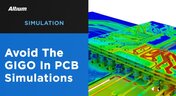
Avoid GIGO in Your PCB Simulation Tools
Simulation tools are extremely useful for understanding electromagnetic behavior in a design. Learn more about how to avoid obtaining inaccurate results during your PCB simulation process.


Blog
•
Choosing a Converter or Regulator For Your Power Supply Design
When designing the power supply for your device, there are lots of different options. In this article, we will take a brief tour of the main choices in DC power supply design.


Blog
•
The Benefits of Ultra HDI
Learn more about the combination of using both flexible materials and ultra-HDI feature sizes in this article.

Blog
•
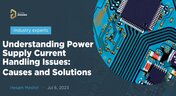
Understanding Power Supply Current Handling Issues: Causes and Solutions
Troubleshooting power supply current handling issues is crucial to achieving optimal performance of your electronic devices. In this article, we will explore the common reasons why a power supply fails to handle the defined output current and provide practical solutions to solving these issues.

Blog
•
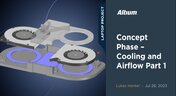
Concept Phase – Cooling and Airflow Part 1
Next step in our open-source laptop project is to explain how to design cooling and airflow. In this article, we can show you the first part of this process, such as airflow concept, fan measurement and clearance.

Blog
•
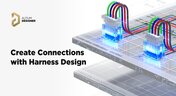
Create Connections with Harness Design
Many modern electronics have multiple boards, and connecting those different boards and systems together are harnesses. Learn more about how Altium Designer can help you create harnesses for your own multi-board designs here.

Blog
•
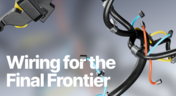
Wiring for the Final Frontier: A Guide to Space-Grade Harness Design
Wiring harnesses are mission-critical in space systems, requiring strict adherence to ECSS-Q-ST-70-61C and NASA-STD-8739.4A. In "Wiring for the Final Frontier: A Guide to Space-Grade Harness Design", Kamil Jasiński explores key design principles, material selection, and testing to ensure reliability in extreme environments.
Blog
•
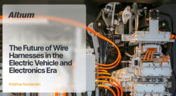
The Future of Wire Harnesses in the Electric Vehicle and Electronics Era
Discover how wire harnesses are evolving to meet the demands of electric vehicles and modern electronics. Our latest article explores key trends like higher voltages, lightweight designs, and smart harnesses, along with challenges such as cost and supply chain issues.
Blog
•
Mastering EMI Control in PCB Design: Decoupling Strategies for PDN
Dario Fresu explores effective decoupling strategies for power distribution networks (PDNs) to minimize EMI in PCB designs. The article covers techniques like decoupling capacitors and power planes to ensure stable power delivery for integrated circuits.
Blog
•
Building Your Own Android Device with a Raspberry Pi
Learn how to turn a Raspberry Pi into a custom Android device. This guide covers hardware selection, software setup, and troubleshooting common issues.
Blog
•
How PCB Design Engineers Can Securely Share Design Files with External Teams
Learn how PCB design engineers can securely share design files with team members, clients, and manufacturers. Marek Orzeł explores best practices and tools to protect your intellectual property while ensuring efficient collaboration.

Blog
•
OEMs and Harness Manufacturers: Building Strong Collaboration for Success
Strong partnerships between OEMs and harness manufacturers are key to efficient, high-quality product development. In this article, Krishna Sundaram shows how collaboration, clear communication, and the right design tools can streamline the harness manufacturing process and drive success.
Blog
•
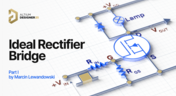
Ideal Rectifier Bridge
Read Marcin Lewandowski's article explaining how MOSFETs are replacing traditional diodes for reverse polarity protection. Step into the future of energy-efficient electronics!
Blog
•
Master Your Circuit Design: Dive into Worst Case Analysis
Dive into Worst Case Analysis techniques with Kamil Jasiński and ensure the reliability of your circuits. Master sensitivity analysis, Monte Carlo simulations, and more to confidently address real-world challenges.
Blog
•
Overview of the Gerber X3 File Format
Want to learn how the Gerber X3 file format simplifies data exchange by unifying assembly and fabrication details in a single file? This article explores the format and its role in streamlining PCB manufacturing.

Blog
•
Save Time and Prevent Errors in Cable Harness Design Today
Our new article explores best practices and tools for streamlining cable harness design workflows. Learn how to minimize errors, save time, and enhance collaboration by leveraging advanced features in Altium Designer.
Blog
•
Mastering EMI Control in PCB Design: How to Design PCBs for Low EMI
This article by Dario Fresu delves into effective techniques for designing PCBs to reduce electromagnetic interference (EMI). It covers key topics such as stackup selection, routing strategies, and grounding best practices, offering actionable insights for improved performance.

Blog
•
Altium and Renesas’ Role in Enabling Economy 4.0 is the Subject of New Documentary
Altium and Renesas are featured in a new CBS-produced documentary exploring how digitalization and cloud platforms are revolutionizing electronics production for Economy 4.0, driving efficiency and accelerating innovation.
Blog
•
Avoid Wiring Errors with Tools Tailored for Harness-to-PCB Integration
Discover how to streamline your wiring projects with advanced harness and PCB integration tools in Altium Designer. This article explores techniques to prevent wiring errors, enhance collaboration, and ensure accurate design documentation for complex projects.

Blog
•
Happy Holidays!!!
Altium wishes you all the best this holiday season! May this time be filled with joy, laughter, and cherished moments with your family and friends. We also extend our warmest wishes for a Happy New Year 2025!
Blog
•
What Is Wire Harness Design?
Explore our latest article to learn the fundamentals of wire harness design, its key components, and how it ensures organized, efficient, and reliable electrical systems across automotive, aerospace, and medical sectors.
Blog
•
How to Determine Ferrite Bead Circuit Model Parameters
Learn how to accurately determine ferrite bead circuit model parameters for effective noise suppression in high-speed PCB designs. This article explores key concepts, measurement techniques, and practical tips for modeling ferrite beads in your projects.


Your search returns no results.