News & Updates
Blog
•
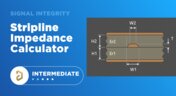
Stripline Impedance Calculator
Striplines provide some advantages over microstrips as they take advantage of natural shielding and coupling from nearby ground plane layers. Although they tend to experience higher losses due to total confinement in the dielectric, they can be thinner due to the high dielectric constant used in internal layers of a PCB. Use our free impedence calculator to help you determine the correct width needed to hit a target impedance.

Blog
•
Which Types of Opto-Isolators Are Right For Your Signal?
An optoisolator is a cool electronic device that can be used to pass information between a diode without passing an electrical current. There are many great applications for these, but do you know which one is right for you?
Blog
•
Properties panel document options in SCH editors
The Properties panel provides access to the properties of documents and objects. The contents of the panel change depending on the active document or the selected object. This blog will quickly go over some of need to know options around the properties panel in the schematic document.


Blog
•
The High-Speed PCB Stackup Design Challenge
Even with all the good guidelines out there for high speed design, there are particular aspects of stackup construction and their relation to building boards that get overlooked. This blog is goes beyond just the typical SI/PI guidelines and looks at these problems from more of an engineering perspective.


Blog
•
Everything You Need to Know About Stitching Vias
Stitching vias are something you often see spread around the surface layer of a PCB, but what are they? and should you be using them? In this guide, we'll go over some of the standard uses of stitching vias and when they should be used in a PCB.


Blog
•
PCB Stackup Basics
In comparison to the build-up of a PCB, the stackup is more concerned with the electrical type of each layer, that is are we working with signals, power, or ground. Continue reading to learn how you can optimize your layer stack.


Blog
•
Multi-board and Harness Design Capability in Altium Designer 23
Altium’s VP of marketing Lawrence Romine discusses the multi-board and harness design capabilities coming in Altium Designer 23.

Blog
•
What Is Wire Harness Design?
Explore our latest article to learn the fundamentals of wire harness design, its key components, and how it ensures organized, efficient, and reliable electrical systems across automotive, aerospace, and medical sectors.
Blog
•
How to Determine Ferrite Bead Circuit Model Parameters
Learn how to accurately determine ferrite bead circuit model parameters for effective noise suppression in high-speed PCB designs. This article explores key concepts, measurement techniques, and practical tips for modeling ferrite beads in your projects.
Blog
•
Mastering EMI Control in PCB Design: How to Choose the Stackup for EMC Design
This article by Dario Fresu, part of the Mastering EMI Control in PCB Design series, explores strategies for selecting PCB stackups to optimize EMC performance. It offers actionable tips for balancing cost, manufacturability, and signal integrity in your designs.

Blog
•
AI Vision with the Kria KV260 Vision AI Starter Kit
Discover AI-driven vision capabilities with the Kria KV260 Vision AI Starter Kit, presented by Ari Mahpour. Ideal for prototyping vision solutions, this kit offers an accessible entry point into advanced AI applications.

Blog
•
Model-Based Systems Engineering in the Era of Digital Twins: A Paradigm Shift in PCB and Electronics Design
Explore how Model-Based Systems Engineering (MBSE) integrates with digital twins to enhance design accuracy, collaboration, and lifecycle management in modern engineering projects. This approach bridges the gap between physical systems and digital models, enabling real-time simulation and optimization.

Blog
•
Wire Bonding in Altium Designer
The Wire Bonding in Altium Designer article highlights how Altium Designer 25’s wire bonding feature streamlines complex designs for advanced assemblies like 3D stacked dies and RF modules. This tool enhances efficiency and precision, catering to modern electronic design needs.
Blog
•
Altium Designer 25: Pioneering Collaboration, Product Development, and Advanced Simulation
Altium Designer 25 introduces groundbreaking features for seamless collaboration and precision in PCB design, from PCB CoDesign to advanced simulation and MCAD tools. Discover how AD25 is transforming electronic product development.

Blog
•
Wire Bonding: Modern Applications, Technology Trends and Cost Considerations
Explore the future of wire bonding, from new applications to cost-saving trends, in this article by Samer Aldhaher. Stay updated on key innovations in this essential connection technology.

Blog
•
Maximizing Efficiency: A Deep Dive into Altium 365 Jira Integration Features
Discover how Altium 365’s Jira integration can streamline collaboration and keep projects running smoothly with real-time design updates and task tracking. Perfect for teams seeking efficiency!

Blog
•
Optimize PCB Design with Integrated BOM and CAD Systems
Discover how integrating BOM management and CAD systems can streamline your PCB design process in this insightful article. Learn how combining these tools enables smoother collaboration, reduces errors, and improves design efficiency, helping you optimize your workflows from concept to manufacturing.
Blog
•
The Essential Guide to Through-Hole Resistors
Resistors are fundamental components in electronic circuits, essential for controlling current and voltage. This article explores their basic principles, types, and key applications, helping you understand their crucial role in electronics.
Blog
•
Avoiding Costly Delays: Essential Tips for PCB Designers
Efficient PCB design is crucial for avoiding costly delays in product development. This article offers practical tips and best practices for PCB designers to streamline their workflows, minimize errors, and ensure timely project completion.

Blog
•
Understanding Signal Reflections for High-Speed Design
Signal integrity is the backbone of high-speed digital systems. In this new article by Rafał Stępień, we break down signal reflections and how to optimize your designs with effective impedance matching techniques.
Blog
•
Mastering EMI Control in PCB Design: Component Placement for EMC
In the second article of the "Mastering EMI Control in PCB Design" series Dario Fresu explores how effective component placement can reduce electromagnetic interference (EMI) in printed circuit boards. He highlights strategies such as board segregation and careful management of high-speed signals and their harmonics to ensure signal integrity and minimize emissions.
Blog
•
Signal Integrity Principles based on Altium Designer 24
Check out this article where Rafał Stępień dives into the essentials of maintaining signal integrity in high-speed digital systems. Discover key techniques like controlling signal reflections, reducing crosstalk, and designing differential pairs in Altium Designer 24 to ensure reliable and efficient PCB performance.

Blog
•
Launch of Requirements & Systems Portal in Altium 365
The Requirements & Systems Portal is now live in Altium 365! Engineers can write, manage, and verify requirements within the Altium 365 workspace. You can link your requirements directly to schematics and PCB designs to ensure all engineers are working with the latest data. Request access today!


Your search returns no results.