News & Updates
Blog
•
How to Build Your Own Laser Range Finder
In this article we will show you how to create step by step a digital laser range finder for your own. Everything is based on Raspberry Pi board.


Blog
•
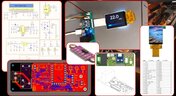
Nucleo Shields Multi-Board Design
Learn how easy it is to create multi-board projects. This practical project article covers the reasons for breaking larger boards into sub-assemblies and explores the various connection options available between sub-assembly boards.
Blog
•
Analog Solar Tracker Project
In this article you can learn about light sensors while building an analog solar panel tracking system. This open-source project covers multi-channel design, window comparators, driving motors, and photosensors.

Blog
•
Concept Phase – Initial CAD Design
We are continuing our journey through the open-source laptop project. This article explains an initialization of CAD design process from the early concept and brainstorming phase.
Blog
•
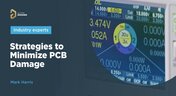
Expert Tips for Safely Powering Up Your New PCB for the First Time
In this blog we will show you the strategies to minimize the risk of damage to circuit boards during the initial power-up process.

Blog
•
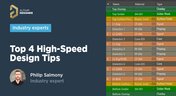
High-Speed PCB Design Tips
Essential tips for high-speed PCB designs, and when you need to start being concerned about how and where you route your traces.

Blog
•
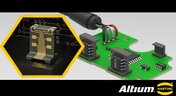
MIDs Make a Comeback as Vertical SMD Modules for Your PCB
If you've ever wanted to mount components vertically, but without the expense of a flex section this article is for you. You can use an MID in your PCB.
Blog
•
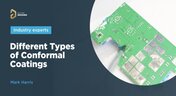
Everything You Need to Know about Conformal Coating
Explore the basics of conformal coating with us. Conformal coating is a protective layer applied to electronic circuits to guard against environmental factors such as moisture and dust.
Blog
•
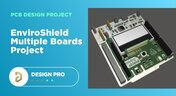
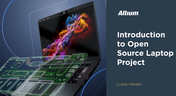
Introduction to Open Source Laptop Project
We have started a very exciting journey into the creation of an open source laptop project. This project will be an ongoing one, with our community able interactively participate. By utilizing Altium 365 users will be able to view, comment on, and download design files. This will be a great learning experience for new and experienced PCB designers.

On-Demand Webinar
•
Benefits of Altium 365 Version Control for Solo Users
Join our insightful webinar on Altium 365 Version Control System (VCS) designed for solo users, where Ari Mahpour will guide you through creating and managing projects on the cloud-based platform.


Blog
•
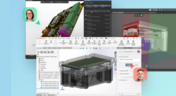
Mechanical and Electrical Design Come Together With Altium’s MCAD CoDesigner
Electronics designers working in small design houses or in large enterprises often encounter a common set of challenges when interfacing with mechanical designers. Continue reading to learn how you can best interface with your mechanical designer to get your projects out the door fast!


Blog
•
Types of Simulation Tools For PCBs
PCB simulation isn’t one-size-fits-all and that’s where it gets interesting! Discover the wide range of tools available, from quick circuit checks to advanced multiphysics simulations, and how they help you design with confidence.

Blog
•
Wiring the Future: The Shift to Unified Electromechanical Design
This article explores the shift from PCB-centric design to complex, system-level development where wiring and harnesses play a critical role in product performance. It highlights how unified electromechanical workflows and bi-directional ECAD–MCAD integration improve accuracy, reduce delays, and ensure reliable, production-ready designs.

Blog
•
Best Tools For PCB DFM Checks
Want to catch manufacturability issues before they turn into expensive delays? Discover the essential DFM tools from real-time checks to post-layout analysis that help you get your PCB right the first time.

Blog
•
Eliminate Your Design Friction with Agile Teams
Design friction from scattered data and disconnected tools slows down PCB development and leads to rework. This webinar shows how Agile Teams streamlines collaboration, aligns domains, and helps teams deliver faster with fewer errors.

Blog
•
What Is an Integrated Design Environment for Electronics?
Using multiple disconnected tools slows down PCB development and increases the risk of errors. This article shows how an integrated environment keeps all design data connected, enabling faster workflows and fewer late-stage issues.

Blog
•
What is the Best Cloud PCB Design Software?
Not all cloud PCB tools are created equal, especially when design complexity increases. This article breaks down key differences between cloud-native and hybrid solutions, helping engineers choose the right approach for performance and scalability.

Blog
•
From Rework to Revenue: Digital PCB DFMA
This article explores how traditional, manual DFMA workflows lead to costly rework, delays, and poor collaboration across engineering teams. It shows how a connected, digital approach enables better data integrity, faster design cycles, and improved manufacturing outcomes.

Blog
•
Introducing Octopart Discover: From Part Search to Solutions Discovery
Octopart has announced Octopart Discover, a new platform that shifts electronic component search toward system-level solution discovery. The tool connects design intent with relevant options, enabling engineers to evaluate tradeoffs and identify the best-fit solutions more efficiently.

Blog
•
How to Choose the Right Components for Your BOM
A strong BOM can make the difference between smooth production and costly delays. Discover a practical approach to choosing components that stay available, meet compliance requirements, and keep your project on schedule.
Blog
•
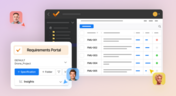
From Scattered Requirements to Confident Product Development
See how the Requirements Portal transforms disconnected requirements into a single, live source of truth that engineers can trust at every stage of a project! Real customer stories in the article prove it’s already helping teams cut down on rework and bring products to market faster.

Blog
•
What is the Best PCB Design Tool For Students?
Students need PCB software that’s intuitive, affordable, and useful for building real skills. This article compares the strengths and weaknesses of leading design tools, from hobbyist platforms to industry-standard software.

Blog
•
What Is Collaborative Engineering?
Collaborative engineering is all about breaking down silos so electrical, mechanical, and sourcing teams can work as one with shared data and real-time updates. This article shows how that approach helps you spot issues early, reduce rework, and get products out the door with fewer surprises.

Blog
•
Bend Reliability: How Trace Geometry and Materials Impact Flex Lifespan
Focused on durability under repeated mechanical stress, this piece details how routing strategy, copper thickness, adhesive systems, and bend radius selection determine flex lifespan. Engineers will find actionable recommendations for reducing strain concentration and improving long-term performance in high-cycle applications.

Blog
•
PCB Design Process: The EDA Design Approach
Dive into how a modern EDA workflow transforms PCB design by linking electrical, mechanical, and manufacturing requirements from idea to final release. With constraint‑driven integration, you can cut down on respins and bring better boards to market faster.
Blog
•
Getting Started for Mechanical Engineers
Explore our collection of MCAD Collaboration walkthroughs, where you’ll discover how to synchronize mechanical constraints and keepouts, maintain traceability with advanced history and revision control, and streamline electromechanical connectivity through harness synchronization. These topics and many more are covered in this article.

Blog
•
Are Your ECAD Tools Holding Back Engineers’ Productivity?
The article highlights that productivity issues often stem from tool limitations rather than engineer effort, especially as project complexity grows. ECAD tools that offer clear version control, cross-discipline integration, and workflow awareness are key to sustaining efficiency.


Your search returns no results.