News & Updates


Blog
•
How Much PCB Mask Expansion is Too Much?
In this article you will learn about finding the right balance between PCB mask expansion and potential problems.

Blog
•
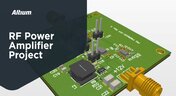
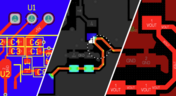
RF Power Amplifier Module PCB Design
RF power amplifiers can be found in many wireless products, often integrated into chipsets or modems. However, in certain specialized systems, you might require higher power output at a specific frequency. This necessitates a discrete amplifier circuit to deliver that power. In this article, we present an example project for a power amplifier that you can incorporate into your RF project.


Blog
•
Avoid GIGO in Your PCB Simulation Tools
Simulation tools are extremely useful for understanding electromagnetic behavior in a design. Learn more about how to avoid obtaining inaccurate results during your PCB simulation process.


Blog
•
Choosing a Converter or Regulator For Your Power Supply Design
When designing the power supply for your device, there are lots of different options. In this article, we will take a brief tour of the main choices in DC power supply design.


Blog
•
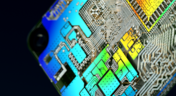
The Benefits of Ultra HDI
Learn more about the combination of using both flexible materials and ultra-HDI feature sizes in this article.


Blog
•
Understanding Power Supply Current Handling Issues: Causes and Solutions
Troubleshooting power supply current handling issues is crucial to achieving optimal performance of your electronic devices. In this article, we will explore the common reasons why a power supply fails to handle the defined output current and provide practical solutions to solving these issues.

Blog
•
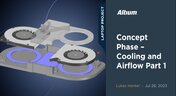
Concept Phase – Cooling and Airflow Part 1
Next step in our open-source laptop project is to explain how to design cooling and airflow. In this article, we can show you the first part of this process, such as airflow concept, fan measurement and clearance.


Blog
•
Create Connections with Harness Design
Many modern electronics have multiple boards, and connecting those different boards and systems together are harnesses. Learn more about how Altium Designer can help you create harnesses for your own multi-board designs here.

Blog
•
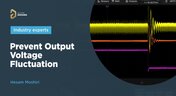
Do You Know How to Prevent Voltage Fluctuation?
We invite you to explore the causes of output voltage fluctuation. In this article we provide you insights on how to solve and prevent these issues.


Blog
•
How Integrated PCB Design Cuts Development Time for Complex Electronics
Fewer tool handoffs, fewer errors, and smoother collaboration that’s the power of integrated PCB design. Learn how unifying your design environment can cut development time and help you deliver complex electronics faster.

Blog
•
Registration Challenges in UHDI: Why Fabrication Tolerances Matter in Your Layout
As UHDI structures shrink, achieving accurate layer-to-layer registration becomes less forgiving than ever. Learn why fabrication tolerances matter so much in ultra-fine geometries and how to design with registration limits in mind from the start.

Blog
•
How Engineering Project Management Tools Are Changing Engineering Teams’ Productivity
Engineering project management tools play a critical role in managing timelines, resources, and cross-disciplinary coordination. This article breaks down the most impactful systems for improving execution and team performance.

Blog
•
7 Ways to Catch Rules & Constraints Early – Checklist
Discover seven actionable ways to spot and fix rules and constraint issues before they derail your PCB project. Using Altium Designer Agile, these tips help you build more manufacturable and reliable boards with fewer iterations.
Blog
•
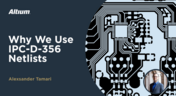
Do You Need an IPC-D-356 Netlist?
If your output package is Gerber-based, adding an IPC-D-356 netlist can dramatically improve how your design is reviewed and validated for production. Here’s when it matters, what it contains, and how to generate it quickly in Altium.

Blog
•
How Agile BOM Management Helps You Lock in Pricing Before Market Shifts
When engineering and procurement work from different BOM versions, delays and cost surprises follow. Learn how agile BOM management brings teams onto one connected BOM so they can respond fast, manage risk, and lock pricing early.

Blog
•
Flexible Circuits: Enhancing Performance with Shielding, Heat Dissipation, and Stiffeners
A flex circuit can look perfect on paper and still fail in the real world due to EMI, hot spots, or mechanical strain. This article breaks down how shielding, thermal planning, and stiffeners help deliver designs that stay reliable over time.
Blog
•
Avoid These Top 3 Power Distribution Failures in PCB Design
Power distribution issues can silently undermine your PCB’s reliability. This article uncovers the top three failure modes and shows how Power Analyzer by Keysight helps you catch them early in the design phase and how Altium Agile Teams turns those checks into structured team action.

Blog
•
From BOM to Requirements and Back: Building Sourcing Constraints Into Specs
When engineering and procurement remain disconnected, supply-chain problems will sneak up on you. This guide argues convincingly: embed sourcing constraints into your requirements from day one, and avoid costly rework down the line.
Blog
•
Understanding Power Integrity in PCB Design: Power Analyzer by Keysight Whitepaper
Power integrity is the backbone of reliable PCB design. This whitepaper explains how to analyze and optimize voltage drop, current density, and grounding directly within Altium Designer Agile using the Power Analyzer by Keysight.

Blog
•
How to Manage ECAD Libraries for Consistent PCB Layout Design
Strong hardware starts with strong libraries. Discover how disciplined ECAD-library management dramatically improves design consistency and accelerates every stage of your PCB workflow.

Blog
•
High Speed PCB Design Review: Signal Integrity Questions You Should Always Ask
As data rates increase, the risks hidden in your layout grow with them. This quick guide highlights the critical SI checkpoints that can save you from late-stage surprises and redesigns. If you design high-speed boards, you’ll want to read this before your next review.

Blog
•
Supplier Negotiation: Turn Market Data Into Your Best Negotiation Tool
Don’t walk into supplier talks blind. Use market data to benchmark quotes, check lead times and uncover alternate parts. This article shows how visibility can shift the balance and de-risk your BOM.
Blog
•
Via-in-Pad in Rigid-Flex Designs: When Space Is Tight, Details Matter
Designing rigid-flex boards is like solving a 3D puzzle of materials, bends and tight spaces, and via-in-pad might just be the piece you need. Dive into how and when to use via-in-pad in rigid-flex designs, and what to watch out for from fabrication to field reliability.

Blog
•
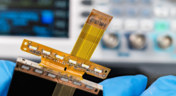
Wearable Electronics: Innovations, Challenges & Future Trends
This whitepaper examines how next-generation wearable electronics are evolving through advancements in flexible and rigid-flex design, smart materials, AI, energy innovations, and connectivity. Discover what’s required to transform early prototypes into scalable, reliable products across healthcare, sports, defense, fashion, and enterprise applications.

Blog
•
Streamlining Component Selection for Long Product Lifecycles
Electronic parts may now cycle from launch to end-of-life in just a few years, but many systems are expected to serve for 10–20+ years. Here’s how to build a component selection process that aligns engineering, procurement and design for longevity and stability.


Your search returns no results.