News & Updates
Blog
•
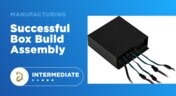
All About Box Build Assemblies
When you’re ready to manufacture a new device at production volume, there are many aspects of the product that must come together. The enclosure, cabling and connectors, embedded software/firmware, and of course the PCBA all have to be considered in totality. There is a quick way to get your product into a usable enclosure, complete with input power and cabling, and with a form factor that fits your PCBA. This overused route to a new product is a box build assembly.
On-Demand Webinar
•
The Best Way to Review Your PCB Designs
It is essential to ask questions and review the design approaches used with your team. Design reviews are essential in the design process, but they can be inconvenient for team members and lack traceability or history. To create the best designs, you need review methods that are as cutting edge as the boards you're making.
Blog
•
Ultra-HDI Technology is Not New
Printed circuit board fabricators have become skilled at manufacturing these technologies and also at understanding the reliability and producibility challenges associated with high-density-interconnect technology. Let’s look at where the PCB industry is at today.


Blog
•
Today's PCB Designers Are Driving Electronics Product Design
What can the industry do to support PCB designers as they continue taking a more active role in product development? Here at Altium, there has been a progressive shift towards looking at the system level and creating tools that get designers more involved throughout the product development process. As the saying goes, over the wall engineering is over… today’s most successful products are built in a collaborative process.


Blog
•
Phased Array Antenna Design for 5G Applications
As the 5G rollout progresses and researchers continue to discuss 6G, many new 5G-capable products operating in sub-GHz and mmWave bands are reaching the marketplace. Devices that will include a 5G-compatible front-end, whether small stations/repeaters or handheld devices, use phased arrays as high-gain antenna systems to provide high data throughput without losing range at higher frequencies.


Blog
•
IPC - Vias
Via protection is an important part of modern PCB design. It provides additional benefits in PCB manufacturing and assembly, increasing the number of acceptable products.
On-Demand Webinar
•
Advantages of Using a Version Control System for Your Next Project
Version control systems (VCS) have been around for a long time in the software world but can be surprisingly new to some folks in the electronics design industry. Version control tools are great for tracking and maintaining entire codebases without the old-school copying, pasting, zipping, and emailing steps many PCB designers use.
Blog
•
Power Integrity Analysis in Your PCB Design Software
Power integrity problems can abound in modern PCBs, especially high-speed boards that run with fast edge rates. These systems require precise design of the PDN impedance to ensure stable power is always delivered throughout the system.


Blog
•
Schematic Compare
A design project doesn’t appear out of nowhere. The design process spreads over time, and project documents change. Schematic documents gradually become more complex, new functional blocks appear, and already finished parts can be modified and updated.

Blog
•
Embedded Capacitance Materials Overview
Capacitance is your friend whenever you need stable power integrity, which is why there is so much focus on decoupling capacitors. While these components are important and they can be used to provide targeted power integrity solutions to certain components, there is one specialty material used to supercharge capacitance in your PCB stackup or package substrate.
Blog
•
How To Import Libraries and Manage Components With Altium 365
The problems you can experience with components and libraries are endless. These problems are the most significant source of design issues and the biggest reason behind respins, costing companies untold amounts of lost profit annually.
If you want to have a better understanding of how to use Altium 365 to maintain a strong and centralized library that is free of problems and headaches, you may want to consider attending this lecture.

Blog
•
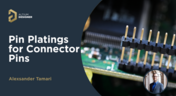
Durability of Pin Plating Materials for PCB Connectors
Pin headers are common components in PCBs, yet one specification often overlooked is the plating material. Discover more about plating materials for electrical connectors in our latest article.

Blog
•
4 Reasons Why We Chose AWS GovCloud (US) for Altium 365 GovCloud
In this blog, we explain the reasons behind our decision to operate Altium 365 GovCloud within AWS GovCloud (US). This partnership is guided by a clear vision: to provide our users with a secure, compliant, and reliable platform for sensitive electronics design data.

Blog
•
How to Reduce Noise From Magnetostriction in Magnetic Components
Magnetic components driven by an AC signal can exhibit an irritating property due to magnetostriction - an effect causing vibrations in magnetic materials, resulting in audible sound. Explore this phenomenon further and discover methods to minimize its impact.

Blog
•
3D MID Design Whitepaper
Dive into a dynamic design experience where you can visualize and edit your circuits in true 3D, offering unparalleled precision. Altium Designer's 3D-MID (Mechatronic Integrated Device) Design tool revolutionizes the design process, providing a fresh perspective. Explore the capabilities and benefits of this feature in our comprehensive guide.

Blog
•
Types of Wiring Harnesses for Electronics
In today's world, many products utilize multiple PCBs interconnected with each other, often leading to a complex network of cables within an enclosure. The most effective way to manage these wires and cables is by constructing a wiring harness. This article explores the various types of harnesses used in electronics.

Blog
•
5 Advantages of Z2Data Integration You Can't Ignore
Z2Data Integration in Altium 365 offers a practical way forward for engineering and procurement. Here are the top five advantages that can streamline your workflows.

Blog
•
Leveraging Altium Designer's Capabilities: Transforming PCB Design Data Management
Are you curious about how Altium Designer's PLM integration is revolutionizing electronics design? Bid farewell to inefficiencies and expensive revisions, and embark on discovering the cutting-edge approach to managing design data. Dive into our latest article to learn how to leverage this new standard in design data management.

Blog
•
Start Altium Designer 24 Training for Free
Level up your design skills with Altium Designer 24 training! Whether you're looking to brush up on the basics or delve into advanced techniques, our instructor-led or on-demand videos will help you master the latest features.

Blog
•
How Altium 365 Supports Agile Hardware Development
Discover how Altium 365 can be your ally in making agile hardware development a practical reality.
Blog
•
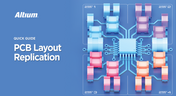
PCB Layout Replication Whitepaper
Experience seamless acceleration in your design workflow with Altium Designer® 24's PCB Layout Replication feature. Effortlessly duplicate layouts for recurring circuit blocks and component groups, amplifying efficiency and reducing expenses.

Blog
•
How Is Your Design Data Protected in Altium 365 GovCloud?
Here's how Altium 365 GovCloud protects your sensitive electronics design data. Learn more about our encryption technologies, access restrictions, and network security standards.

Blog
•
Balancing Budget and Data Security: Cost-Effective Strategies for IT Managers
Make decisions that balance cost-efficiency with uncompromised security. Find ways to ensure your data security measures are both strong and economically viable.
Blog
•
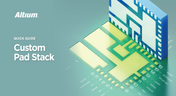
Custom Pad Stack Whitepaper
Explore our manual on the Custom Pad Stack enhanced feature. From thermal connections to pad shapes, every detail matters. Pads are no longer merely points; they demand unique, tailored solutions. With Altium Designer 24, you can customize pad shapes, fine-tune thermal relief, and master rounded/chamfered rectangle pads to meet manufacturing standards, conquer tight spaces, and elevate your design game significantly.
Blog
•
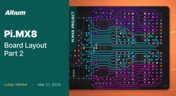
Pi.MX8 Project - Board Layout Part 2
We are continuing the exploration of board layout in our Pi.MX8 Project. In this chapter, we focus on defining the impedance profiles, establishing matching design rules for the correct trace width, and initiating the routing of the DRAM interface.
Blog
•
How Altium Designer Empowers Designers to Master Complex PCB Projects
Discover the power of Altium Designer for tackling modern PCB design challenges! From advanced constraint management to dynamic routing, it's tailored for success. In our brand new article, you'll find the ultimate solution for managing the varying complexities of PCB design.

Blog
•
How Data Integrations Improve Supply Chain Performance
Discover how data integrations can elevate your supply chain performance through real-time insights, enhanced transparency, and enriched component data.


Your search returns no results.