News & Updates


Blog
•
BOM Portal vs BOM Tool: What Changes When You Upgrade
Not all BOM solutions work the same way. This article explains the key differences between BOM tools and BOM portals, and why real-time data and collaboration are becoming essential for modern electronics development.

Blog
•
Altium vs KiCAD: Built to Scale From First Board to Full Product
Starting with a simple board today doesn't mean your next project will stay simple. Learn how Altium Designer and KiCAD compare when designs become more complex, teams get larger, and products move toward manufacturing.

Blog
•
Eliminate the Design-to-Production Gap with Agile Teams + Duro
Learn how Agile Teams and Duro connect design and production workflows through a unified system of record. This webinar shows how structured change management and automated data synchronization help teams reduce errors and accelerate product releases.

Blog
•
Agile Hardware Development: How to Scale Speed Without Losing Control
Agile hardware development isn’t just about working faster, it’s about working together in real time. This article explores how shared environments for ECAD, MCAD, sourcing, and requirements management eliminate handoff delays and improve decision-making across teams.


Blog
•
How Reusable Parameters in Requirements Reduce Errors and Speed Up Iterations
Verification becomes much easier when requirements and system performance data stay connected automatically. This article explains how reusable parameters and V&V rules help teams detect violations earlier and validate designs with greater confidence.


Blog
•
Complex Engineering Projects Leverage Multiple ECAD/MCAD Formats
This article explores how modern engineering teams manage complex projects involving multiple ECAD, MCAD, and manufacturing file formats across distributed workflows. It highlights the importance of design authority, disciplined revision control, and bidirectional collaboration to ensure accurate integration between PCBs and mechanical systems.


Blog
•
Avoid Costly Interconnect Errors: Essential Multiboard PCB Layout Strategies for Reliable Designs
Complex multiboard designs demand more than just connecting boards together. They require every interface to work flawlessly under real-world conditions. Discover how better pin assignments, return paths, and mechanical planning can dramatically improve reliability and reduce rework.


Blog
•
BOM Cost Optimization During Schematic Capture
Engineering and sourcing teams work best when BOM decisions happen with live market data in view. This article explains how integrated cost and availability insights help teams collaborate earlier and avoid redesigns driven by supply chain issues.

Blog
•
Why ECAD–MCAD Collaboration Is Essential to Design for Manufacturability (DFM)
Poor ECAD-MCAD coordination often leads to enclosure conflicts, connector misalignment, and costly redesigns. This article shows how integrated collaboration helps teams catch manufacturability issues earlier and keep projects moving smoothly.

Blog
•
Registration Tolerance Is Now a Design Constraint, Not a Fab Problem
Ultra HDI is changing the rules of PCB design and registration tolerance is now part of the design conversation from day one. Discover how smarter spacing, stackup planning, and collaboration with fabricators can dramatically improve manufacturability and reliability.

Blog
•
How to Use a Multicad Viewer for Seamless Collaboration
Because ECAD formats are typically incompatible, teams often struggle with versioning, conversions, and fragmented review processes. This article breaks down how multi-CAD viewers provide a unified, read-only environment that supports structured design reviews, comments, and task assignment across disciplines.
Blog
•
Unleashing the Power of Concurrent PCB Design
Concurrent PCB Design is essential to unlocking the full potential of engineering teams and delivering innovative products that meet the demands of the modern world. Learn more about the main capabilities and the numerous benefits of this upcoming feature in Altium Designer.

Blog
•
Crosstalk Reduction and Elimination Techniques in Altium Designer
Whether you're designing a digital board with a ton of traces, or an RF board operating at very high frequencies, any electronic device with propagating signals will experience crosstalk. Learn more about some sure-fire ways you can reduce crosstalk in your high-speed designs.

Blog
•
Baxandall Volume Control for Audio
The Baxandall volume control is an especially useful, flexible, and simple-to-implement circuit for numerous audio designs. In this article, we will demonstrate how to design this type of equipment.
Blog
•
Common Flex Design Mistakes and How to Fix Them
Designing flexible circuits involves managing numerous factors. Discover how to prevent mistakes in this process and how to rectify them post-implementation.
Blog
•
How Much PCB Mask Expansion is Too Much?
In this article you will learn about finding the right balance between PCB mask expansion and potential problems.
Blog
•
RF Power Amplifier Module PCB Design
RF power amplifiers can be found in many wireless products, often integrated into chipsets or modems. However, in certain specialized systems, you might require higher power output at a specific frequency. This necessitates a discrete amplifier circuit to deliver that power. In this article, we present an example project for a power amplifier that you can incorporate into your RF project.
Blog
•
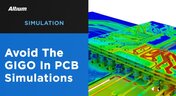
Avoid GIGO in Your PCB Simulation Tools
Simulation tools are extremely useful for understanding electromagnetic behavior in a design. Learn more about how to avoid obtaining inaccurate results during your PCB simulation process.

Blog
•
Choosing a Converter or Regulator For Your Power Supply Design
When designing the power supply for your device, there are lots of different options. In this article, we will take a brief tour of the main choices in DC power supply design.

Blog
•
The Benefits of Ultra HDI
Learn more about the combination of using both flexible materials and ultra-HDI feature sizes in this article.

Blog
•
Understanding Power Supply Current Handling Issues: Causes and Solutions
Troubleshooting power supply current handling issues is crucial to achieving optimal performance of your electronic devices. In this article, we will explore the common reasons why a power supply fails to handle the defined output current and provide practical solutions to solving these issues.
Blog
•
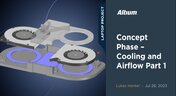
Concept Phase – Cooling and Airflow Part 1
Next step in our open-source laptop project is to explain how to design cooling and airflow. In this article, we can show you the first part of this process, such as airflow concept, fan measurement and clearance.
Blog
•
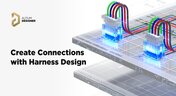
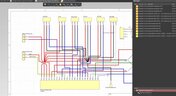
Create Connections with Harness Design
Many modern electronics have multiple boards, and connecting those different boards and systems together are harnesses. Learn more about how Altium Designer can help you create harnesses for your own multi-board designs here.
Blog
•
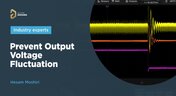
Do You Know How to Prevent Voltage Fluctuation?
We invite you to explore the causes of output voltage fluctuation. In this article we provide you insights on how to solve and prevent these issues.
Blog
•
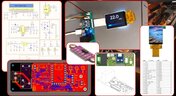
How to Build Your Own Laser Range Finder
In this article we will show you how to create step by step a digital laser range finder for your own. Everything is based on Raspberry Pi board.
Blog
•
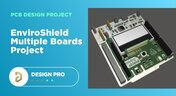
Nucleo Shields Multi-Board Design
Learn how easy it is to create multi-board projects. This practical project article covers the reasons for breaking larger boards into sub-assemblies and explores the various connection options available between sub-assembly boards.
Blog
•
Analog Solar Tracker Project
In this article you can learn about light sensors while building an analog solar panel tracking system. This open-source project covers multi-channel design, window comparators, driving motors, and photosensors.


Your search returns no results.