News & Updates

Blog
•
The Basics of Monte Carlo in SPICE: Theory and Demo
Anytime you place a component in your PCB, it’s almost like you’re gambling. All components have tolerances, and some of these are very precise, but others components can have very wide tolerances on their nominal values. In the event the tolerances on these components become too large, how can you predict how these tolerances will affect your circuits?


Blog
•
What's In Your BGA Land Pattern and Footprint
If you look in datasheets for most components, you’ll often find a recommended land pattern, usually alongside some mechanical package information and assembly information. This is not always the case with BGA components, especially components with high ball count. There are a few reasons for this that we can speculate: those ball counts might just be too big to put into a single page, or the manufacturer just expects you to know how to create that land pattern.


Blog
•
MIDs Make a Comeback as Vertical SMD Modules for Your PCB
Molded interconnect devices are essentially plastic molded substrates with traces running along any surface, including at right angles and running vertically. Altium users can use the new 3D Routing extension to design their own component carriers, which can be mounted vertically in a standard assembly process. If you’ve always wanted to vertically mount components or entire circuits, but without the expense of adding a flex section to your design, the new 3D Routing extension with HARTING’s component carrier designs provides a unique solution.


Blog
•
MCAD CoDesigner 2.9.0 is Out
Altium has released version 2.9.0 of the MCAD CoDesigner. This version has the option to exclude small components when transferring from ECAD to MCAD. The arc behavior was improved, and the support for splines in board shape and cutouts was added. With this release, you can now select a specific SOLIDWORKS configuration of a part to use on the board and view the improvements made for Siemens NX.

Blog
•
Support for Rigid-Flex in Altium Designer
Altium Designer's world-class PCB design features help users quickly get started with new rigid-flex designs and prepare them for manufacturing. Rigid-flex in Altium Designer starts with designing a manufacturable PCB layer stack complete with via transitions and any calculated impedance requirements. Keep reading to see how Altium Designer supports your flex and rigid-flex designs.


Blog
•
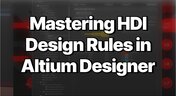
2+N+2 PCB Stackup Design for HDI Boards
Like any other advanced PCB, success in HDI design comes from designing the right stackup. One common HDI stackup used to support routing into moderate pin count, high-density BGA components is the 2+N+2 PCB layer stack for HDI boards. We’ll explore this stackup more in this article, as well as how it is related to other advanced stackups used in HDI PCBs.


Blog
•
PDF in Altium 365 Web Viewer
Altium 365 Web Viewer now includes a built-in PDF viewer that allows you to view PDF files in releases without an external PDF viewer application. Keep reading to learn about new key features that make your work easier


Blog
•
Flex and Rigid-Flex PCB Applications
There are two basic reasons for designing a flex circuit into your product: to build a compact and efficiently assembled device, or to make the circuit dynamically integrated with the mechanical function of the product. You may, of course, lean on both of these reasons for justifying the use of flex circuits. On this note, let’s look at some rigid-flex PCB applications and design examples to see the issues that spring to mind when designing flex circuits

On-Demand Webinar
•
Preparing your files for Fabrication Release
When you’re done creating a new board, it’s time to send your design data to the manufacturer. Before releasing your designs, you’ll want to make sure that everything is ready and works as intended. In this informative video, we’ll review some of the must-have checks before sending your output data for fabrication.

Blog
•
Granular Sharing — Role and Group Management
With Altium 365, you can grant permission to teams or users based on the specific needs of a project. We have expanded Altium 365’s file-sharing setting, giving you more granular control over who can download source files and reshare projects with others


Blog
•
Crosstalk Reduction and Elimination Techniques in Altium Designer
Whether you're designing a digital board with a ton of traces, or an RF board operating at very high frequencies, any electronic device with propagating signals will experience crosstalk. Learn more about some sure-fire ways you can reduce crosstalk in your high-speed designs.

Blog
•
Baxandall Volume Control for Audio
The Baxandall volume control is an especially useful, flexible, and simple-to-implement circuit for numerous audio designs. In this article, we will demonstrate how to design this type of equipment.
Blog
•
Common Flex Design Mistakes and How to Fix Them
Designing flexible circuits involves managing numerous factors. Discover how to prevent mistakes in this process and how to rectify them post-implementation.
Blog
•
How Much PCB Mask Expansion is Too Much?
In this article you will learn about finding the right balance between PCB mask expansion and potential problems.
Blog
•
RF Power Amplifier Module PCB Design
RF power amplifiers can be found in many wireless products, often integrated into chipsets or modems. However, in certain specialized systems, you might require higher power output at a specific frequency. This necessitates a discrete amplifier circuit to deliver that power. In this article, we present an example project for a power amplifier that you can incorporate into your RF project.
Blog
•
Avoid GIGO in Your PCB Simulation Tools
Simulation tools are extremely useful for understanding electromagnetic behavior in a design. Learn more about how to avoid obtaining inaccurate results during your PCB simulation process.

Blog
•
Choosing a Converter or Regulator For Your Power Supply Design
When designing the power supply for your device, there are lots of different options. In this article, we will take a brief tour of the main choices in DC power supply design.

Blog
•
The Benefits of Ultra HDI
Learn more about the combination of using both flexible materials and ultra-HDI feature sizes in this article.
Blog
•
Understanding Power Supply Current Handling Issues: Causes and Solutions
Troubleshooting power supply current handling issues is crucial to achieving optimal performance of your electronic devices. In this article, we will explore the common reasons why a power supply fails to handle the defined output current and provide practical solutions to solving these issues.
Blog
•
Concept Phase – Cooling and Airflow Part 1
Next step in our open-source laptop project is to explain how to design cooling and airflow. In this article, we can show you the first part of this process, such as airflow concept, fan measurement and clearance.
Blog
•
Create Connections with Harness Design
Many modern electronics have multiple boards, and connecting those different boards and systems together are harnesses. Learn more about how Altium Designer can help you create harnesses for your own multi-board designs here.
Blog
•
Do You Know How to Prevent Voltage Fluctuation?
We invite you to explore the causes of output voltage fluctuation. In this article we provide you insights on how to solve and prevent these issues.
Blog
•
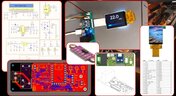
How to Build Your Own Laser Range Finder
In this article we will show you how to create step by step a digital laser range finder for your own. Everything is based on Raspberry Pi board.
Blog
•
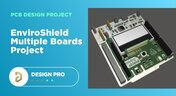
Nucleo Shields Multi-Board Design
Learn how easy it is to create multi-board projects. This practical project article covers the reasons for breaking larger boards into sub-assemblies and explores the various connection options available between sub-assembly boards.
Blog
•
Analog Solar Tracker Project
In this article you can learn about light sensors while building an analog solar panel tracking system. This open-source project covers multi-channel design, window comparators, driving motors, and photosensors.

Blog
•
Concept Phase – Initial CAD Design
We are continuing our journey through the open-source laptop project. This article explains an initialization of CAD design process from the early concept and brainstorming phase.


Your search returns no results.