News & Updates

Blog
•
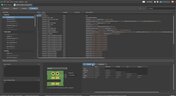
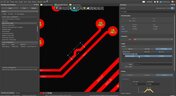
Properties Panel Tuning
High-speed PCBs often require tuning groups of tracks, both single and differential. Altium Designer includes powerful tools that allow you to solve such tasks quickly and with high quality. Study this document and achieve the desired result even faster.
On-Demand Webinar
•
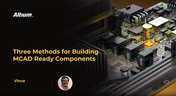
Three Methods for Building MCAD Ready Components
One of the most difficult and frustrating things to arise when traveling to a foreign country is the language barrier. Communicating a simple greeting can sometimes seem like a big hassle. The same thing is true for different CAD tools. When your tools aren’t speaking the same language, you’re going to run into problems. Bridge this gap by building out your component libraries with everything it takes to truly define a component, including 3D models that seamlessly propagate into the PCB editor and beyond.

Blog
•
Reflectionless Matching vs. Conjugate Matching: An Apparent Contradiction
There is one confusion related to impedance matching that comes up again and again, and it appears to be a fundamental confusion between reflection and power delivery. This leads to an apparent contradiction that arises when we try to generalize power delivery to wave reflection, despite the fact that the two were not meant to be related.


Blog
•
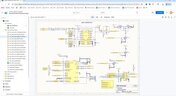
Properties Panel Routing
Routing is one of the most time-consuming stages of PCB design. Altium Designer has a large set of tools that allow you to do it as accurately and quickly as possible. This document will help you to learn how to manage your routing effectively and use it to its fullest extent.

Blog
•
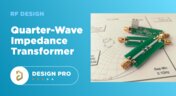
Quarter-Wave Transformer Design For Real and Reactive Loads
RF systems operate with specific impedance values across entire interconnects, including on PCBs. Not all RF components are packaged in integrated circuits with defined impedances, so impedance matching circuits and line sections are needed to ensure signal transmission between different sections of an interconnect. One of these impedance matching techniques is the quarter-wave impedance transformer, which can be implemented as a printed trace with specific impedance.


Blog
•
Altium Designer 22.10 Update
We are happy to announce that the Altium Designer 22.10 update is now available. Altium Designer 22.10 continues to focus on improving the user experience, as well as performance and stability of the software, based on feedback from our users. Check out the key new features in the What's New section on the left side of this window!

Blog
•
Component Warpage Causes in a PCB
A staff member at a PCB manufacturer once explained to me that they thought we were having an issue with a package warping. Unfortunately, component warping can occur both in a PCB and in components. In this article, we'll give an overview of warpage in a PCB, specifically in the circuit board and in the components.

On-Demand Webinar
•
8 Reasons to Store Your Components in Altium 365
Working with local libraries seems like a simple solution, but we often don’t take into account the added time spent maintaining libraries and sharing them between team members. There is no good way to avoid duplicate efforts with component creation and no standardization to ensure consistent naming. Worst of all, there is no way to identify the latest component revision, and library files can be easily corrupted or misplaced. This webinar showcases the advantages of component storage in Аltium 365 to resolve the issues of local libraries and component management.

Blog
•
RF Signal Chain and Link Budget Basics
If you're designing a wireless IoT device, and you know how to calculate the link budget, you can reasonably estimate whether your signal will reach its destination and be read by the receiver. To calculate the link budget, the designer needs to know something about all other sources of gain and loss in the system. Once link budget is determined, the designer can judge whether some modification is needed in their RF signal chain.


Blog
•
Best Methods for Calculating SMD Pad Size in PCB Design
SMD components require precisely sized pads for soldering during assembly. The designer is responsible for ensuring pad sizes are correct, either by calculating them and comparing with footprint data, looking through datasheets, or by memorizing SMD pad size standards. If you have a component and you don't have access to the footprint, and you decide to biuld the footprint yourself, what resources are available to ensure you have the correct pad size?


Blog
•
Can You Fix a Warped PCB?
Before we get too deep into this article, I’ll give you the simple answer. You probably can’t fix warping in your PCB after it’s already been fabricated. You can prevent an unwarped board from becoming warped during assembly, but only as long as materials were selected properly and the board is put into reflow correctly. We’ll run over some of these points in this article, and I’ll examine some points that might help you recover a warped board.


Blog
•
What is an Eye Diagram?
The eye diagram is a useful measurement or simulation as part of channel compliance. The measurement shows many different factors that can affect signal behavior simultaneously, ultimately allowing for qualification of errors and losses in a channel. In this article, I’ll run over some of the fundamental measurements that you could manually extract from an eye diagram and how they reveal some strategies for improving channel designs.

Blog
•
Why Human Error Is Electronics Design Cybersecurity's Biggest Weakness
Human error is a leading cause of cybersecurity breaches—even in electrical engineering. Our article explores how everyday design and collaboration habits can create vulnerabilities, and what engineers can do to build safer, more secure workflows.
Blog
•
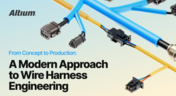
From Concept to Production: A Modern Approach to Wire Harness Engineering
Discover how modern wire harness engineering is evolving to meet the growing complexity of electrified systems. This whitepaper explores best practices, intelligent automation, and ECAD-MCAD collaboration to improve efficiency and reduce errors. Download now to stay ahead in an increasingly connected world.
Blog
•
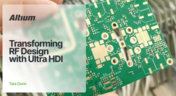
Transforming RF Design with Ultra HDI
Ultra-HDI technology is transforming RF design by enabling finer line widths, improved signal integrity, and more compact, high-performance boards. Our brand-new article explores its advantages over traditional methods and the benefits of integrating flexible circuits.
Blog
•
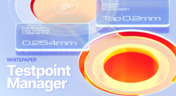
Boost Your PCB Testing Efficiency with Testpoint Manager
Testpoints are essential for efficient PCBA testing and debugging. Our latest whitepaper dives into testpoint optimization, fault detection, and automated testing strategies, along with a full tutorial on using Testpoint Manager in Altium Designer. Discover how to streamline your testpoint assignments and improve measurement accuracy!

Blog
•
Top 5 Hidden Challenges of Cable Harness Design in Electronic Products
Krishna Sundaram explores the hidden challenges of cable harness design, from routing complexity to mechanical constraints and manufacturability. Learn how to design a robust and efficient harness.
Blog
•
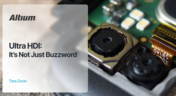
Ultra HDI: It’s Not Just Buzzword
Ultra-HDI technology is transforming PCB design, enabling unprecedented miniaturization and performance. In this article, explore what sets Ultra-HDI apart from traditional HDI and how it’s shaping the future of electronics.

Blog
•
Cloud PCB Design: 5 Cloud Security Myths Debunked
This article addresses common misconceptions about cloud security in PCB design. It explains how modern cloud platforms, such as Altium 365, often provide superior security compared to traditional on-premises solutions. Key features like advanced infrastructure, granular access controls, and compliance with stringent regulations ensure the protection of valuable design data.

Blog
•
Renesas and Altium Announce Introduction of Renesas 365, Powered by Altium
Last week, Renesas Electronics and Altium proudly announced the introduction of Renesas 365, Powered by Altium—a first-of-its-kind industry solution designed to streamline electronic system development, from silicon selection to system lifecycle management. Renesas 365 will be demonstrated at Embedded World, Booth 5-371, from March 11-13 in Nuremberg, Germany.

Blog
•
DFM/DFA Requirements in Systems Engineering
Learn how integrating DFM and DFA principles into systems engineering ensures manufacturable, cost-effective PCB designs by optimizing CAD, CAM, and requirements management in our new article by Javier Alcina.
Blog
•
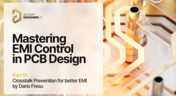
Mastering EMI Control in PCB Design: Crosstalk Prevention for better EMI
Crosstalk control is essential for better EMI performance. Learn effective design techniques to reduce interference in the final installment of this series by Dario Fresu.

Blog
•
Best Practices for Electronics Project Management - Part 2
Part 2 of this series covers essential project management techniques for electronics design teams. Rafał Stępień discusses effective data organization, revision control, and collaboration strategies to improve efficiency and minimize errors.

Blog
•
Rigid-Flex PCBs: Understanding the Pros, Cons, and Fabrication Considerations
Read our new article which discusses the advantages of rigid-flex PCBs, such as space-saving designs and enhanced reliability, while also addressing potential challenges in their fabrication. It provides essential design and manufacturing tips to help engineers effectively implement this technology in various applications.

Blog
•
The Role of Automation & Robotics in Wire Harness Assembly
Our new article highlights how automation and robotics are transforming wire harness assembly, improving efficiency, precision, and cost-effectiveness. Technologies like robotic wire handling and AI-driven testing are paving the way for smarter production. However, challenges like custom designs and high costs still persist.

Blog
•
Best Practices for Electronics Project Management - Part 1
Check out the first part of "Best Practices for Electronics Project Management" by Rafał Stępień. It offers valuable advice on enhancing team communication and documentation in hardware design projects.

Blog
•
Wiring for the Final Frontier: A Guide to Space-Grade Harness Design
Wiring harnesses are mission-critical in space systems, requiring strict adherence to ECSS-Q-ST-70-61C and NASA-STD-8739.4A. In "Wiring for the Final Frontier: A Guide to Space-Grade Harness Design", Kamil Jasiński explores key design principles, material selection, and testing to ensure reliability in extreme environments.

Blog
•
The Future of Wire Harnesses in the Electric Vehicle and Electronics Era
Discover how wire harnesses are evolving to meet the demands of electric vehicles and modern electronics. Our latest article explores key trends like higher voltages, lightweight designs, and smart harnesses, along with challenges such as cost and supply chain issues.


Your search returns no results.