News & Updates

Blog
•
Design Rule Checking in the PCB Design Workflow
Any time you design a PCB, and you want to turn it into a real product, you will have to make sure the design obeys the constraints within the standard PCB manufacturing process. This imposes multiple rules on any design, and ECAD software will enforce design rules as you create the board to ensure you obey these important constraints. Make sure you enforce the right design rules at the beginning of the PCB design workflow


Blog
•
Best Practices for High-Frequency PCB Material Selection
High frequency PCB design can seem esoteric, and I've heard many an engineer describe it as "black magic"! The subject is also a bit confusing, especially once someone asks which frequencies could be reasonably considered "high". Before you do anything inside the layout for a high-speed or RF PCB, you will need to pay attention to the materials being used in the board. If you're unsure which high frequency PCB materials you should use, then keep reading to learn more.


Blog
•
PCB Noise Reduction: Do You Need Isolation, Shielding, or Filters?
Of all the noise and operational challenges designers face in their PCBs, there is one overarching problem that is arguably most popular: electronic noise. It could originate as an SI/PI problem, it could possibly arise from some external source, or it could be good old-fashioned crosstalk! These tend to fall into three categories: adding shielding, doing something to create isolation, or placing filters. Let's look at all of these as they tend to be the default solution set when confronted with many noise problems.

On-Demand Webinar
•
CoDesigner and MCAD Component Placement On-Demand Webinar
We design products not just PCBs requiring effective collaboration between MCAD and ECAD engineers. We need to consider how we can reduce the likelihood of errors when placing critical design components. Component placement in the context of enclosures can be easily handled in an MCAD environment while it is more difficult to achieve in the ECAD domain. Learn how to place components from the MCAD side and synchronize them with Altium Designer ECAD models, designators, and sourcing data to simplify your design process.

Blog
•
What’s New in Altium 365: Version Control for Hardware, Layer Stackup in Web Viewer, and SOC 2 Type 1 Certification
In February, we hit a new record in the number of users on the platform. The Altium 365 user community is now 20,000 strong! You can now migrate from an external version control system to Altium 365 preserving the history of commits. We also received the SOC 2 Type 1 certification from KPMG, made layer stack available in the web viewer, and added the brand new capability to track tasks in the context of your design project. Keep reading to learn more!


Blog
•
Introducing Spectra's Electronic Design to Delivery Index
Get a cohesive view of supply chain market conditions, stay on top of trends, and avoid disruption with this free, monthly report from Spectra.


Blog
•
Support for Rigid-Flex in Altium Designer
Rigid-flex in Altium Designer starts with designing a manufacturable PCB layer stack complete with via transitions and any calculated impedance requirements. Flex sections also need to be placed in the layer stack before moving into the PCB layout. Once inside the PCB editor, bending lines can be clearly defined in the PCB layout, and these can be visualized in Altium Designer's 3D PCB design tools. Keep reading to see how Altium Designer supports your flex and rigid-flex designs.


Blog
•
Communicating PCB Layer Stackup Needs to Manufacturers
In the business of PCB design, communicating needs to manufacturers and vendors is a top priority. The context of our requests is sometimes lost either by not providing the correct information, not listing enough information, or not giving any information. Although the experienced PCB designer can take steps to specify everything they want to see in their PCB stackup, eventaully the manufacturer will handle that decision in an effort to balance available materials with processing capabilities and yield.

On-Demand Webinar
•
Intelligent Supply Chain Webinar
Many factors can affect your supply chain. Currently, supply disruptions are being felt due to the effect of the Covid-19 Pandemic. In this webinar, learn how Concord Pro on Altium 365 can mitigate disruptions in your supply chain and help you stay on schedule and budget for your designs.

Blog
•
Risk Vs. Reward
During the recent IPC APEX expo, there was a lot of discussion about SAP, or semi-additive PCB processes. As with any new technology adoption there were people that are excited to jump right in and start designing with much finer feature sizes and work through the inevitable changes to the traditional thought process. Others are in a "let’s wait and see" mode and of course there are a few skeptics there as well, so keep reading to learn more.


Blog
•
Parasitic Extraction with an Electromagnetic Solver in PCB Routing
Parasitic extraction: the integrated circuit design community must grapple with this task on a daily basis, especially once gate features are reduced below ~350 nm and chips run at high switching speeds. The PCB community also has to deal with this idea in order to better design power delivery networks, interconnects with precise impedance, and properly quantify crosstalk and coupling mechanisms.
Blog
•
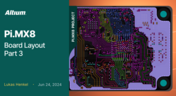
Pi.MX8 Project - Board Layout Part 3
We continue our exploration of the Pi.MX8 open-source computer module project. In this new installment, we focus on routing planning and then cover all the layers' routing with all the details you need to know if you want to prepare a similar project.

Blog
•
Mastering Blind and Buried Vias
Check our compilation of essential resources you'll need to use blind and buried vias successfully in an HDI PCB. In our brand new article, we present the main and most valuable information about this technology, which may not be new but is still highly useful in High-Density Interconnect projects.

Blog
•
Penn Electric Racing Pushes the Envelope with Altium 365
Discover how Penn Electric Racing builds award-winning, fully electric racecars with Altium 365, pushing the boundaries of technology and design.

Blog
•
Make Sure to Clean Your No-Clean Flux
No-clean flux has become popular due to its convenience. Learn more about why this solution is used, why cleaning might still be necessary, and how to remove no-clean flux residues. We will try to dispel all these doubts in this brand new article.
Blog
•
SPICE Simulation Module: How To Use Automated Measurements in Simulations To Save Time and Money in Design Challenges
Simulation of electronic circuits is a key factor in the success of your design. A SPICE circuit simulator may be used to speed up the design analysis. Learn more about how Altium Designer can help you with automated measurements, saving you time and money during the design process.

Blog
•
Achieve Seamless Rigid-Flex Design with Altium Designer's Unified Solution
Check out our refreshed feature page about Rigid-Flex PCB Design and see how Altium Designer’s unified environment can help you manage this kind of project with no limitations or additional licensing required.

Blog
•
How to Design a Thermal Prototype PCB
Thermal problems in PCBs often go unnoticed until prototyping, which can be costly. Design teams can't afford endless iterations, but they can conduct lower-cost thermal prototypes. Learn more about this approach in our new article.

Blog
•
6 Challenges of Managing Disconnected PLM Workflows
Discover six challenges of managing disconnected PLM workflows in electronics product development. Identify your main challenge and find the solution here.

Blog
•
DC-Aware Return Current in Mixed Signal PCBs
In this article, we will examine specific cases involving these types of components, where a very low-frequency signal or a DC signal needs to be measured, and the return path must be tracked to ensure the current loop is tight.

Blog
•
PCB Layout Replication: The Perfect Tool for Test Jigs
Replicate your circuits across multiple blocks with just a few clicks using a flawless preview pane, ensuring consistent, perfect results without the need for trial and error. Check out our new article on the PCB Layout Replication feature.
Blog
•
Durability of Pin Plating Materials for PCB Connectors
Pin headers are common components in PCBs, yet one specification often overlooked is the plating material. Discover more about plating materials for electrical connectors in our latest article.

Blog
•
4 Reasons Why We Chose AWS GovCloud (US) for Altium 365 GovCloud
In this blog, we explain the reasons behind our decision to operate Altium 365 GovCloud within AWS GovCloud (US). This partnership is guided by a clear vision: to provide our users with a secure, compliant, and reliable platform for sensitive electronics design data.

Blog
•
How to Reduce Noise From Magnetostriction in Magnetic Components
Magnetic components driven by an AC signal can exhibit an irritating property due to magnetostriction - an effect causing vibrations in magnetic materials, resulting in audible sound. Explore this phenomenon further and discover methods to minimize its impact.

Blog
•
3D MID Design Whitepaper
Dive into a dynamic design experience where you can visualize and edit your circuits in true 3D, offering unparalleled precision. Altium Designer's 3D-MID (Mechatronic Integrated Device) Design tool revolutionizes the design process, providing a fresh perspective. Explore the capabilities and benefits of this feature in our comprehensive guide.

Blog
•
Types of Wiring Harnesses for Electronics
In today's world, many products utilize multiple PCBs interconnected with each other, often leading to a complex network of cables within an enclosure. The most effective way to manage these wires and cables is by constructing a wiring harness. This article explores the various types of harnesses used in electronics.

Blog
•
5 Advantages of Z2Data Integration You Can't Ignore
Z2Data Integration in Altium 365 offers a practical way forward for engineering and procurement. Here are the top five advantages that can streamline your workflows.


Your search returns no results.