News & Updates


Blog
•
From Scattered Requirements to Confident Product Development
See how the Requirements Portal transforms disconnected requirements into a single, live source of truth that engineers can trust at every stage of a project! Real customer stories in the article prove it’s already helping teams cut down on rework and bring products to market faster.


Blog
•
What is the Best PCB Design Tool For Students?
Students need PCB software that’s intuitive, affordable, and useful for building real skills. This article compares the strengths and weaknesses of leading design tools, from hobbyist platforms to industry-standard software.

Blog
•
What Is Collaborative Engineering?
Collaborative engineering is all about breaking down silos so electrical, mechanical, and sourcing teams can work as one with shared data and real-time updates. This article shows how that approach helps you spot issues early, reduce rework, and get products out the door with fewer surprises.


Blog
•
Bend Reliability: How Trace Geometry and Materials Impact Flex Lifespan
Focused on durability under repeated mechanical stress, this piece details how routing strategy, copper thickness, adhesive systems, and bend radius selection determine flex lifespan. Engineers will find actionable recommendations for reducing strain concentration and improving long-term performance in high-cycle applications.


Blog
•
PCB Design Process: The EDA Design Approach
Dive into how a modern EDA workflow transforms PCB design by linking electrical, mechanical, and manufacturing requirements from idea to final release. With constraint‑driven integration, you can cut down on respins and bring better boards to market faster.

Blog
•
Getting Started for Mechanical Engineers
Explore our collection of MCAD Collaboration walkthroughs, where you’ll discover how to synchronize mechanical constraints and keepouts, maintain traceability with advanced history and revision control, and streamline electromechanical connectivity through harness synchronization. These topics and many more are covered in this article.


Blog
•
Are Your ECAD Tools Holding Back Engineers’ Productivity?
The article highlights that productivity issues often stem from tool limitations rather than engineer effort, especially as project complexity grows. ECAD tools that offer clear version control, cross-discipline integration, and workflow awareness are key to sustaining efficiency.


Blog
•
How Integrated PCB Design Cuts Development Time for Complex Electronics
Fewer tool handoffs, fewer errors, and smoother collaboration that’s the power of integrated PCB design. Learn how unifying your design environment can cut development time and help you deliver complex electronics faster.


Blog
•
Registration Challenges in UHDI: Why Fabrication Tolerances Matter in Your Layout
As UHDI structures shrink, achieving accurate layer-to-layer registration becomes less forgiving than ever. Learn why fabrication tolerances matter so much in ultra-fine geometries and how to design with registration limits in mind from the start.


Blog
•
How Engineering Project Management Tools Are Changing Engineering Teams’ Productivity
Engineering project management tools play a critical role in managing timelines, resources, and cross-disciplinary coordination. This article breaks down the most impactful systems for improving execution and team performance.

Blog
•
How to Reduce Noise From Magnetostriction in Magnetic Components
Magnetic components driven by an AC signal can exhibit an irritating property due to magnetostriction - an effect causing vibrations in magnetic materials, resulting in audible sound. Explore this phenomenon further and discover methods to minimize its impact.

Blog
•
3D MID Design Whitepaper
Dive into a dynamic design experience where you can visualize and edit your circuits in true 3D, offering unparalleled precision. Altium Designer's 3D-MID (Mechatronic Integrated Device) Design tool revolutionizes the design process, providing a fresh perspective. Explore the capabilities and benefits of this feature in our comprehensive guide.

Blog
•
Types of Wiring Harnesses for Electronics
In today's world, many products utilize multiple PCBs interconnected with each other, often leading to a complex network of cables within an enclosure. The most effective way to manage these wires and cables is by constructing a wiring harness. This article explores the various types of harnesses used in electronics.

Blog
•
5 Advantages of Z2Data Integration You Can't Ignore
Z2Data Integration in Altium 365 offers a practical way forward for engineering and procurement. Here are the top five advantages that can streamline your workflows.

Blog
•
Leveraging Altium Designer's Capabilities: Transforming PCB Design Data Management
Are you curious about how Altium Designer's PLM integration is revolutionizing electronics design? Bid farewell to inefficiencies and expensive revisions, and embark on discovering the cutting-edge approach to managing design data. Dive into our latest article to learn how to leverage this new standard in design data management.

Blog
•
Start Altium Designer 24 Training for Free
Level up your design skills with Altium Designer 24 training! Whether you're looking to brush up on the basics or delve into advanced techniques, our instructor-led or on-demand videos will help you master the latest features.

Blog
•
How Altium 365 Supports Agile Hardware Development
Discover how Altium 365 can be your ally in making agile hardware development a practical reality.

Blog
•
PCB Layout Replication Whitepaper
Experience seamless acceleration in your design workflow with Altium Designer® 24's PCB Layout Replication feature. Effortlessly duplicate layouts for recurring circuit blocks and component groups, amplifying efficiency and reducing expenses.

Blog
•
How Is Your Design Data Protected in Altium 365 GovCloud?
Here's how Altium 365 GovCloud protects your sensitive electronics design data. Learn more about our encryption technologies, access restrictions, and network security standards.

Blog
•
Balancing Budget and Data Security: Cost-Effective Strategies for IT Managers
Make decisions that balance cost-efficiency with uncompromised security. Find ways to ensure your data security measures are both strong and economically viable.
Blog
•
Custom Pad Stack Whitepaper
Explore our manual on the Custom Pad Stack enhanced feature. From thermal connections to pad shapes, every detail matters. Pads are no longer merely points; they demand unique, tailored solutions. With Altium Designer 24, you can customize pad shapes, fine-tune thermal relief, and master rounded/chamfered rectangle pads to meet manufacturing standards, conquer tight spaces, and elevate your design game significantly.
Blog
•
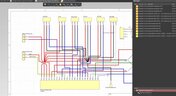
Pi.MX8 Project - Board Layout Part 2
We are continuing the exploration of board layout in our Pi.MX8 Project. In this chapter, we focus on defining the impedance profiles, establishing matching design rules for the correct trace width, and initiating the routing of the DRAM interface.
Blog
•
How Altium Designer Empowers Designers to Master Complex PCB Projects
Discover the power of Altium Designer for tackling modern PCB design challenges! From advanced constraint management to dynamic routing, it's tailored for success. In our brand new article, you'll find the ultimate solution for managing the varying complexities of PCB design.

Blog
•
How Data Integrations Improve Supply Chain Performance
Discover how data integrations can elevate your supply chain performance through real-time insights, enhanced transparency, and enriched component data.

Blog
•
Why Altium Designer Can Help Design PCBs Intuitively and Intelligently
Altium Designer sets the PCB design standard with its cohesive environment, cutting-edge tools, and 3D-MID support. Learn more about how to eliminate errors, accelerate cycles, and foster innovation with our software.

Blog
•
Multi-CAD Engineering: Top 6 Challenges
Explore the challenges and reasons behind Multi-CAD engineering and discover solutions for smooth cross-platform ECAD collaboration.


Your search returns no results.