News & Updates
Blog
•
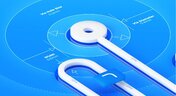
Properties Panel Routing
Routing is one of the most time-consuming stages of PCB design. Altium Designer has a large set of tools that allow you to do it as accurately and quickly as possible. This document will help you to learn how to manage your routing effectively and use it to its fullest extent.

Blog
•
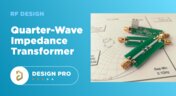
Quarter-Wave Transformer Design For Real and Reactive Loads
RF systems operate with specific impedance values across entire interconnects, including on PCBs. Not all RF components are packaged in integrated circuits with defined impedances, so impedance matching circuits and line sections are needed to ensure signal transmission between different sections of an interconnect. One of these impedance matching techniques is the quarter-wave impedance transformer, which can be implemented as a printed trace with specific impedance.


Blog
•
Altium Designer 22.10 Update
We are happy to announce that the Altium Designer 22.10 update is now available. Altium Designer 22.10 continues to focus on improving the user experience, as well as performance and stability of the software, based on feedback from our users. Check out the key new features in the What's New section on the left side of this window!
Blog
•
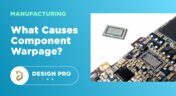
Component Warpage Causes in a PCB
A staff member at a PCB manufacturer once explained to me that they thought we were having an issue with a package warping. Unfortunately, component warping can occur both in a PCB and in components. In this article, we'll give an overview of warpage in a PCB, specifically in the circuit board and in the components.

On-Demand Webinar
•
8 Reasons to Store Your Components in Altium 365
Working with local libraries seems like a simple solution, but we often don’t take into account the added time spent maintaining libraries and sharing them between team members. There is no good way to avoid duplicate efforts with component creation and no standardization to ensure consistent naming. Worst of all, there is no way to identify the latest component revision, and library files can be easily corrupted or misplaced. This webinar showcases the advantages of component storage in Аltium 365 to resolve the issues of local libraries and component management.

Blog
•
RF Signal Chain and Link Budget Basics
If you're designing a wireless IoT device, and you know how to calculate the link budget, you can reasonably estimate whether your signal will reach its destination and be read by the receiver. To calculate the link budget, the designer needs to know something about all other sources of gain and loss in the system. Once link budget is determined, the designer can judge whether some modification is needed in their RF signal chain.


Blog
•
Best Methods for Calculating SMD Pad Size in PCB Design
SMD components require precisely sized pads for soldering during assembly. The designer is responsible for ensuring pad sizes are correct, either by calculating them and comparing with footprint data, looking through datasheets, or by memorizing SMD pad size standards. If you have a component and you don't have access to the footprint, and you decide to biuld the footprint yourself, what resources are available to ensure you have the correct pad size?


Blog
•
Can You Fix a Warped PCB?
Before we get too deep into this article, I’ll give you the simple answer. You probably can’t fix warping in your PCB after it’s already been fabricated. You can prevent an unwarped board from becoming warped during assembly, but only as long as materials were selected properly and the board is put into reflow correctly. We’ll run over some of these points in this article, and I’ll examine some points that might help you recover a warped board.


Blog
•
What is an Eye Diagram?
The eye diagram is a useful measurement or simulation as part of channel compliance. The measurement shows many different factors that can affect signal behavior simultaneously, ultimately allowing for qualification of errors and losses in a channel. In this article, I’ll run over some of the fundamental measurements that you could manually extract from an eye diagram and how they reveal some strategies for improving channel designs.

On-Demand Webinar
•
Fundamentals of High-Speed Design
This track is for the designer who is new to high-speed layout and routing practices and wants to understand how they relate to signal integrity, and how to get started designing for high-speed digital applications.

Blog
•
What Skills Are Needed to be a PCB Layout Designer?
To readers who have been working in the PCB industry for most of your career, you have probably seen a very diverse group of professionals with varied skill sets and backgrounds. Designers might get started as engineers or as technicians, and some designers learn how to create beautiful PCB layouts in university. No matter how you got into PCB design, there are some important skills to know that will take you a long way towards advancing your career.


Blog
•
Beginner PCB Design Mistakes and How To Avoid Them
When starting out with PCB design, it’s common to treat the process as simply ‘connecting the dots’: as long as connections are made, it’s not particularly important how these connections are made. Having reviewed quite a number of PCBs of other PCB design engineers over the last few years, there are common, unfortunately erroneous, occurrences between a lot of them. This article aims to illustrate the top five beginner PCB design mistakes and what we can do to avoid making them. Let’s get started!

Blog
•
Altium OutJob Files vs. Project Release: What's the Difference?
When it’s time to share your design data with your manufacturer, it’s like taking a leap of faith. Sending off a complete documentation package might seem as easy as placing your fab files in a zip folder, but there are better ways to ensure your manufacturer understands your project and has access to all your design data. For Altium Designer users, there are multiple options for creating and packaging release data into a complete package for your manufacturers.

Blog
•
Testing the Limits of Your LDO's Efficiency
If you’re designing a circuit board to be powered by anything except a bench-top regulated power supply, you’ll need to select a power regulator to place on your board. Just like any other component, your regulator has stated operating specs you’ll see in a product summary, and it has more detailed specs you’ll find in a datasheet. The fine details in your datasheets are easy to overlook, but they are the major factors that determine how your component will interact with the rest of your system.

Blog
•
How Total Harmonic Distortion Affects Your Power System
It would be nice if the power that came from the wall was truly noise-free. Unfortunately, this is not the case, and although a power system can appear to output a clean sine wave, zooming into an oscilloscope trace or using an FFT will tell you a different story. When you take "dirty" power, put it through rectification, and then pass it through a switching regulator, you introduce additional noise into the system that further degrades power quality. If you’re a power supply or power systems designer, then you know the value of supplying your devices with clean, noise-free power.

Blog
•
What PCB Copper Thickness Should You Use?
If you’re an electronics designer or you’re just beginning your career as an engineer, the PCB stackup is probably one of the last things you’ll think about. Simple items like PCB copper thickness and board thickness can get pushed to the back burner, but you’ll need to think about these two points for many applications as not every board will be fabricated on a standard 1.57 mm two-layer PCB

Blog
•
Should You Route Signals in Your PCB Power Plane?
I often get questions from designers asking about things like signal integrity and power integrity, and this most recent question forced me to think about some basic routing practices near planes and copper pour. "Is it okay to route signal traces on the same layer as power planes? I’ve seen some stackup guidelines that suggest this is fine, but no one provides solid advice." Once again, we have a great example of a long-standing design guideline without enough context.

Blog
•
The Anatomy of Your Schematic Netlist, Ports, and Net Names
Electronics schematics form the foundation of your design data, and the rest of your design documents will build off of your schematic. If you’ve ever worked through a design and made changes to the schematic, then you’re probably aware of the synchronization you need to maintain with the PCB layout. At the center of it all is an important set of data about your components: your schematic netlist. What’s important for designers is to know how the netlist defines connections between different components and schematics in a large project.

Blog
•
How to Compare PCB Manufacturing Services for Your Board
There are plenty of PCB manufacturing services you can find online, and they can all start to blend together. If you’re searching for a new service provider, it can be hard to compare all of them and find the best manufacturer that meets your needs. While experienced designers can spot bogus manufacturers from afar, there is always a temptation to go with the lowest priced, supposedly fastest overseas company you can find. However, there is a lot more that should go into choosing a PCB manufacturing service than just price.

Blog
•
Pi Filter Designs for Power Supplies
Pi Filters are a type of passive filter that gets its name from the arrangement of the three constituent components in the shape of the Greek letter Pi (π). Pi filters can be designed as either low pass or high pass filters, depending on the components used. The low-pass filter used for power supply filtering is formed from an inductor in series between the input and output with two capacitors, one across the input and the other across the output. Keep reading to learn more about their application in the PCB Design.
Blog
•
How to Design a Hybrid PCB Stackup
The first question that should come up when selecting materials and planning a stackup is: what materials are needed and how many layers should be used? Assuming you’ve determined you need a low-loss laminate and you’ve determined your required layer count, it’s time to consider whether you should use a hybrid stackup. There are a few broad situations where you could consider using a hybrid stackup with low-loss laminates in your PCB

Blog
•
Efficient Battery Power Supplies
Batteries offer a great power source for electrical devices that need to be mobile or located somewhere where connection to a mains electricity supply or other power source is impossible. The biggest problem with battery power is the expectation of users that the device will operate for significant periods with the need for recharging or replacing the batteries. This demand is placing the onus on the designer to improve efficiency and reduce power demand to meet this need.

Blog
•
What Target Impedance Should You Use in Your PDN?
A number of us on this blog and in other publications often bring up the concept of target impedance when discussing power integrity in high-speed designs. Some designs will be simple enough that you can take a “set it and forget it” approach to design a functional prototype. For more advanced designs, or if you’re fine-tuning a new board that has existing power integrity problems, target impedance is a real consideration that should be considered in your design.

Blog
•
An Overview of Dual Power Supply Design
Dual power supplies are circuits that generate two different output voltages from a single input source. The simplest method of generating dual output voltages is to use a transformer with two taps on the output winding. Bespoke transformers can have any voltage ratio depending on the number of windings in each part of the output side of the transformer.

Blog
•
Overlapping Planes in Your Mixed-Signal PCB Layout
With digital boards that are nominally running at DC, splitting up a power plane or using multiple power planes is a necessity for routing large currents at standard core/logic levels to digital components. Once you start mixing analog and digital sections into your power layers with multiple nets, it can be difficult to implement clean power in a design if you’re not careful with your layout.

Blog
•
Follow Mixed Signal PCB Design Guidelines With the Best CAD Tools
High-speed digital PCBs are challenging enough to design, but what about mixed-signal boards? Many modern systems contain elements that operate with both digital and analog signaling, and these systems must be designed to ensure signal integrity in both domains. Altium Designer has the layout and signal integrity tools you need to ensure your mixed-signal PCB design does not experience interference and obeys important design standards.

Blog
•
Get Ready for WiFi 7 under the 802.11be Standard
Just as WiFi 6 and 6E are starting to hit the market and new chipsets become available, WiFi 7 is in the works under the 802.11be standard. While this technology still has not hit the market, I would expect more inquiries for experimental systems, evaluation modules, and surface-mountable modules to come up once the first chipsets become available. Now is the time to start thinking about these systems, especially if you’re developing evaluation products to support WiFi 7.

Blog
•
What Goes Into Rugged Electronics Design?
Rugged electronics need to take a punch mechanically, but there is more that goes into a rugged system than being able to survive a drop on the pavement. This is as much about enclosure design as it is about component selection and manufacturing choices. Mil-aero designers often use the term “harsh environment” to describe a number of scenarios where an electronic device’s reliability and lifetime will be put to the test. If you want to make your next product truly rugged, it helps to adopt some of their strategies in your PCB layout.


Your search returns no results.