News & Updates


Blog
•
Migrating Data From Other Version Control Systems
The development of electronic devices always involves the release of many different types of files. And these files are not static - they change as the project progresses. When filling a project with data, a user creates new files, modifies outdated files that have become irrelevant. Managing project data is a separate task, especially for large developments where several participants with different specializations are involved in the process.


Blog
•
Properties Panel Tuning
High-speed PCBs often require tuning groups of tracks, both single and differential. Altium Designer includes powerful tools that allow you to solve such tasks quickly and with high quality. Study this document and achieve the desired result even faster.
On-Demand Webinar
•
Three Methods for Building MCAD Ready Components
One of the most difficult and frustrating things to arise when traveling to a foreign country is the language barrier. Communicating a simple greeting can sometimes seem like a big hassle. The same thing is true for different CAD tools. When your tools aren’t speaking the same language, you’re going to run into problems. Bridge this gap by building out your component libraries with everything it takes to truly define a component, including 3D models that seamlessly propagate into the PCB editor and beyond.

Blog
•
Reflectionless Matching vs. Conjugate Matching: An Apparent Contradiction
There is one confusion related to impedance matching that comes up again and again, and it appears to be a fundamental confusion between reflection and power delivery. This leads to an apparent contradiction that arises when we try to generalize power delivery to wave reflection, despite the fact that the two were not meant to be related.


Blog
•
Properties Panel Routing
Routing is one of the most time-consuming stages of PCB design. Altium Designer has a large set of tools that allow you to do it as accurately and quickly as possible. This document will help you to learn how to manage your routing effectively and use it to its fullest extent.

Blog
•
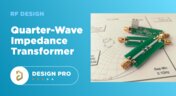
Quarter-Wave Transformer Design For Real and Reactive Loads
RF systems operate with specific impedance values across entire interconnects, including on PCBs. Not all RF components are packaged in integrated circuits with defined impedances, so impedance matching circuits and line sections are needed to ensure signal transmission between different sections of an interconnect. One of these impedance matching techniques is the quarter-wave impedance transformer, which can be implemented as a printed trace with specific impedance.


Blog
•
Altium Designer 22.10 Update
We are happy to announce that the Altium Designer 22.10 update is now available. Altium Designer 22.10 continues to focus on improving the user experience, as well as performance and stability of the software, based on feedback from our users. Check out the key new features in the What's New section on the left side of this window!

Blog
•
Component Warpage Causes in a PCB
A staff member at a PCB manufacturer once explained to me that they thought we were having an issue with a package warping. Unfortunately, component warping can occur both in a PCB and in components. In this article, we'll give an overview of warpage in a PCB, specifically in the circuit board and in the components.

On-Demand Webinar
•
8 Reasons to Store Your Components in Altium 365
Working with local libraries seems like a simple solution, but we often don’t take into account the added time spent maintaining libraries and sharing them between team members. There is no good way to avoid duplicate efforts with component creation and no standardization to ensure consistent naming. Worst of all, there is no way to identify the latest component revision, and library files can be easily corrupted or misplaced. This webinar showcases the advantages of component storage in Аltium 365 to resolve the issues of local libraries and component management.

Blog
•
RF Signal Chain and Link Budget Basics
If you're designing a wireless IoT device, and you know how to calculate the link budget, you can reasonably estimate whether your signal will reach its destination and be read by the receiver. To calculate the link budget, the designer needs to know something about all other sources of gain and loss in the system. Once link budget is determined, the designer can judge whether some modification is needed in their RF signal chain.


Blog
•
Best Methods for Calculating SMD Pad Size in PCB Design
SMD components require precisely sized pads for soldering during assembly. The designer is responsible for ensuring pad sizes are correct, either by calculating them and comparing with footprint data, looking through datasheets, or by memorizing SMD pad size standards. If you have a component and you don't have access to the footprint, and you decide to biuld the footprint yourself, what resources are available to ensure you have the correct pad size?
Blog
•
The Critical Role of Constraint-Based PCB Design in Modern Electronics
A constraint-based approach to PCB design is crucial in today's electronics industry. This article delves deeper into this complex and interesting topic, exploring various types of constraints, their advantages, and providing guidance on implementing them into your PCB design process.
Blog
•
Pi.MX8 Project – Introduction and Overview
Do you have extensive knowledge about the Pi.MX8 module? We're excited to introduce a new series of articles focusing on an innovative approach to utilizing this module. In this inaugural chapter, we provide insights into the preparation for this project and detail the elements that will be used.

Blog
•
How to 'Shift Left' and Connect Procurement and Engineering? Altium 365 BOM Portal Step-by-Step
Learn why BOM management is critical for both procurement managers and electronic engineers. Altium 365 BOM Portal helps to bridge the gap between these worlds. Discover how!
Blog
•
Altium 365 Assembly Assistant: Available Now in the Altium Store
Happy New Year! 🎉 We are thrilled to announce that the Altium 365 Assembly Assistant is now officially released and available for direct purchase through the Altium Store.
Blog
•
Simple Documentation for Hand PCB Assembly
Creating documentation for hand PCB assembly does not prevent the same documentation from being utilized to assist in automated PCB assembly. Learn more about the optimal format for this data to enhance both your hand PCB assembly and overall assembly processes.
Blog
•
Constraint Manager: Precision in Every Detail
Explore the powerful features of Altium Designer 24! Experience Constraint Manager and revolutionize your PCB design with reusable constraint sets, schematic-to-board rule transition, easy class and differential pair grouping, and more.

Blog
•
Accelerate Last-Minute Design Changes with Altium 365
Curious about how to solve production blockers before they derail your product launch? Explore how Altium 365® can help you swiftly manage last-minute design changes.
Blog
•
Design Phase – Lid Assembly Electronics Part 1
We are advancing our Open Source Laptop project to the next stage: assembling lid electronics. In the first part of this phase, we are focusing on the electronics and PCB design of the webcam module.
Blog
•
3 Common Challenges Stopping Your Production Line
The efficiency of production lines is crucial for any successful hardware product development. However, some challenges derail these processes. Do you face these problems, too? Let’s find out!
Blog
•
Explore New Possibilities with True 3D-MID Design
3D-MID technology seamlessly integrates electrical circuits with three-dimensional mechanical parts. This unique fusion of functionality unlocks a myriad of possibilities across various application areas. Explore more about this innovative feature, available in Altium Designer 24, to delve into the fascinating world of the 3D design process.

Blog
•
Strategies to Minimize PCB Damage
The PCB design process is always an exciting journey for a designer or the founder of a project. The first run of it can be breathtaking. In this article, we delve into strategies for minimizing PCB damage in the case of an exemplary circuit.

Blog
•
Fragmented Feedback Loops: The Hidden Cost in PCB Design and Testing
Explore the hidden impact of fragmented feedback loops in PCB design and testing. Check how minor communication gaps lead to significant financial burdens and learn how to address them.

Blog
•
Altium 365 GovCloud 101: Everything You Need to Know
Would you like to improve the protection of your data? Altium 365 GovCloud can help you achieve these goals. It’s a version of Altium 365, engineered to meet the stringent demands of US government regulations.
Blog
•
Design Phase – Lid Assembly Mechanics Part 3
We are heightening the anticipation for our Open Source Laptop project. In this chapter, we delve into the ambient light sensor module. Learn more about how to implement it into this project.

Blog
•
PCB CoDesign: Design Faster Together
Experience accelerated design collaboration with PCB CoDesign, exclusively available on Altium Designer starting from December 13th. This innovative feature adopts a collaborative approach by seamlessly integrating schematic and PCB design, enabling multiple engineers to work on the same project. Explore this cutting-edge feature on our newly launched page dedicated to its functionalities.

Blog
•
6 Steps to Accelerate the Development of Complex Products
Learn the key lessons from the presentation at Iteration22; “Joe Justice, Wikispeed - Everyone Must Be a Chief Engineer at SpaceX.” Read on and discover how to speed up the development of complex products.


Your search returns no results.