News & Updates


Blog
•
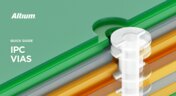
IPC - Vias
Via protection is an important part of modern PCB design. It provides additional benefits in PCB manufacturing and assembly, increasing the number of acceptable products.
On-Demand Webinar
•
Advantages of Using a Version Control System for Your Next Project
Version control systems (VCS) have been around for a long time in the software world but can be surprisingly new to some folks in the electronics design industry. Version control tools are great for tracking and maintaining entire codebases without the old-school copying, pasting, zipping, and emailing steps many PCB designers use.
Blog
•
Power Integrity Analysis in Your PCB Design Software
Power integrity problems can abound in modern PCBs, especially high-speed boards that run with fast edge rates. These systems require precise design of the PDN impedance to ensure stable power is always delivered throughout the system.


Blog
•
Schematic Compare
A design project doesn’t appear out of nowhere. The design process spreads over time, and project documents change. Schematic documents gradually become more complex, new functional blocks appear, and already finished parts can be modified and updated.

Blog
•
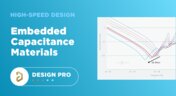
Embedded Capacitance Materials Overview
Capacitance is your friend whenever you need stable power integrity, which is why there is so much focus on decoupling capacitors. While these components are important and they can be used to provide targeted power integrity solutions to certain components, there is one specialty material used to supercharge capacitance in your PCB stackup or package substrate.
Blog
•
How To Import Libraries and Manage Components With Altium 365
The problems you can experience with components and libraries are endless. These problems are the most significant source of design issues and the biggest reason behind respins, costing companies untold amounts of lost profit annually.
If you want to have a better understanding of how to use Altium 365 to maintain a strong and centralized library that is free of problems and headaches, you may want to consider attending this lecture.


Blog
•
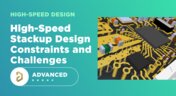
The High-Speed PCB Stackup Design Challenge
As much as we would like to build every high speed PCB perfectly, with ideal SI/PI/EMI characteristics, it isn’t always possible due to many practical constraints. Sometimes a stackup can be “good enough,” even for a high-speed PCB. This always comes from the need to balance engineering constraints, functional requirements, and the need to ensure signal and power integrity in a high-speed design, and finally to ensure compliance with EMC requirements.

On-Demand Webinar
•
Ensuring First Pass Manufacturing Success
When it's time to release your project to your manufacturer, it's essential to ensure that all the necessary design aspects like assembly, BOM, and documentation are accurately and completely conveyed. Consistency is key to ensuring a successful release. Without clear release documentation, the designer faces increased risks of costly manufacturing response, time-consuming rework, or unintentional defects that can make it into the final product.
Blog
•
How I Improved My Collaboration Efficiency with Altium 365
Involving the whole team that will bring a product to completion early on in the development cycle is vital to efficient development. Design reviews with all the relevant parties are critical at each step of the design process, starting with high-level component selection, then through the schematic capture and PCB layout stages.


Blog
•
Countersink and Counterbore
Ergonomics and convenience are important issues when designing a printed circuit board and the device as a whole. A lot of Altium Designer tools are aimed at solving them. These include Countersink and Counterbore holes, which allow the use of various types of screws in the mounting holes of the board.
Blog
•
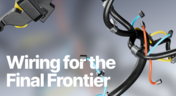
Wiring for the Final Frontier: A Guide to Space-Grade Harness Design
Wiring harnesses are mission-critical in space systems, requiring strict adherence to ECSS-Q-ST-70-61C and NASA-STD-8739.4A. In "Wiring for the Final Frontier: A Guide to Space-Grade Harness Design", Kamil Jasiński explores key design principles, material selection, and testing to ensure reliability in extreme environments.
Blog
•
The Future of Wire Harnesses in the Electric Vehicle and Electronics Era
Discover how wire harnesses are evolving to meet the demands of electric vehicles and modern electronics. Our latest article explores key trends like higher voltages, lightweight designs, and smart harnesses, along with challenges such as cost and supply chain issues.
Blog
•
Mastering EMI Control in PCB Design: Decoupling Strategies for PDN
Dario Fresu explores effective decoupling strategies for power distribution networks (PDNs) to minimize EMI in PCB designs. The article covers techniques like decoupling capacitors and power planes to ensure stable power delivery for integrated circuits.
Blog
•
Building Your Own Android Device with a Raspberry Pi
Learn how to turn a Raspberry Pi into a custom Android device. This guide covers hardware selection, software setup, and troubleshooting common issues.
Blog
•
How PCB Design Engineers Can Securely Share Design Files with External Teams
Learn how PCB design engineers can securely share design files with team members, clients, and manufacturers. Marek Orzeł explores best practices and tools to protect your intellectual property while ensuring efficient collaboration.

Blog
•
OEMs and Harness Manufacturers: Building Strong Collaboration for Success
Strong partnerships between OEMs and harness manufacturers are key to efficient, high-quality product development. In this article, Krishna Sundaram shows how collaboration, clear communication, and the right design tools can streamline the harness manufacturing process and drive success.
Blog
•
Ideal Rectifier Bridge
Read Marcin Lewandowski's article explaining how MOSFETs are replacing traditional diodes for reverse polarity protection. Step into the future of energy-efficient electronics!
Blog
•
Master Your Circuit Design: Dive into Worst Case Analysis
Dive into Worst Case Analysis techniques with Kamil Jasiński and ensure the reliability of your circuits. Master sensitivity analysis, Monte Carlo simulations, and more to confidently address real-world challenges.
Blog
•
Overview of the Gerber X3 File Format
Want to learn how the Gerber X3 file format simplifies data exchange by unifying assembly and fabrication details in a single file? This article explores the format and its role in streamlining PCB manufacturing.

Blog
•
Save Time and Prevent Errors in Cable Harness Design Today
Our new article explores best practices and tools for streamlining cable harness design workflows. Learn how to minimize errors, save time, and enhance collaboration by leveraging advanced features in Altium Designer.
Blog
•
Mastering EMI Control in PCB Design: How to Design PCBs for Low EMI
This article by Dario Fresu delves into effective techniques for designing PCBs to reduce electromagnetic interference (EMI). It covers key topics such as stackup selection, routing strategies, and grounding best practices, offering actionable insights for improved performance.

Blog
•
Altium and Renesas’ Role in Enabling Economy 4.0 is the Subject of New Documentary
Altium and Renesas are featured in a new CBS-produced documentary exploring how digitalization and cloud platforms are revolutionizing electronics production for Economy 4.0, driving efficiency and accelerating innovation.
Blog
•
Avoid Wiring Errors with Tools Tailored for Harness-to-PCB Integration
Discover how to streamline your wiring projects with advanced harness and PCB integration tools in Altium Designer. This article explores techniques to prevent wiring errors, enhance collaboration, and ensure accurate design documentation for complex projects.

Blog
•
Happy Holidays!!!
Altium wishes you all the best this holiday season! May this time be filled with joy, laughter, and cherished moments with your family and friends. We also extend our warmest wishes for a Happy New Year 2025!
Blog
•
What Is Wire Harness Design?
Explore our latest article to learn the fundamentals of wire harness design, its key components, and how it ensures organized, efficient, and reliable electrical systems across automotive, aerospace, and medical sectors.
Blog
•
How to Determine Ferrite Bead Circuit Model Parameters
Learn how to accurately determine ferrite bead circuit model parameters for effective noise suppression in high-speed PCB designs. This article explores key concepts, measurement techniques, and practical tips for modeling ferrite beads in your projects.


Your search returns no results.