News & Updates


Blog
•
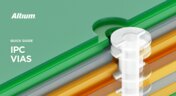
IPC - Vias
Via protection is an important part of modern PCB design. It provides additional benefits in PCB manufacturing and assembly, increasing the number of acceptable products.
On-Demand Webinar
•
Advantages of Using a Version Control System for Your Next Project
Version control systems (VCS) have been around for a long time in the software world but can be surprisingly new to some folks in the electronics design industry. Version control tools are great for tracking and maintaining entire codebases without the old-school copying, pasting, zipping, and emailing steps many PCB designers use.
Blog
•
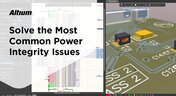
Power Integrity Analysis in Your PCB Design Software
Power integrity problems can abound in modern PCBs, especially high-speed boards that run with fast edge rates. These systems require precise design of the PDN impedance to ensure stable power is always delivered throughout the system.


Blog
•
Schematic Compare
A design project doesn’t appear out of nowhere. The design process spreads over time, and project documents change. Schematic documents gradually become more complex, new functional blocks appear, and already finished parts can be modified and updated.


Blog
•
Embedded Capacitance Materials Overview
Capacitance is your friend whenever you need stable power integrity, which is why there is so much focus on decoupling capacitors. While these components are important and they can be used to provide targeted power integrity solutions to certain components, there is one specialty material used to supercharge capacitance in your PCB stackup or package substrate.
Blog
•
How To Import Libraries and Manage Components With Altium 365
The problems you can experience with components and libraries are endless. These problems are the most significant source of design issues and the biggest reason behind respins, costing companies untold amounts of lost profit annually.
If you want to have a better understanding of how to use Altium 365 to maintain a strong and centralized library that is free of problems and headaches, you may want to consider attending this lecture.


Blog
•
The High-Speed PCB Stackup Design Challenge
As much as we would like to build every high speed PCB perfectly, with ideal SI/PI/EMI characteristics, it isn’t always possible due to many practical constraints. Sometimes a stackup can be “good enough,” even for a high-speed PCB. This always comes from the need to balance engineering constraints, functional requirements, and the need to ensure signal and power integrity in a high-speed design, and finally to ensure compliance with EMC requirements.

On-Demand Webinar
•
Ensuring First Pass Manufacturing Success
When it's time to release your project to your manufacturer, it's essential to ensure that all the necessary design aspects like assembly, BOM, and documentation are accurately and completely conveyed. Consistency is key to ensuring a successful release. Without clear release documentation, the designer faces increased risks of costly manufacturing response, time-consuming rework, or unintentional defects that can make it into the final product.
Blog
•
How I Improved My Collaboration Efficiency with Altium 365
Involving the whole team that will bring a product to completion early on in the development cycle is vital to efficient development. Design reviews with all the relevant parties are critical at each step of the design process, starting with high-level component selection, then through the schematic capture and PCB layout stages.


Blog
•
Countersink and Counterbore
Ergonomics and convenience are important issues when designing a printed circuit board and the device as a whole. A lot of Altium Designer tools are aimed at solving them. These include Countersink and Counterbore holes, which allow the use of various types of screws in the mounting holes of the board.

Blog
•
Types of Wiring Harnesses for Electronics
In today's world, many products utilize multiple PCBs interconnected with each other, often leading to a complex network of cables within an enclosure. The most effective way to manage these wires and cables is by constructing a wiring harness. This article explores the various types of harnesses used in electronics.

Blog
•
5 Advantages of Z2Data Integration You Can't Ignore
Z2Data Integration in Altium 365 offers a practical way forward for engineering and procurement. Here are the top five advantages that can streamline your workflows.

Blog
•
Leveraging Altium Designer's Capabilities: Transforming PCB Design Data Management
Are you curious about how Altium Designer's PLM integration is revolutionizing electronics design? Bid farewell to inefficiencies and expensive revisions, and embark on discovering the cutting-edge approach to managing design data. Dive into our latest article to learn how to leverage this new standard in design data management.

Blog
•
Start Altium Designer 24 Training for Free
Level up your design skills with Altium Designer 24 training! Whether you're looking to brush up on the basics or delve into advanced techniques, our instructor-led or on-demand videos will help you master the latest features.

Blog
•
How Altium 365 Supports Agile Hardware Development
Discover how Altium 365 can be your ally in making agile hardware development a practical reality.
Blog
•
PCB Layout Replication Whitepaper
Experience seamless acceleration in your design workflow with Altium Designer® 24's PCB Layout Replication feature. Effortlessly duplicate layouts for recurring circuit blocks and component groups, amplifying efficiency and reducing expenses.

Blog
•
How Is Your Design Data Protected in Altium 365 GovCloud?
Here's how Altium 365 GovCloud protects your sensitive electronics design data. Learn more about our encryption technologies, access restrictions, and network security standards.

Blog
•
Balancing Budget and Data Security: Cost-Effective Strategies for IT Managers
Make decisions that balance cost-efficiency with uncompromised security. Find ways to ensure your data security measures are both strong and economically viable.
Blog
•
Custom Pad Stack Whitepaper
Explore our manual on the Custom Pad Stack enhanced feature. From thermal connections to pad shapes, every detail matters. Pads are no longer merely points; they demand unique, tailored solutions. With Altium Designer 24, you can customize pad shapes, fine-tune thermal relief, and master rounded/chamfered rectangle pads to meet manufacturing standards, conquer tight spaces, and elevate your design game significantly.
Blog
•
Pi.MX8 Project - Board Layout Part 2
We are continuing the exploration of board layout in our Pi.MX8 Project. In this chapter, we focus on defining the impedance profiles, establishing matching design rules for the correct trace width, and initiating the routing of the DRAM interface.
Blog
•
How Altium Designer Empowers Designers to Master Complex PCB Projects
Discover the power of Altium Designer for tackling modern PCB design challenges! From advanced constraint management to dynamic routing, it's tailored for success. In our brand new article, you'll find the ultimate solution for managing the varying complexities of PCB design.

Blog
•
How Data Integrations Improve Supply Chain Performance
Discover how data integrations can elevate your supply chain performance through real-time insights, enhanced transparency, and enriched component data.
Blog
•
Why Altium Designer Can Help Design PCBs Intuitively and Intelligently
Altium Designer sets the PCB design standard with its cohesive environment, cutting-edge tools, and 3D-MID support. Learn more about how to eliminate errors, accelerate cycles, and foster innovation with our software.

Blog
•
Multi-CAD Engineering: Top 6 Challenges
Explore the challenges and reasons behind Multi-CAD engineering and discover solutions for smooth cross-platform ECAD collaboration.
Blog
•
Constraint Manager Whitepaper
Explore the precision of PCB design with Altium Designer's latest Constraint Manager! Hone your skills in component positioning, routing, and rule definition to enhance your design capabilities with Altium's state-of-the-art tools. Discover more about this cutting-edge feature in the manual today.
Blog
•
Redefining the Assembly Process for Miniaturization and Ultra HDI Technology
Learn the whole story of revamping the SMTA Test Board, the groundbreaking tool for solder paste testing.


Your search returns no results.