News & Updates

Blog
•
From Complexity to Clarity: Smart Design Reviews for Agile Engineering Teams
Understand how structured design reviews within Altium Agile Teams enhance visibility, traceability, and cross-team collaboration. This webinar highlights methods to detect issues early and optimize your development workflow.

Blog
•
Building a Local-LLM Datasheet Extractor for IC Driver Development
Parsing long datasheets manually slows down embedded development and introduces errors. This article shows how to use a local LLM pipeline to convert datasheets into structured data that speeds up driver creation.

Blog
•
Types of Simulation Tools For PCBs
PCB simulation isn’t one-size-fits-all and that’s where it gets interesting! Discover the wide range of tools available, from quick circuit checks to advanced multiphysics simulations, and how they help you design with confidence.


Blog
•
Wiring the Future: The Shift to Unified Electromechanical Design
This article explores the shift from PCB-centric design to complex, system-level development where wiring and harnesses play a critical role in product performance. It highlights how unified electromechanical workflows and bi-directional ECAD–MCAD integration improve accuracy, reduce delays, and ensure reliable, production-ready designs.


Blog
•
Best Tools For PCB DFM Checks
Want to catch manufacturability issues before they turn into expensive delays? Discover the essential DFM tools from real-time checks to post-layout analysis that help you get your PCB right the first time.

Blog
•
Eliminate Your Design Friction with Agile Teams
Design friction from scattered data and disconnected tools slows down PCB development and leads to rework. This webinar shows how Agile Teams streamlines collaboration, aligns domains, and helps teams deliver faster with fewer errors.


Blog
•
What Is an Integrated Design Environment for Electronics?
Using multiple disconnected tools slows down PCB development and increases the risk of errors. This article shows how an integrated environment keeps all design data connected, enabling faster workflows and fewer late-stage issues.


Blog
•
What is the Best Cloud PCB Design Software?
Not all cloud PCB tools are created equal, especially when design complexity increases. This article breaks down key differences between cloud-native and hybrid solutions, helping engineers choose the right approach for performance and scalability.

Blog
•
From Rework to Revenue: Digital PCB DFMA
This article explores how traditional, manual DFMA workflows lead to costly rework, delays, and poor collaboration across engineering teams. It shows how a connected, digital approach enables better data integrity, faster design cycles, and improved manufacturing outcomes.


Blog
•
Introducing Octopart Discover: From Part Search to Solutions Discovery
Octopart has announced Octopart Discover, a new platform that shifts electronic component search toward system-level solution discovery. The tool connects design intent with relevant options, enabling engineers to evaluate tradeoffs and identify the best-fit solutions more efficiently.

Blog
•
How to Choose the Right Components for Your BOM
A strong BOM can make the difference between smooth production and costly delays. Discover a practical approach to choosing components that stay available, meet compliance requirements, and keep your project on schedule.

Blog
•
How to Reduce Noise From Magnetostriction in Magnetic Components
Magnetic components driven by an AC signal can exhibit an irritating property due to magnetostriction - an effect causing vibrations in magnetic materials, resulting in audible sound. Explore this phenomenon further and discover methods to minimize its impact.

Blog
•
3D MID Design Whitepaper
Dive into a dynamic design experience where you can visualize and edit your circuits in true 3D, offering unparalleled precision. Altium Designer's 3D-MID (Mechatronic Integrated Device) Design tool revolutionizes the design process, providing a fresh perspective. Explore the capabilities and benefits of this feature in our comprehensive guide.

Blog
•
Types of Wiring Harnesses for Electronics
In today's world, many products utilize multiple PCBs interconnected with each other, often leading to a complex network of cables within an enclosure. The most effective way to manage these wires and cables is by constructing a wiring harness. This article explores the various types of harnesses used in electronics.

Blog
•
5 Advantages of Z2Data Integration You Can't Ignore
Z2Data Integration in Altium 365 offers a practical way forward for engineering and procurement. Here are the top five advantages that can streamline your workflows.

Blog
•
Leveraging Altium Designer's Capabilities: Transforming PCB Design Data Management
Are you curious about how Altium Designer's PLM integration is revolutionizing electronics design? Bid farewell to inefficiencies and expensive revisions, and embark on discovering the cutting-edge approach to managing design data. Dive into our latest article to learn how to leverage this new standard in design data management.

Blog
•
Start Altium Designer 24 Training for Free
Level up your design skills with Altium Designer 24 training! Whether you're looking to brush up on the basics or delve into advanced techniques, our instructor-led or on-demand videos will help you master the latest features.

Blog
•
How Altium 365 Supports Agile Hardware Development
Discover how Altium 365 can be your ally in making agile hardware development a practical reality.
Blog
•
PCB Layout Replication Whitepaper
Experience seamless acceleration in your design workflow with Altium Designer® 24's PCB Layout Replication feature. Effortlessly duplicate layouts for recurring circuit blocks and component groups, amplifying efficiency and reducing expenses.

Blog
•
How Is Your Design Data Protected in Altium 365 GovCloud?
Here's how Altium 365 GovCloud protects your sensitive electronics design data. Learn more about our encryption technologies, access restrictions, and network security standards.

Blog
•
Balancing Budget and Data Security: Cost-Effective Strategies for IT Managers
Make decisions that balance cost-efficiency with uncompromised security. Find ways to ensure your data security measures are both strong and economically viable.
Blog
•
Custom Pad Stack Whitepaper
Explore our manual on the Custom Pad Stack enhanced feature. From thermal connections to pad shapes, every detail matters. Pads are no longer merely points; they demand unique, tailored solutions. With Altium Designer 24, you can customize pad shapes, fine-tune thermal relief, and master rounded/chamfered rectangle pads to meet manufacturing standards, conquer tight spaces, and elevate your design game significantly.
Blog
•
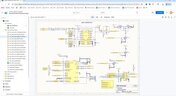
Pi.MX8 Project - Board Layout Part 2
We are continuing the exploration of board layout in our Pi.MX8 Project. In this chapter, we focus on defining the impedance profiles, establishing matching design rules for the correct trace width, and initiating the routing of the DRAM interface.
Blog
•
How Altium Designer Empowers Designers to Master Complex PCB Projects
Discover the power of Altium Designer for tackling modern PCB design challenges! From advanced constraint management to dynamic routing, it's tailored for success. In our brand new article, you'll find the ultimate solution for managing the varying complexities of PCB design.

Blog
•
How Data Integrations Improve Supply Chain Performance
Discover how data integrations can elevate your supply chain performance through real-time insights, enhanced transparency, and enriched component data.
Blog
•
Why Altium Designer Can Help Design PCBs Intuitively and Intelligently
Altium Designer sets the PCB design standard with its cohesive environment, cutting-edge tools, and 3D-MID support. Learn more about how to eliminate errors, accelerate cycles, and foster innovation with our software.

Blog
•
Multi-CAD Engineering: Top 6 Challenges
Explore the challenges and reasons behind Multi-CAD engineering and discover solutions for smooth cross-platform ECAD collaboration.


Your search returns no results.