News & Updates

Blog
•
High-Speed PCB Design Tips
Essential tips for high-speed PCB designs, and when you need to start being concerned about how and where you route your traces.

Blog
•
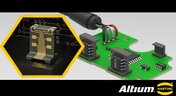
MIDs Make a Comeback as Vertical SMD Modules for Your PCB
If you've ever wanted to mount components vertically, but without the expense of a flex section this article is for you. You can use an MID in your PCB.
Blog
•
Everything You Need to Know about Conformal Coating
Explore the basics of conformal coating with us. Conformal coating is a protective layer applied to electronic circuits to guard against environmental factors such as moisture and dust.

Blog
•
Introduction to Open Source Laptop Project
We have started a very exciting journey into the creation of an open source laptop project. This project will be an ongoing one, with our community able interactively participate. By utilizing Altium 365 users will be able to view, comment on, and download design files. This will be a great learning experience for new and experienced PCB designers.

On-Demand Webinar
•
Benefits of Altium 365 Version Control for Solo Users
Join our insightful webinar on Altium 365 Version Control System (VCS) designed for solo users, where Ari Mahpour will guide you through creating and managing projects on the cloud-based platform.


Blog
•
Mechanical and Electrical Design Come Together With Altium’s MCAD CoDesigner
Electronics designers working in small design houses or in large enterprises often encounter a common set of challenges when interfacing with mechanical designers. Continue reading to learn how you can best interface with your mechanical designer to get your projects out the door fast!


Blog
•
Ebook: Routing High-Density Interconnects with Reliable Microvias
HDI PCBs take a particular approach to routing interconnects through multiple layers to ensure reliability during fabrication, assembly, and operation. The critical structure that enables this is microvias, which are prone to failure if not designed properly. In this e-book, readers will receive an initial look at the reasons microvia reliability has come into the spotlight and why HDI PCB designers put reliability first when routing through microvias.

Blog
•
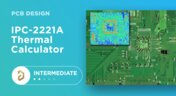
IPC-2221 Calculator for PCB Trace Current and Heating
Aside from impedance and annular ring calculations, one of the other major formulas specified in the IPC 2221 standard relates temperature rise, trace width, and trace current. THere is also the IPC-2152 standard, both include this guidance on designing for thermal reliability, but which standard should we use?


Blog
•
Printed Electronics: The Future of Flexible and Cost-Effective Circuit Design
This article explores the rise of printed electronics as a lightweight, flexible, and cost-effective alternative to traditional PCB design. It highlights key benefits like reduced manufacturing costs, sustainability, and new design possibilities—especially in wearables, medical devices, and automotive applications.

Blog
•
How to Choose the Best Requirements Management Tool for Electronics Development
Many electronics teams still rely on documents and spreadsheets for requirements management—leading to gaps, errors, and delays. Alexsander Tamari explores better tools to improve traceability, collaboration, and project outcomes.

Blog
•
New Routing Possibilities with Ultra HDI
Explore how Ultra HDI technology is redefining PCB design. This article breaks down the benefits and manufacturing considerations of Ultra HDI, and how it enables next-level routing density and miniaturization in advanced electronics.
Blog
•
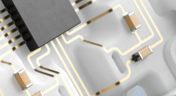
3D-MID in Focus: Principles, Processes, and Practical Use
This article introduces 3D-MID (Mechatronic Integrated Devices), a technology that integrates circuitry into 3D plastic structures to reduce size, weight, and complexity. It explains the production process, use cases, and benefits of 3D-MID in sectors like automotive, medical, and consumer electronics.
Blog
•
Eliminate EMI and Signal Integrity Issues in Multi-Board PCB Designs
Ensure signal integrity and minimize EMI in complex electronics. Our new article explains how to address electromagnetic interference and signal integrity challenges in multi-board PCB designs, offering practical strategies and layout considerations for reliable system performance.
Blog
•
How to Overcome Power Distribution and Connector Misalignment Challenges in Multi-Board PCB Systems
Connector misalignment can compromise the reliability of power delivery in multi-board systems. This article explores the causes, effects, and prevention strategies for connector misalignment in power distribution, helping you design more robust multi-board PCB systems.

Blog
•
Mastering Component Templates in Altium Designer 25
Our new article by Dario Fresu explains how Component Templates in Altium Designer 25 Pro improve design consistency, reduce errors, and streamline collaboration. It highlights practical benefits like standardized naming, faster component creation, and scalability across projects. Includes examples of using templates with Altium 365™ to simplify complex component setup.
Blog
•
Wire Harness Design Guide for Development and Manufacturing
Designing a wire harness goes far beyond just connecting components—it’s about ensuring manufacturability, reliability, and compliance. This article walks you through the entire process, from initial design to production, helping you streamline development and avoid common pitfalls.

Blog
•
Preparing for Medical Device Cybersecurity Assessments
Explore the key considerations and best practices for conducting cybersecurity assessments in medical device development. This article outlines how to identify potential threats, evaluate risks, and ensure compliance with evolving industry standards.
Blog
•
Harness Complexity, Design with Simplicity
Harness Design in Altium Designer simplifies managing PCB interconnections, ensuring reliable performance and streamlined manufacturing. With logical connectivity tools, harness layout drawing, and manufacturing-ready documentation, it keeps your designs efficient and organized—all within a unified design environment. Perfect for automotive, aerospace, and industrial applications.

Blog
•
Getting Started with NVMe and the Raspberry Pi 5
Our new article guides you through enhancing your Raspberry Pi 5's performance by setting up NVMe SSD storage using an expansion HAT. It covers the benefits over traditional MicroSD cards, including improved speed and reliability, and provides step-by-step instructions for installation and configuration.

Blog
•
Why Human Error Is Electronics Design Cybersecurity's Biggest Weakness
Human error is a leading cause of cybersecurity breaches—even in electrical engineering. Our article explores how everyday design and collaboration habits can create vulnerabilities, and what engineers can do to build safer, more secure workflows.
Blog
•
From Concept to Production: A Modern Approach to Wire Harness Engineering
Discover how modern wire harness engineering is evolving to meet the growing complexity of electrified systems. This whitepaper explores best practices, intelligent automation, and ECAD-MCAD collaboration to improve efficiency and reduce errors. Download now to stay ahead in an increasingly connected world.
Blog
•
Transforming RF Design with Ultra HDI
Ultra-HDI technology is transforming RF design by enabling finer line widths, improved signal integrity, and more compact, high-performance boards. Our brand-new article explores its advantages over traditional methods and the benefits of integrating flexible circuits.
Blog
•
Boost Your PCB Testing Efficiency with Testpoint Manager
Testpoints are essential for efficient PCBA testing and debugging. Our latest whitepaper dives into testpoint optimization, fault detection, and automated testing strategies, along with a full tutorial on using Testpoint Manager in Altium Designer. Discover how to streamline your testpoint assignments and improve measurement accuracy!

Blog
•
Top 5 Hidden Challenges of Cable Harness Design in Electronic Products
Krishna Sundaram explores the hidden challenges of cable harness design, from routing complexity to mechanical constraints and manufacturability. Learn how to design a robust and efficient harness.


Your search returns no results.