News & Updates

Blog
•
Create Connections with Harness Design
Many modern electronics have multiple boards, and connecting those different boards and systems together are harnesses. Learn more about how Altium Designer can help you create harnesses for your own multi-board designs here.

Blog
•
Do You Know How to Prevent Voltage Fluctuation?
We invite you to explore the causes of output voltage fluctuation. In this article we provide you insights on how to solve and prevent these issues.


Blog
•
How to Build Your Own Laser Range Finder
In this article we will show you how to create step by step a digital laser range finder for your own. Everything is based on Raspberry Pi board.

Blog
•
Nucleo Shields Multi-Board Design
Learn how easy it is to create multi-board projects. This practical project article covers the reasons for breaking larger boards into sub-assemblies and explores the various connection options available between sub-assembly boards.
Blog
•
Analog Solar Tracker Project
In this article you can learn about light sensors while building an analog solar panel tracking system. This open-source project covers multi-channel design, window comparators, driving motors, and photosensors.

Blog
•
Concept Phase – Initial CAD Design
We are continuing our journey through the open-source laptop project. This article explains an initialization of CAD design process from the early concept and brainstorming phase.

Blog
•
Expert Tips for Safely Powering Up Your New PCB for the First Time
In this blog we will show you the strategies to minimize the risk of damage to circuit boards during the initial power-up process.

Blog
•
High-Speed PCB Design Tips
Essential tips for high-speed PCB designs, and when you need to start being concerned about how and where you route your traces.

Blog
•
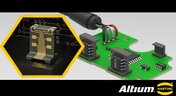
MIDs Make a Comeback as Vertical SMD Modules for Your PCB
If you've ever wanted to mount components vertically, but without the expense of a flex section this article is for you. You can use an MID in your PCB.
Blog
•
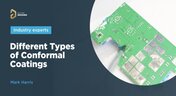
Everything You Need to Know about Conformal Coating
Explore the basics of conformal coating with us. Conformal coating is a protective layer applied to electronic circuits to guard against environmental factors such as moisture and dust.

Blog
•
Introduction to Open Source Laptop Project
We have started a very exciting journey into the creation of an open source laptop project. This project will be an ongoing one, with our community able interactively participate. By utilizing Altium 365 users will be able to view, comment on, and download design files. This will be a great learning experience for new and experienced PCB designers.

On-Demand Webinar
•
Benefits of Altium 365 Version Control for Solo Users
Join our insightful webinar on Altium 365 Version Control System (VCS) designed for solo users, where Ari Mahpour will guide you through creating and managing projects on the cloud-based platform.

NEW

Blog
•
Benefits of Using an Integrated Design Environment for PCB Development
Using separate tools often creates inefficiencies and increases the risk of mistakes. This article explains how integrated design environments streamline workflows by keeping design data connected and accessible.
NEW

Blog
•
Enterprise vs. Midsize PCB Design Software: What Actually Changes at Scale
PCB design challenges change significantly as organizations scale. This article explores the key differences between mid-size and enterprise design environments, from collaboration and governance to data management and workflow automation.

Blog
•
BOM Portal vs BOM Tool: What Changes When You Upgrade
Not all BOM solutions work the same way. This article explains the key differences between BOM tools and BOM portals, and why real-time data and collaboration are becoming essential for modern electronics development.

Blog
•
Altium vs KiCAD: Built to Scale From First Board to Full Product
Starting with a simple board today doesn't mean your next project will stay simple. Learn how Altium Designer and KiCAD compare when designs become more complex, teams get larger, and products move toward manufacturing.

Blog
•
Eliminate the Design-to-Production Gap with Agile Teams + Duro
Learn how Agile Teams and Duro connect design and production workflows through a unified system of record. This webinar shows how structured change management and automated data synchronization help teams reduce errors and accelerate product releases.

Blog
•
Agile Hardware Development: How to Scale Speed Without Losing Control
Agile hardware development isn’t just about working faster, it’s about working together in real time. This article explores how shared environments for ECAD, MCAD, sourcing, and requirements management eliminate handoff delays and improve decision-making across teams.

Blog
•
How Reusable Parameters in Requirements Reduce Errors and Speed Up Iterations
Verification becomes much easier when requirements and system performance data stay connected automatically. This article explains how reusable parameters and V&V rules help teams detect violations earlier and validate designs with greater confidence.

Blog
•
Complex Engineering Projects Leverage Multiple ECAD/MCAD Formats
This article explores how modern engineering teams manage complex projects involving multiple ECAD, MCAD, and manufacturing file formats across distributed workflows. It highlights the importance of design authority, disciplined revision control, and bidirectional collaboration to ensure accurate integration between PCBs and mechanical systems.

Blog
•
Avoid Costly Interconnect Errors: Essential Multiboard PCB Layout Strategies for Reliable Designs
Complex multiboard designs demand more than just connecting boards together. They require every interface to work flawlessly under real-world conditions. Discover how better pin assignments, return paths, and mechanical planning can dramatically improve reliability and reduce rework.

Blog
•
BOM Cost Optimization During Schematic Capture
Engineering and sourcing teams work best when BOM decisions happen with live market data in view. This article explains how integrated cost and availability insights help teams collaborate earlier and avoid redesigns driven by supply chain issues.

Blog
•
Why ECAD–MCAD Collaboration Is Essential to Design for Manufacturability (DFM)
Poor ECAD-MCAD coordination often leads to enclosure conflicts, connector misalignment, and costly redesigns. This article shows how integrated collaboration helps teams catch manufacturability issues earlier and keep projects moving smoothly.
Blog
•
Registration Tolerance Is Now a Design Constraint, Not a Fab Problem
Ultra HDI is changing the rules of PCB design and registration tolerance is now part of the design conversation from day one. Discover how smarter spacing, stackup planning, and collaboration with fabricators can dramatically improve manufacturability and reliability.

Blog
•
How to Use a Multicad Viewer for Seamless Collaboration
Because ECAD formats are typically incompatible, teams often struggle with versioning, conversions, and fragmented review processes. This article breaks down how multi-CAD viewers provide a unified, read-only environment that supports structured design reviews, comments, and task assignment across disciplines.

Blog
•
Best Online ECAD File Viewers for Engineers and PCB Designers
Sharing PCB designs doesn’t have to be complicated. Check out the best online ECAD viewers that let anyone view and collaborate on designs right from a browser.

Blog
•
Rigid-Flex PCBs in Consumer Electronics
Rigid-flex PCBs help modern devices get smaller, lighter, and more compact by eliminating connectors and fitting into tight 3D spaces. This article explains how to design them properly to avoid common reliability issues.

Blog
•
From Design to First Assembly: Complete Your BOM & Plan Your Build
This webinar walks through the complete post-release workflow, from generating a managed BOM to sourcing components and assembling the first prototype. It demonstrates how integrated tools streamline data enrichment, supplier selection, and guided assembly to reduce delays and errors.


Your search returns no results.