News & Updates
On-Demand Webinar
•
Design with Confidence: Altium 365 Meets SiliconExpert
Watch the webinar to learn how the SiliconExpert Integration in Altium 365 can optimize your workflows and elevate your design process. Make data-driven design decisions!

On-Demand Webinar
•
How to Design PCBs and Meet US Government Requirements with Altium 365 GovCloud
Watch the webinar and learn from Altium's Director of Security, Bruno Blasigh, and Renata Lang, Altium 365 Product Marketing Manager, about designing PCBs that meet US government requirements using Altium 365's GovCloud.

Blog
•
How to Design for Test in Embedded Systems
Whether you're designing a high-speed PCB, or a complex embedded system, it will need some level of testing. In this article, we will show you some simple tricks that can make testing and debugging a prototype much easier.

Blog
•
Crosstalk Basics in PCB Design
Crosstalk is one of the most common issues related to electronics. Learn the basics of this phenomenon in PCB design, and gain knowledge on how to avoid it in your projects.

Blog
•
Top 3 Multi-Board PCB Connectivity Errors
Preparing complex PCB designs can often keep you awake at night. Learn more about some of the most common issues encountered in multi-board electrical connections.


Blog
•
Access to your Training Certificates on My Altium
Introduce an update on the My Altium user page that highlights your certificates and tracks your training progress, with one-click access to the Training Dashboard and Training Catalog pages. Easily view and share your certificates, keep an eye on your learning journey, and explore a variety of training resources.

Blog
•
Rigid-Flex PCBs: Advantages and Challenges
In this article, we will begin with a basic explanation of how rigid-flex technology differs from rigid board technology. We will then provide an overview of the advantages and conclude with a discussion of the challenges to be aware of.
Blog
•
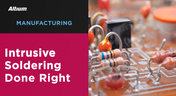
When Should You Use Intrusive Soldering?
Through-hole components are frequently employed in power electronics, particularly when dealing with AC power from a wall outlet. In this article, you can delve into the intrusive soldering process and discover when it can be applied in PCB design.

Blog
•
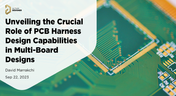
Unveiling the Crucial Role of PCB Harness Design Capabilities in Multi-Board Designs
Multi-board designs are the key to meeting evolving demands, requiring robust PCB Harness Design for seamless interconnection and success. Join us as we explore the importance of PCB Harness Design capabilities and how they are crucial for the success of multi-board designs.


On-Demand Webinar
•
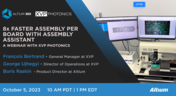
8x Faster Assembly per Board with Assembly Assistant - A Webinar with XVP Photonics
Looking for a way to reduce time and increase the accuracy of the manual assembly of PCBs? Watch this webinar recording for a transformative session and learn how XVP Photonics achieved these goals with Assembly Assistant!
Blog
•
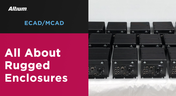
What Makes a PCB Enclosure Rugged?
Whether you purchase products off-the-shelf or online, they all come housed within an enclosure. In some cases, these enclosures are intentionally ruggedized to withstand harsh environments or mechanical shocks. You can learn more about enclosures in this new and interesting article.

Blog
•
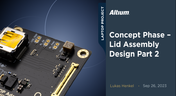
Concept Phase – Lid Assembly Design Part 2
We are continuing our journey through the lid assembly design phase of our Open Source Laptop project. In this section, we will discuss the layout of the test adapter and provide a demonstration of the first test for the display panel, along with the initial steps involved in assembling the boards.

Blog
•
Wire Bonding: Modern Applications, Technology Trends and Cost Considerations
Explore the future of wire bonding, from new applications to cost-saving trends, in this article by Samer Aldhaher. Stay updated on key innovations in this essential connection technology.

Blog
•
Maximizing Efficiency: A Deep Dive into Altium 365 Jira Integration Features
Discover how Altium 365’s Jira integration can streamline collaboration and keep projects running smoothly with real-time design updates and task tracking. Perfect for teams seeking efficiency!

Blog
•
Optimize PCB Design with Integrated BOM and CAD Systems
Discover how integrating BOM management and CAD systems can streamline your PCB design process in this insightful article. Learn how combining these tools enables smoother collaboration, reduces errors, and improves design efficiency, helping you optimize your workflows from concept to manufacturing.
Blog
•
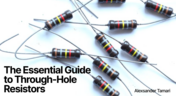
The Essential Guide to Through-Hole Resistors
Resistors are fundamental components in electronic circuits, essential for controlling current and voltage. This article explores their basic principles, types, and key applications, helping you understand their crucial role in electronics.
Blog
•
Avoiding Costly Delays: Essential Tips for PCB Designers
Efficient PCB design is crucial for avoiding costly delays in product development. This article offers practical tips and best practices for PCB designers to streamline their workflows, minimize errors, and ensure timely project completion.

Blog
•
Understanding Signal Reflections for High-Speed Design
Signal integrity is the backbone of high-speed digital systems. In this new article by Rafał Stępień, we break down signal reflections and how to optimize your designs with effective impedance matching techniques.
Blog
•
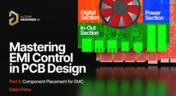
Mastering EMI Control in PCB Design: Component Placement for EMC
In the second article of the "Mastering EMI Control in PCB Design" series Dario Fresu explores how effective component placement can reduce electromagnetic interference (EMI) in printed circuit boards. He highlights strategies such as board segregation and careful management of high-speed signals and their harmonics to ensure signal integrity and minimize emissions.
Blog
•
Signal Integrity Principles based on Altium Designer 24
Check out this article where Rafał Stępień dives into the essentials of maintaining signal integrity in high-speed digital systems. Discover key techniques like controlling signal reflections, reducing crosstalk, and designing differential pairs in Altium Designer 24 to ensure reliable and efficient PCB performance.

Blog
•
Launch of Requirements & Systems Portal in Altium 365
The Requirements & Systems Portal is now live in Altium 365! Engineers can write, manage, and verify requirements within the Altium 365 workspace. You can link your requirements directly to schematics and PCB designs to ensure all engineers are working with the latest data. Request access today!
Blog
•
Enhancing Signal Integrity in PCB Design: Key Considerations and Strategies
Looking to enhance signal integrity in your PCB designs? Check out our latest article by David Marrakchi, where he shares key strategies and best practices for achieving reliable high-speed designs.
Blog
•
Favorite Tools for BOM Review
Check out our article, where Lawrence Romine shares his top tools for conducting efficient Bill of Materials (BOM) reviews in PCB design. It highlights key features in Altium 365, Octopart, and ActiveBOM that help engineers avoid unsourceable components and streamline procurement.
Blog
•
Mastering EMI Control in PCB Design: How Signals Propagate in a PCB
As the first article in the "Mastering EMI Control in PCB Design" series from our new asset Dario Fresu, this piece explores signal propagation in PCBs, highlighting the crucial roles of impedance, dielectric materials, and trace geometry in maintaining signal integrity.
Blog
•
High-Speed PCB Design: Ensuring Signal Integrity, EMI Mitigation, and Thermal Management
Discover essential strategies for high-speed PCB design, focusing on signal integrity, EMI mitigation, and thermal management. Our latest article provides insights on managing crosstalk, optimizing grounding, and addressing thermal challenges to ensure reliable PCB performance.
Blog
•
Designing Micro-vias with Sintered Paste for Rigid-Flex Printed Circuit Boards
Designing microvias with sintered paste in rigid-flex PCBs offers enhanced electrical conductivity and mechanical strength, crucial for high-density applications. Our new article explores the benefits of sintered paste and provides essential design tips to optimize microvia performance and reliability.
Blog
•
Simple Strategies to Reach 10% PCB Cost Reduction
Our new article outlines strategies to achieve a 10% reduction in PCB costs by optimizing design and material choices, such as adjusting stack-up materials and hole sizes, using lower-cost parts, and considering single-sided assembly. These techniques help reduce expenses without sacrificing quality.

Blog
•
Say Goodbye to EDA Software Vendor Lock
Check how Altium 365 helps eliminate EDA software vendor lock by enabling multi-CAD support in the cloud. This allows users to work with different CAD file formats within a single platform, enhancing collaboration and reducing the need for additional licenses. This approach offers greater flexibility and is set to transform the industry.


Your search returns no results.