News & Updates
Blog
•
Redefining the Assembly Process for Miniaturization and Ultra HDI Technology
Learn the whole story of revamping the SMTA Test Board, the groundbreaking tool for solder paste testing.

Blog
•
Why the Principles Are Sound, but the Tactics Need a Re-Think
Explore common principles and rituals of Agile and how you can adapt them to hardware product development.

Blog
•
USB to Serial-Over-RJ45 Module
Have you considered converting a USB interface to serial (UART), while delivering data over a custom Ethernet cable and RJ45 connectors? If so, we invite you to check out this article on building a USB to Serial-Over-RJ45 Module. Additionally, you'll find a link to our workspace to explore the entire project.


Blog
•
Why the Principles Are Sound, but the Tactics Need a Re-Think
Explore common principles and rituals of Agile and how you can adapt them to hardware product development.

Blog
•
Pi.MX8 Project - Board Layout Part 1
Our exploration of the Pi.MX8 open-source computer module project progresses. In this third chapter, our focus shifts to the PCB layout preparation of the board. Key topics include defining the layerstack and component break-out routing.

Blog
•
PCB CoDesign Whitepaper
Design faster together with the innovative PCB CoDesign feature, exclusively available in Altium Designer. This cutting-edge functionality seamlessly integrates schematic and PCB design, facilitating concurrent work by multiple engineers on the same project. Learn more about this groundbreaking feature in our comprehensive manual.

Blog
•
How to Test Suspect Electronic Components
Electronic components power nearly everything in our modern lives. However, as long as there are buyers for parts, counterfeiters will persist in their endeavors. Financial losses resulting from fake components are challenging to ascertain due to enforcement limitations and the difficulty in collecting data on the issue. In this article, we demonstrate how to test and verify components in batch orders.

On-Demand Webinar
•
Can Agile Development Work for Hardware? 3 Critical Elements for Success
Watch the webinar to explore the benefits of agile methodologies and how they can be translated into the physical world of hardware development! Learn how Altium 365 can support the adoption of this approach.


Blog
•
The Positive Impact of Supply Chain Visibility on Design to Cost
With increased electronics supply chain visibility, you can develop better products faster and align perfectly with budget constraints early on. Here’s why.

Blog
•
What Most Agile "Gurus" Get Wrong About Hardware Development
Explore common myths about Agile hardware development and learn how to adapt Agile principles for hardware projects.

Blog
•
Design Phase – Lid Assembly Electronics Part 2
We are going deeper into lid assembly electronics in our Open Source Laptop project. In this chapter we will tackle the PCB design of the webcam board and show you how to deal with some expected challenges, such as overall small form factor of the board or breaking out the microscopic webcam image sensor.


Blog
•
Compare Commercial Altium 365 vs Altium 365 GovCloud
If you're trying to understand how commercial Altium 365 differs from Altium 365 GovCloud, you're in the right place. Click to grasp the unique features of each.

Blog
•
5 Ways Hardware Development Is Just… Different
Explore the challenges and strategies of implementing Agile methodology in electronics hardware development. Understand key differences between hardware and software development within the Agile framework.


On-Demand Webinar
•
How to Design PCBs and Meet US Government Requirements with Altium 365 GovCloud
Watch our webinar and discover how Altium 365 GovCloud can assist you in PCB design while ensuring compliance with US government regulations.

Blog
•
What Makes a PCB Enclosure Rugged?
Whether you purchase products off-the-shelf or online, they all come housed within an enclosure. In some cases, these enclosures are intentionally ruggedized to withstand harsh environments or mechanical shocks. You can learn more about enclosures in this new and interesting article.
Blog
•
Concept Phase – Lid Assembly Design Part 2
We are continuing our journey through the lid assembly design phase of our Open Source Laptop project. In this section, we will discuss the layout of the test adapter and provide a demonstration of the first test for the display panel, along with the initial steps involved in assembling the boards.
Blog
•
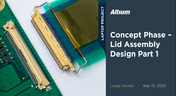
Concept Phase – Lid Assembly Design Part 1
In the exciting next phase of the open-source laptop project we're (finally) diving into design, and getting hands-on with the display panel. Discover how we're selecting the right panel, integrating it seamlessly, and creating a custom DisplayPort adapter to illuminate the screen. Plus, learn how our choices impact features like microphones, webcams, and touch sensors, and how Altium can help bring it all to life. It’s not too late to join as we continue on this innovative journey!
Blog
•
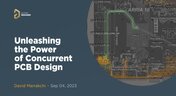
Unleashing the Power of Concurrent PCB Design
Concurrent PCB Design is essential to unlocking the full potential of engineering teams and delivering innovative products that meet the demands of the modern world. Learn more about the main capabilities and the numerous benefits of this upcoming feature in Altium Designer.

Blog
•
Crosstalk Reduction and Elimination Techniques in Altium Designer
Whether you're designing a digital board with a ton of traces, or an RF board operating at very high frequencies, any electronic device with propagating signals will experience crosstalk. Learn more about some sure-fire ways you can reduce crosstalk in your high-speed designs.

Blog
•
Baxandall Volume Control for Audio
The Baxandall volume control is an especially useful, flexible, and simple-to-implement circuit for numerous audio designs. In this article, we will demonstrate how to design this type of equipment.
Blog
•
Common Flex Design Mistakes and How to Fix Them
Designing flexible circuits involves managing numerous factors. Discover how to prevent mistakes in this process and how to rectify them post-implementation.
Blog
•
How Much PCB Mask Expansion is Too Much?
In this article you will learn about finding the right balance between PCB mask expansion and potential problems.
Blog
•
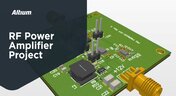
RF Power Amplifier Module PCB Design
RF power amplifiers can be found in many wireless products, often integrated into chipsets or modems. However, in certain specialized systems, you might require higher power output at a specific frequency. This necessitates a discrete amplifier circuit to deliver that power. In this article, we present an example project for a power amplifier that you can incorporate into your RF project.
Blog
•
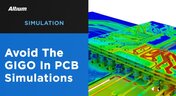
Avoid GIGO in Your PCB Simulation Tools
Simulation tools are extremely useful for understanding electromagnetic behavior in a design. Learn more about how to avoid obtaining inaccurate results during your PCB simulation process.

Blog
•
Choosing a Converter or Regulator For Your Power Supply Design
When designing the power supply for your device, there are lots of different options. In this article, we will take a brief tour of the main choices in DC power supply design.

Blog
•
The Benefits of Ultra HDI
Learn more about the combination of using both flexible materials and ultra-HDI feature sizes in this article.
Blog
•
Understanding Power Supply Current Handling Issues: Causes and Solutions
Troubleshooting power supply current handling issues is crucial to achieving optimal performance of your electronic devices. In this article, we will explore the common reasons why a power supply fails to handle the defined output current and provide practical solutions to solving these issues.
Blog
•
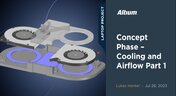
Concept Phase – Cooling and Airflow Part 1
Next step in our open-source laptop project is to explain how to design cooling and airflow. In this article, we can show you the first part of this process, such as airflow concept, fan measurement and clearance.
Blog
•
Create Connections with Harness Design
Many modern electronics have multiple boards, and connecting those different boards and systems together are harnesses. Learn more about how Altium Designer can help you create harnesses for your own multi-board designs here.
Blog
•
Do You Know How to Prevent Voltage Fluctuation?
We invite you to explore the causes of output voltage fluctuation. In this article we provide you insights on how to solve and prevent these issues.


Your search returns no results.